
热门标签
热门文章
- 1知识图谱之《海贼王-ONEPICE》领域图谱项目实战(含码源):数据采集、知识存储、知识抽取、知识计算、知识应用、图谱可视化、问答系统(KBQA)等_知识图谱数据采集
- 2sourcetree 回滚提交_sourcetree回滚提交
- 3React 从入门到实战 一一开发环境基础搭建(小白篇)
- 4图神经网络 | (2) 图神经网络(Graph Neural Networks,GNN)综述_t2-gnn: graph neural networks for graphs with inco
- 52022下半年软件评测师真题评析_2022年软件评测师真题
- 6AI之DS/CV/NLP:Python与人工智能相关的库/框架(数据可视化常用库、机器学习常用库、数据科学常用库、深度学习常用库、计算机视觉常用库、自然语言处理常用库)的简介、案例应用之详细攻略_ds cv nlp
- 72023 最新 Java学习路线 java 学习资料_redis 书籍 pan
- 8信创应用软件之邮箱_信创邮箱
- 9【微服务-SpringCloud】详细介绍,搭建一套微服务项目_springcloud搭建一个微服务项目
- 10module ‘cv2‘ has no attribute ‘INTER‘_module 'cv2' has no attribute 'intersect
当前位置: article > 正文
基于YOLO8的目标检测系统:开启智能视觉识别之旅_ultralytics
作者:weixin_40725706 | 2024-07-26 13:56:16
赞
踩
ultralytics
在线体验


- 基于
opencv的摄像头实时目标检测
快速开始
- 创建
anaconda环境
conda create -n XXX python=3.10
- 1
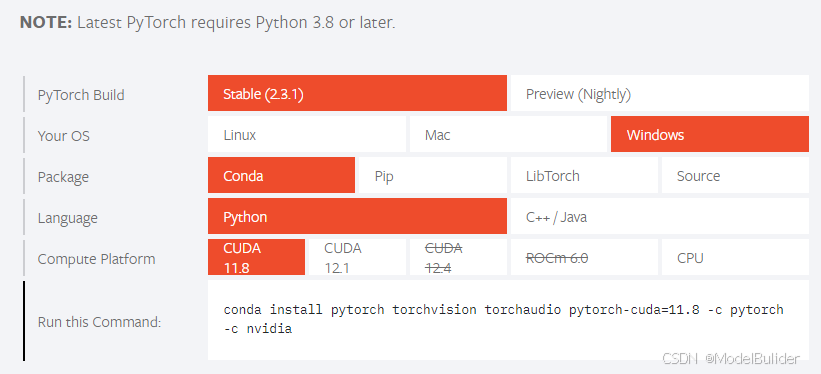
- pytorch安装
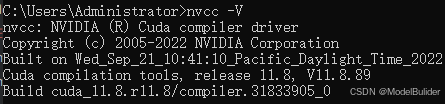
# 查看cuda版本(示例为:11.8)
nvcc -V
- 1
- 2
# 安装对应版本的pytorch
# 官网:https://pytorch.org/

# pip安装
pip3 install torch torchvision torchaudio --index-url https://download.pytorch.org/whl/cu118

# conda安装,建议配置conda国内镜像源
conda install pytorch torchvision torchaudio pytorch-cuda=11.8 -c pytorch -c nvidia
- 1
- 2
- 3
- 4
- 5
- 6
- 7
- 8
- 其他依赖包安装
pip install -r ./requirements-target-dec.txt
- 1
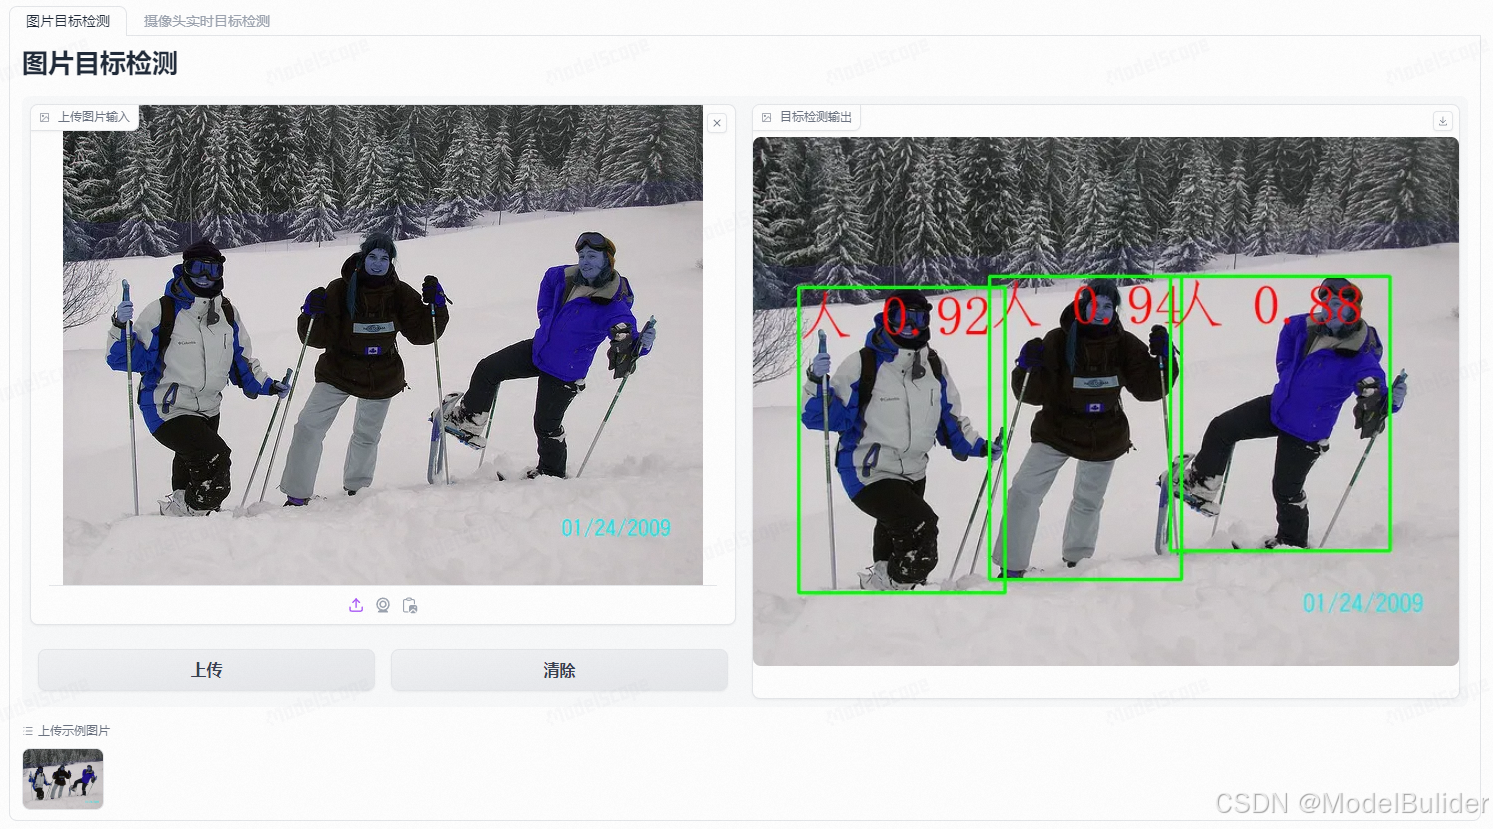
- 网页界面如下,可在示例图片中快速进行试验
一、项目介绍篇
在人工智能和机器学习的浪潮中,YOLO8作为目标检测领域的一颗新星,以其卓越的性能和灵活性,受到了广泛关注。本项目基于YOLO8算法,构建了一个高效、易用的目标检测系统,旨在为用户提供一个强大的本地部署解决方案。通过精心设计的界面和丰富的功能,用户可以轻松实现目标检测任务,无论是在网页端还是本地计算机上。
1.1 YOLO8
- YOLO8是新一代的目标检测算法,由YOLO(You Only Look Once)系列发展而来。它继承了YOLO算法快速、高效的特点,并在此基础上进行了改进和优化,以适应更复杂的目标检测任务。YOLO8通过引入新的网络结构和训练策略,提高了检测的准确性和鲁棒性,尤其是在小目标和遮挡目标的检测上表现出色。
- YOLO8算法的关键创新包括:
- 改进的网络结构:YOLO8采用了更深层次的卷积神经网络,增强了特征提取的能力,使得模型能够更准确地识别和定位目标。
- 优化的锚框机制:通过优化锚框的设计,YOLO8能够更好地适应不同形状和大小的目标,减少了误检和漏检的情况。
- 增强的数据增强技术:YOLO8使用了更先进的数据增强方法,提高了模型对不同环境和条件的泛化能力。
- 高效的训练策略:YOLO8引入了新的损失函数和训练技巧,加快了模型的收敛速度,同时保持了检测性能。
- YOLO8的这些改进使得它在实时性要求高的应用场景中,如视频监控、自动驾驶等领域,具有广泛的应用前景。尽管YOLO8的具体细节和性能指标尚未完全公开,但其在目标检测领域的潜力已经引起了业界的广泛关注。
1.2 ultralytics
- Ultraalytics是一家专注于计算机视觉和人工智能技术的公司,以其开发的高性能目标检测模型YOLO(You Only Look Once)而闻名。YOLO模型以其快速和准确的目标检测能力在业界获得了广泛认可,特别是在需要实时处理的场合,如视频监控、自动驾驶和工业自动化等领域。
- Ultraalytics的YOLO算法通过单次前向传播即可预测图像中的物体位置和类别,与传统的多步骤检测方法相比,大大提高了检测速度。随着YOLO算法的迭代发展,Ultraalytics不断推出新版本,如YOLOv3、YOLOv4、YOLOv5等,每个版本都在准确性、速度和易用性方面进行了优化。
- 除了目标检测,Ultraalytics还提供其他AI解决方案,包括图像分割、数据标注工具和模型部署服务。公司致力于推动AI技术的创新和应用,帮助企业实现智能化转型。Ultraalytics的技术和产品因其高效性和可靠性,在全球范围内拥有众多用户和合作伙伴。
1.3 模块介绍
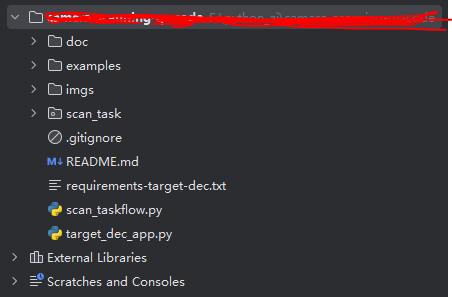
1.3.1 scan_task
- 构建了执行的任务,用于为
scan_taskflow提供可执行对象
1.3.2 scan_taskflow.py
- 基于open-cv2的本地界面系统
1.3.3 target_dec_app.py
- gradio页面代码
二、核心代码介绍篇
2.1 target_dec_app.py
import cv2
import gradio as gr
from scan_task import ScanTargetDec

scan_model = ScanTargetDec(version='YOLOv8n', use_gpu=False)


def target_scan(frame):
    frame, _ = scan_model.run(frame, text_size=50)
    '''run方法其他可传参数
    text_color: 显示文字颜色 默认:(0, 0, 255)
    text_size: 显示文字大小 默认:20
    y_pos: y轴位置偏移量 默认:0
    '''
    return frame


if __name__ == '__main__':
    examples = [
        [cv2.imread('./examples/image_detection.jpg')]]
    with gr.Blocks() as demo:
        with gr.Tabs():
            # 图片目标检测
            with gr.Tab(label='图片目标检测') as tab1:
                gr.Markdown(value="# 图片目标检测")
                with gr.Row(variant="panel"):
                    with gr.Column():
                        img_input1 = gr.Image(label="上传图片输入", mirror_webcam=False)
                        with gr.Row(variant="panel"):
                            submit_bn1 = gr.Button(value='上传')
                            clear_bn1 = gr.ClearButton(value='清除')
                    img_out1 = gr.Image(label="目标检测输出", mirror_webcam=False)

                # 添加演示用例
                gr.Examples(label='上传示例图片', examples=examples, fn=target_scan,
                            inputs=[img_input1],
                            outputs=[img_out1],
                            cache_examples=False)

            submit_bn1.click(fn=target_scan, inputs=img_input1, outputs=img_out1)
            clear_bn1.add([img_input1, img_out1])

            # 摄像头实时目标检测
            with gr.Tab(label='摄像头实时目标检测') as tab3:
                gr.Markdown(value="# 摄像头实时目标检测")
                with gr.Column(variant='panel') as demo_scan:
                    with gr.Row(variant="panel"):
                        img_input3 = gr.Image(label="实时输入", sources=["webcam"],
                                              mirror_webcam=False, streaming=True)
                        img_out3 = gr.Image(label="目标检测输出", sources=["webcam"],
                                            mirror_webcam=False, streaming=True)
            img_input3.stream(fn=target_scan, inputs=img_input3, outputs=img_out3)

    demo.launch()
- 1
- 2
- 3
- 4
- 5
- 6
- 7
- 8
- 9
- 10
- 11
- 12
- 13
- 14
- 15
- 16
- 17
- 18
- 19
- 20
- 21
- 22
- 23
- 24
- 25
- 26
- 27
- 28
- 29
- 30
- 31
- 32
- 33
- 34
- 35
- 36
- 37
- 38
- 39
- 40
- 41
- 42
- 43
- 44
- 45
- 46
- 47
- 48
- 49
- 50
- 51
- 52
- 53
- 54
- 55
- 此段代码主要是用于生成前端页面,以及配置按钮点击事件触发时的回调函数
- 可配置参数包括:
use_gpu、text_color、text_size、y_posuse_gpu: 是否使用gputext_color:定位的二维码,显示文字颜色 默认:(0, 0, 255)text_size:定位的二维码,显示文字大小 默认:20y_pos:y轴位置偏移量 默认:0
2.2 scan_taskflow.py
class ScanTaskflow:
    def __init__(self, task: str, video_index=0, win_name='Scan XXX', win_width=800, win_height=600, **kwargs):
        ..初始化摄像头扫描对象,设置窗口尺寸等属性..

    def run(self, **kwargs):
        ..开启摄像头,进行检测任务..


if __name__ == '__main__':
    # 启动默认的目标检测系统
    scanTaskflow = ScanTaskflow(task='scan_target_dec',
                                version='YOLOv8n', use_gpu=True,
                                video_index=0, win_name='target_dec',
                                win_width=640, win_height=480)
    scanTaskflow.run(text_color=(0, 255, 0), y_pos=0)
- 1
- 2
- 3
- 4
- 5
- 6
- 7
- 8
- 9
- 10
- 11
- 12
- 13
- 14
- 15
- 16
__init__用于预加载项目所需模型run是检测系统的核心方法,用于将视频的实时帧进行检测
三、结语
- 本项目提供了一个基于YOLO8算法的目标检测系统,它不仅易于部署和使用,而且具备高性能和高灵活性。我们相信,随着技术的不断进步和社区的积极参与,本项目将能够为更多用户提供价值,推动目标检测技术的发展。如果您在使用过程中遇到任何问题,欢迎在ModelScope创空间-基于YOLO8的目标检测系统上提出issue,我们会及时为您解答。
- 希望本项目能够成为您在目标检测领域的得力助手。如果您觉得本项目对您有帮助,请给项目点个star,并持续关注我的个人主页ModelBulider的个人主页
声明:本文内容由网友自发贡献,不代表【wpsshop博客】立场,版权归原作者所有,本站不承担相应法律责任。如您发现有侵权的内容,请联系我们。转载请注明出处:https://www.wpsshop.cn/w/weixin_40725706/article/detail/885673
推荐阅读
相关标签

