热门标签
热门文章
- 1基于ROS搭建简易软件框架实现ROV水下目标跟踪(十二)--数据集制作_ros rov
- 2MAC MINI 2012安装Montery折腾笔记_macmini2012升级最高系统
- 3【Bert】文本多标签分类_bert多标签文本分类
- 4【深度学习项目三】ResNet50多分类任务【十二生肖分类】_retnet用于分类任务
- 5Windows 安装 Xinference_xinference windows 部署
- 6ssm725基于Java的宠物医院预约挂号系统的设计与实现+vue_宠物医院预约系统毕业设计任务书
- 7linux里enc的用法,如何使用EncFS在Linux和Windows上加密云存储 | MOS86
- 8基于ROS的YOLOV3实现目标检测项目过程记录_yolo ros
- 9Python如何下载视频
- 10AttributeError: module ‘backend_interagg‘ has no attribute ‘FigureCanvas‘问题的解决办法
当前位置: article > 正文
利用Cloudflare搭建ChatGPT API 代理服务器 傻瓜教程_cloudflare chatgpt
作者:Monodyee | 2024-04-02 20:45:26
赞
踩
cloudflare chatgpt
✈ChatGPT的API接口为 https://api.openai.com 但是很多小伙伴不是国家区域不对,就试没有一个好的代理,经常chatgpt出现无法聊天的情况,那么自己搭建一个代理服务器那不是很香?还是免费的,直接整起来!图文教程,无缝链接!
教程
1.首先注册并且登录cloudflare
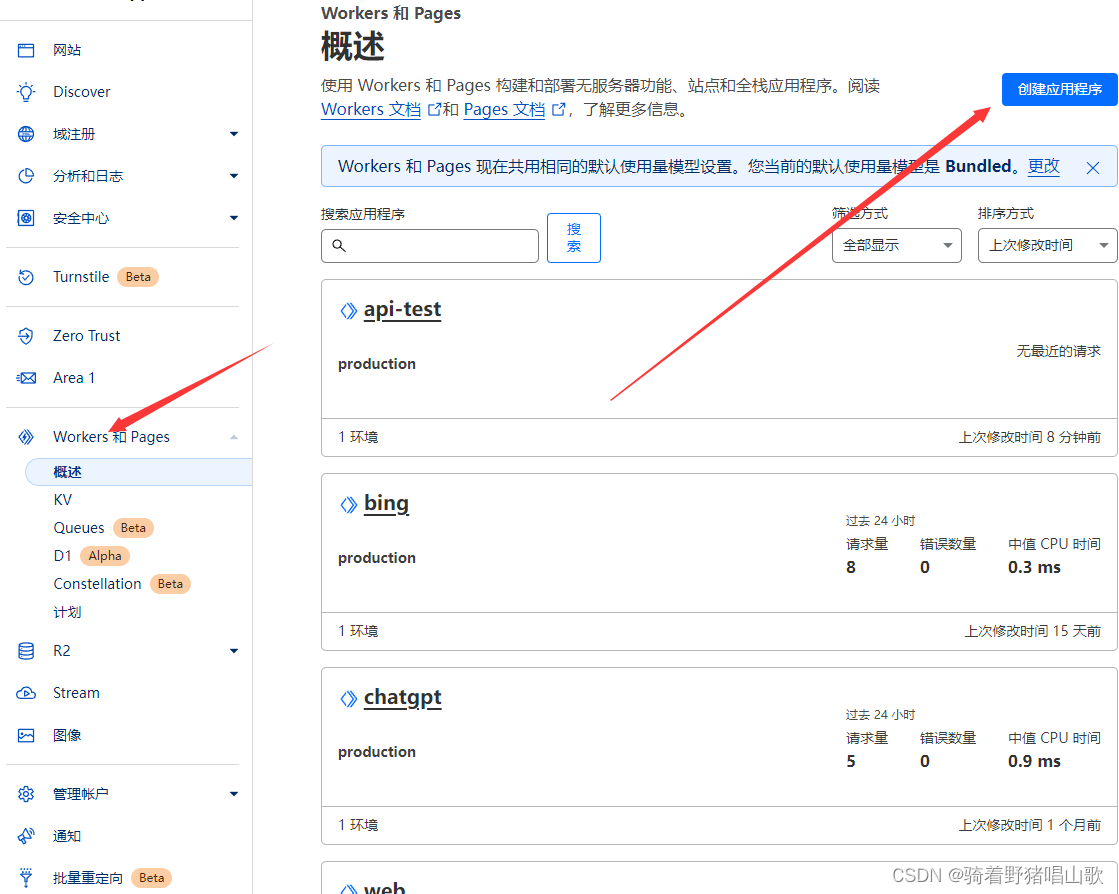
https://www.cloudflare.com/zh-cn/2. 打开Workers和Pages,并且创建应用程序

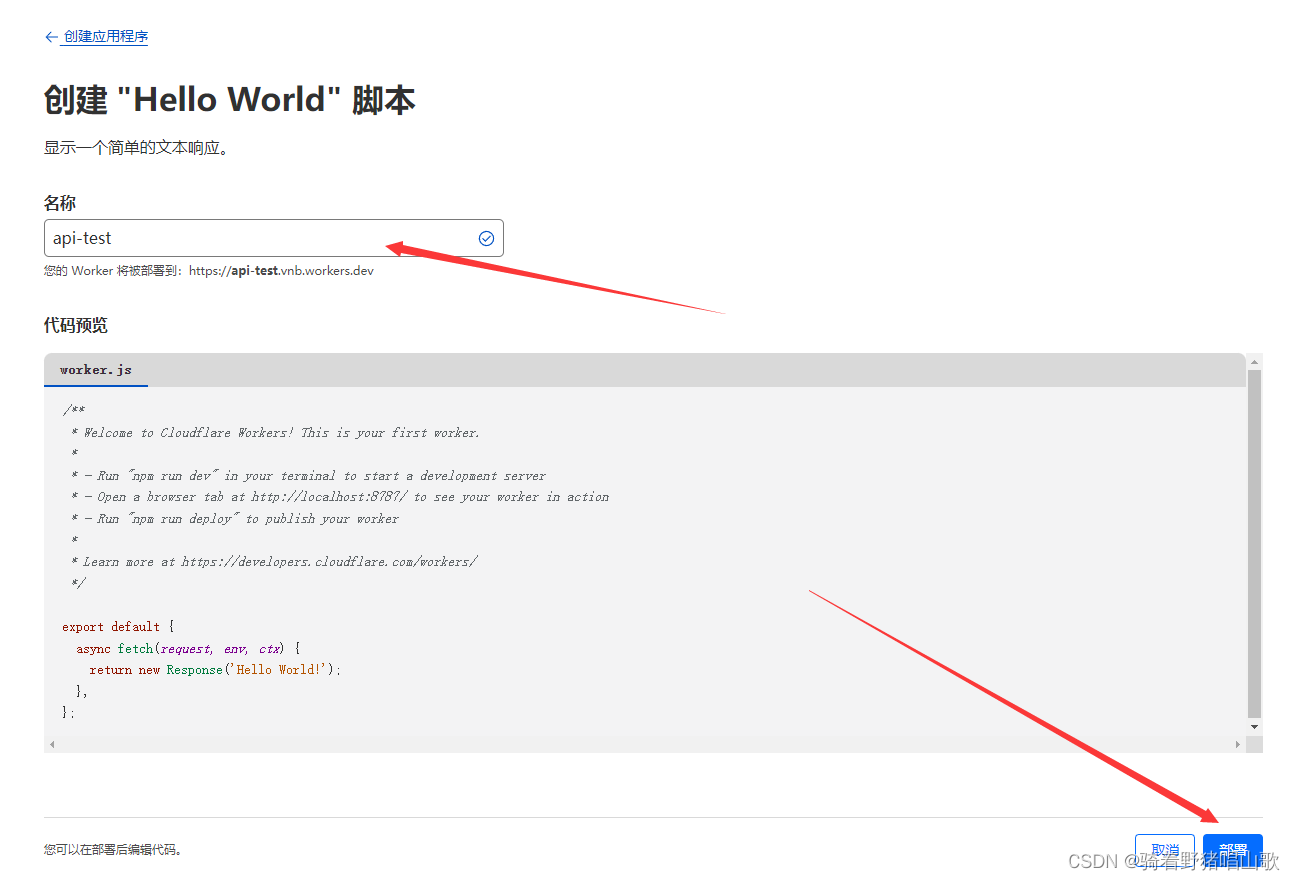
创建Worker
部署程序

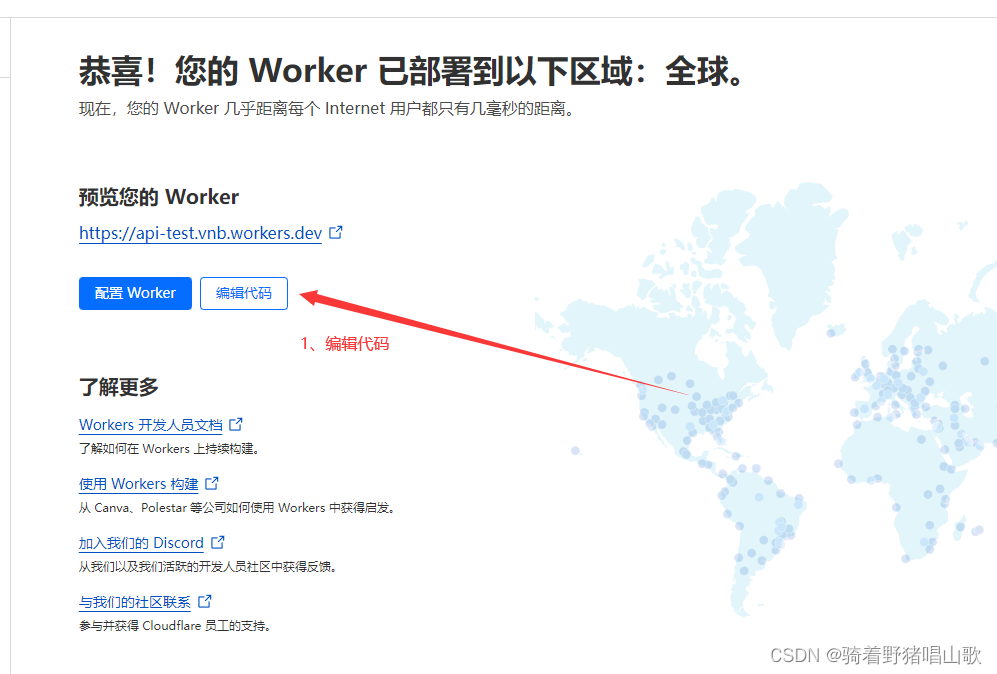
3. 编辑代码:

编辑代码:
- const TELEGRAPH_URL = 'https://api.openai.com';
-
- addEventListener('fetch', event => {
- event.respondWith(handleRequest(event.request))
- })
-
- async function handleRequest(request) {
- const url = new URL(request.url);
- const headers_Origin = request.headers.get("Access-Control-Allow-Origin") || "*"
- url.host = TELEGRAPH_URL.replace(/^https?:\/\//, '');
- const modifiedRequest = new Request(url.toString(), {
- headers: request.headers,
- method: request.method,
- body: request.body,
- redirect: 'follow'
- });
- const response = await fetch(modifiedRequest);
- const modifiedResponse = new Response(response.body, response);
- // 添加允许跨域访问的响应头
- modifiedResponse.headers.set('Access-Control-Allow-Origin', headers_Origin);
- return modifiedResponse;
- }

基本部署完成
1. 测试连接
https://你自定义的项目名.workers.dev/v1/chat/completions

2. 成功示例
- {
- "error": {
- "message": "You didn't provide an API key. You need to provide your API key in an Authorization header using Bearer auth (i.e. Authorization: Bearer YOUR_KEY), or as the password field (with blank username) if you're accessing the API from your browser and are prompted for a username and password. You can obtain an API key from https://platform.openai.com/account/api-keys.",
- "type": "invalid_request_error",
- "param": null,
- "code": null
- }
- }
上面的基本就算部署成功了,但是你还需要部署你自己的域名来访问,成为你自己专属的第一无二的api接口,所以你还需要绑定域名。
部署域名
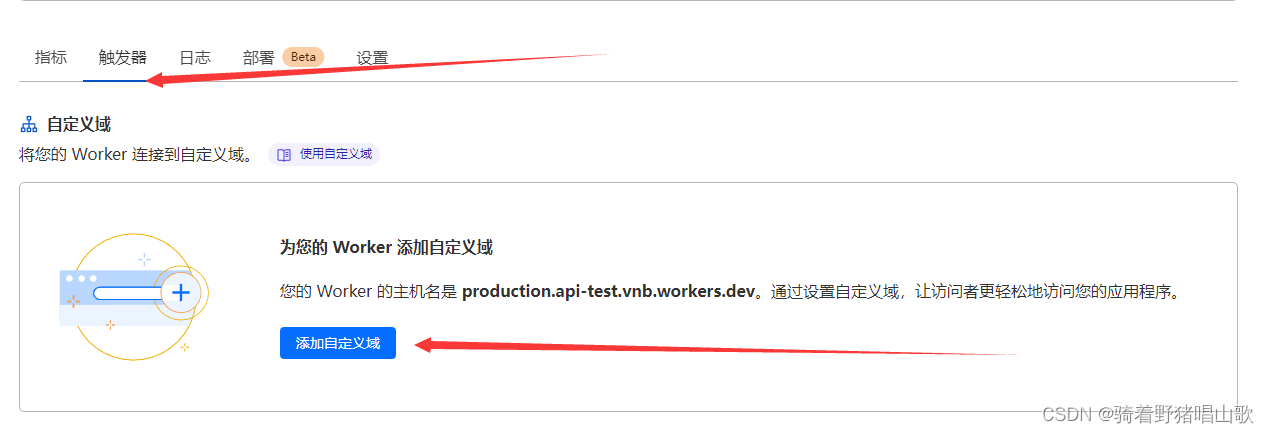
1. 点开触发器
添加自定义域

2. 输入自定义域名
输入你在Cloudflare托管的域名,自定义一个未使用的二级域名地址,并点添加自定义域

3. 最终成品

声明:本文内容由网友自发贡献,转载请注明出处:【wpsshop】
推荐阅读
相关标签


