
- 1【机构vip教程】Android SDK手机测试环境搭建
- 2基于SadTalker的AI数字人视频(以AutoDL算力云平台部署为例)_sadtalker baidu ai
- 3Python 中文分词:jieba库的使用_jieba.cut
- 4使用C++播放声音的完整指南_c++新手学习]windows下如何使用c++播放mp3 原
- 5Flutter-State状态管理_flutter state
- 6JAVA学习实战(四)ElasticSearch原理及使用介绍_elasticsearch java
- 7python菜鸟教程 | wordcount词频统计_3 wordcount_dict=dict(zip(df_filtered['word'],df_f
- 8Jmeter实现webservice接口测试
- 9MacBook Pro M2芯片虚机安装centOS7_mac m2 安装centos 没反应
- 10人脸检测MTCNN和人脸识别Facenet(附源码)_facenet人脸识别中mtcnn检测的关键点
手把手教你搭建微信聊天机器人系列(三):搭建对接文心一言(ERNIE-Bot大模型)接口的微信聊天机器人_自建微信聊天机器人
赞
踩
上一章介绍了eggjs+wechaty搭建一个简单的微信聊天机器人,只是实现了简单的回复,这一章我们将对接ERNIE-Bot接口,实现智能回复。
access_token的请求
config.default.js配置
我们在上一章代码基础上进行调整,首先我们要加入access_token的请求逻辑。第一章我们说过,请求需要使用应用对应的API Key,Secret Key作为入参。eggjs规定了配置的写法,我们可以将其配置在config/config.default.js里面。
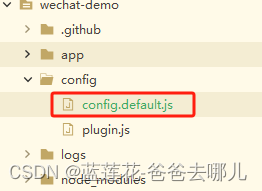
- //配置ernie
- config.ernie = {
- client_id: '填入您的API Key', //API Key
- client_secret: '填入您的Secret Key',//Secret Key
- access_token: '',//先置空,后续由程序填充
- expire_day: 30 //access_token过期时长(天)
- }
ernie.js定义getAccessToken
我们在app/service目录增加ernie.js。
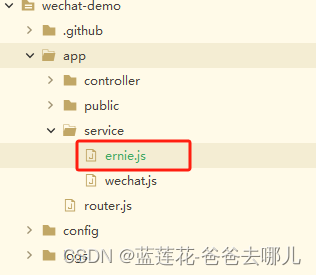
ernie.js文件专门用来和ERNIE-Bot接口进行交互,代码如下:
- const {
- Service
- } = require('egg');
-
-
- class ErnieService extends Service {
- async getAccessToken() {
- console.log('===================ErnieService getAccessToken=====================');
- let ctx = this.ctx;
-
- try {
- const res = await ctx.curl(
- `https://aip.baidubce.com/oauth/2.0/token?grant_type=client_credentials&client_id=${ctx.app.config.ernie.client_id}&client_secret=${ctx.app.config.ernie.client_secret}`, {
- method: 'GET',
- rejectUnauthorized: false,
- data: {},
- headers: {},
- timeout: 30000,
- contentType: 'json',
- dataType: 'json',
- })
- console.log(res)
-
- if (res.data.access_token) {
- ctx.app.config.ernie.access_token = res.data.access_token;
- console.log('access_token', ctx.app.config.ernie.access_token)
- }
-
- } catch (error) {
- console.log(error)
- }
- }
- }
-
- module.exports = ErnieService;

我们按eggjs的service的写法,定义了一个方法,用来请求access_token,但是这样写并不能执行,我们需要有个逻辑,在应用启动完毕后会调用这个方法。
app.js执行getAccessToken
我们在根目录增加app.js。
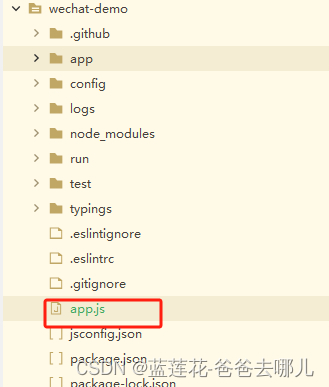
app.js代码如下:
- module.exports = app => {
-
- app.beforeStart(async () => {
- // 应用会等待这个函数执行完成才启动
- console.log("==app beforeStart==");
- });
-
- app.ready(async () => {
- console.log("==app ready==");
- let ctx = app.createAnonymousContext();
- ctx.service.ernie.getAccessToken(); //请求AccessToken
- })
-
- app.beforeClose(async () => {
- console.log("==app beforeClose==");
- })
- };
我们执行命令npm run dev启动项目,看到最终会打印出access_token,有了access_token我们继续开发接口请求函数sendMsg。
对话请求
ernie.js定义sendMsg
sendMsg函数用于调用ERNIE-Bot会话接口,传入对话内容并返回对话结果。在class ErnieService中加入以下代码:
- async sendMsg(msg) {
- console.log('===================ErnieService sendMsg=====================');
- let ctx = this.ctx;
- try {
- const res = await ctx.curl(
- `https://aip.baidubce.com/rpc/2.0/ai_custom/v1/wenxinworkshop/chat/completions?access_token=${ctx.app.config.ernie.access_token}`, {
- method: 'POST',
- rejectUnauthorized: false,
- data: {
- "messages": msg
- },
- timeout: 30000,
- contentType: 'json',
- dataType: 'json',
- })
- console.log(res)
-
- if (res.data) {
- return res.data;
- }
- return null;
- } catch (error) {
- console.log(error)
- return null;
- }
- }
wechat.js
我们在wechat.js中,将原先的逻辑调整一下,主要是改两个地方,
1、我们在之前的代码中经常有看到ctx这个变量,可以通过他获取配置文件的参数值。但Service文件中的ctx的获取只能通过app.js调用Service中函数的方式来获得。所以我们将机器人初始化的操作定义在startBot()方法中,由app.js来执行这个方法,就可以接收到ctx的值。
2、原先回复是直接扔回用户发的信息的,现在将其对接到ernie.js中的sendMsg方法。
wechat.js全部代码如下:
- const {
- Service
- } = require('egg');
-
-
- const {
- WechatyBuilder,
- ScanStatus
- } = require("wechaty");
- const qrcode = require("qrcode-terminal");
-
- let ctx;
- let wechaty;
- let startStatus = false;
-
- const onMessage = async (message) => {
- console.log(`收到消息: ${message}`);
- if (message.type() === wechaty.Message.Type.Text) {
- const userMsg = await message.text();
-
- try {
- let msgRecord = [{
- "role": "user",
- "content": userMsg
- }];
- let res = await ctx.service.ernie.sendMsg(msgRecord);
- if (res) {
- if (res.error_code) {
- message.say(JSON.stringify(res));
- console.log(`报错: ${JSON.stringify(res)}`);
- } else {
- if (res.result) {
- message.say(res.result);
- console.log(`回复: ${res.result}`);
- }
- }
- }
- } catch (error) {
- console.log(error);
- message.say(JSON.stringify(error));
- }
- }
- };
-
- const onLogout = (user) => {
- console.log(`用户 ${user} 退出成功`);
- };
- const onLogin = async (user) => {
- console.log(`用户 ${user} 登录成功`);
- };
- const onError = console.error;
- const onScan = (code, status) => {
- // status: 2代表链接等待调用,3代表链接已打开,这个链接实际上是提供一个登录的二维码供扫描
- if (status === ScanStatus.Waiting) {
- // status: 2代表等待,3代表扫码完成
- qrcode.generate(code, {
- small: true
- }, console.log)
- }
- };
-
- class WechatService extends Service {
- async startBot() {
- console.log('===================WechatService startBot=====================');
- ctx = this.ctx;
- if (startStatus && wechaty) {
- if (wechaty.isLoggedIn) {
- await wechaty.logout();
- }
- await wechaty.stop();
- startStatus = false;
- wechaty = null;
- }
- wechaty = await WechatyBuilder.build();
- wechaty
- .on("scan", onScan)
- .on("login", onLogin)
- .on("logout", onLogout)
- .on("error", onError)
- .on("message", onMessage);
- await wechaty.start();
- startStatus = true;
- }
- }
-
- module.exports = WechatService;
app.js执行startBot
在AccessToken请求后加入初始化BOT
- app.ready(async () => {
- console.log("==app ready==");
- let ctx = app.createAnonymousContext();
- await ctx.service.ernie.getAccessToken(); //请求AccessToken
- await ctx.service.wechat.startBot(); //初始化BOT
- })
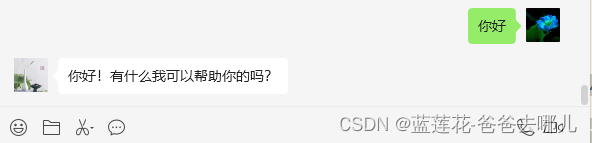
至此,我们已经实现了一次会话的功能。多轮对话的功能等下一章再详述。
本章完整代码在这里下载。运行前请配置好config/config.default.js里面config.ernie下的client_id和client_secret配置项。

