
- 1【ACDC数据集】:预处理ACDC心脏3D MRI影像数据集到VOC数据集格式,nii转为jpg,label转为png
- 2【“云计算”的初识,从无到有的第一步积累】_公有云是指外部客户提供服务的云
- 3R语言ggplot2改变坐标轴的顺序或者方向:改变字体、颜色、旋转刻度标签、轴刻度 log、sqrt 等转换、设置和隐藏刻度标记、反转轴方向、设定范围和反转轴方向、x 与 y 轴固定的比例_ggplot 更改y轴排序
- 4ATSHA204A(二)——基本特性
- 5ABAP - 内表行数统计的三种方法_abap 取内表中符合条件的行数
- 6Topaz Video Enhance AI(ai视频画质增强软件)官方正式版V2.2.0 | AI视频放大软件下载 | 视频画质怎么变清晰?
- 7修改elementui 里面input的placeholder字体颜色_element-plus 选择器 placeholder颜色
- 8win服务器系统2019和2016区别,Windows Server 2019和Windows Server, Version 1909的区别是什么?...
- 9Js字符串操作函数大全_js instr
- 10使用腾讯云快速完成网站备案的详细过程_腾讯云网站备案
Unet的Pytorch实现_unet pytorch
赞
踩
最近在开发一个基于Unet的剪枝模型,于是从论文到代码把Unet撸了一遍。本篇是基于Pytorch的Unet开源实现,复现Kaggle上的一个算法竞赛“ Carvana Image Masking Challenge”。
源码地址:https://github.com/milesial/Pytorch-UNet
原始论文地址:U-Net: Convolutional Networks for Biomedical Image Segmentation
1. 网络结构
Unet的提出最开始是为了解决医学图像分割的问题。
Unet的网络结构如下图所示:

从图中可以看出, Unet包含两条路径,左边的为收缩路径(Contracting path),右边的为扩张路径(Expansive path)。
收缩路径遵循典型的卷积神经网络结构,包括两个重复的3x3卷积(no padding),每个卷积后面跟着一个ReLU和一个步长为2的2x2 max pooling,以达到下采样的目的。每个下采样步骤中,将特征通道数增加一倍。
在扩张路径上,每一个步骤包含一个对feature map的上采样,然后是一个2x2的up-convolution,使得通道数减半;接下来是copy and crop,即把收缩路径中相同层的feature map经过裁剪之后拼接在当前层(由于左侧路径中的feature map比右侧对应路径中的feature map要大一些,因此需要crop之后才能做拼接),接着是两个3x3卷积+ReLU。在最后一个层,使用1x1卷积将64元素的特征向量映射到不同的类别。
Unet共有23个卷积层。
2. 开源实现
篇幅限制,本篇先不涉及具体代码,只讲工程操作。
2.1 运行容器
由于服务器上已经安装了比较新版的Docker以及nvidia-docker2,因此直接用Docker运行。通过如下命令运行容器:
sudo docker run --rm --shm-size=8g --ulimit memlock=-1 --gpus all -it milesial/unet第一次执行以上命令时,由于本地没有 milesial/unet这个docker image,因此会自动从docker hub下载,时间略长一些。另外,如果不想命令行终端关闭的时候容器退出,可以把容器改为后台运行,最好指定一个容器名称,方便后续容器操作,命令行如下:
sudo docker run --rm --shm-size=8g --ulimit memlock=-1 --gpus all --name=unet -itd milesial/unet2.2 下载数据集
容器运行起来之后,如果需要在容器中进行模型训练,我么需要去下载相应地数据集。本工程中,下载的是Kaggle上的竞赛数据集carvana-image-masking-challenge。执行工程中的脚本进行下载:
bash scripts/download_data.sh脚本内容如下:
- #!/bin/bash
-
- if [[ ! -f ~/.kaggle/kaggle.json ]]; then
- echo -n "Kaggle username: "
- read USERNAME
- echo
- echo -n "Kaggle API key: "
- read APIKEY
-
- mkdir -p ~/.kaggle
- echo "{\"username\":\"$USERNAME\",\"key\":\"$APIKEY\"}" > ~/.kaggle/kaggle.json
- chmod 600 ~/.kaggle/kaggle.json
- fi
-
- pip install kaggle --upgrade
-
- kaggle competitions download -c carvana-image-masking-challenge -f train_hq.zip
- unzip train_hq.zip
- mv train_hq/* data/imgs/
- rm -d train_hq
- rm train_hq.zip
-
- kaggle competitions download -c carvana-image-masking-challenge -f train_masks.zip
- unzip train_masks.zip
- mv train_masks/* data/masks/
- rm -d train_masks
- rm train_masks.zip

其中的步骤也可以分开执行。需要注意的是,下载数据需要注册Kaggle账号并拿到API Key,然后需要在Kaggle竞赛界面进行验证和授权,这个我在上一篇博客中有详细介绍:
Ubuntu从Kaggle上下载数据集出现403 - Forbidden
2.3 模型训练
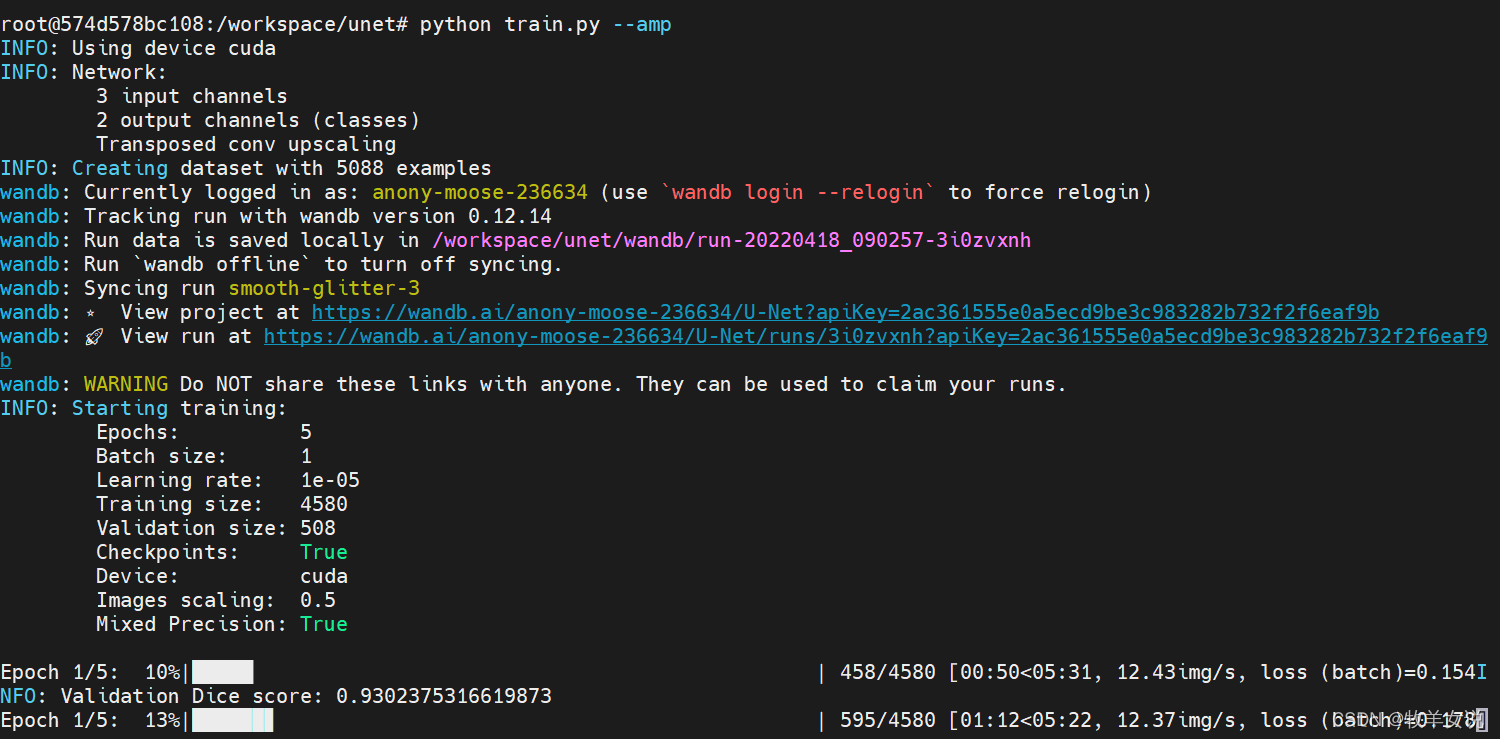
运行训练程序:
python train.py --amp正常情况下,执行以上语句后,即开始训练了:
想要修改训练参数,可以参考以下参数说明:
- > python train.py -h
- usage: train.py [-h] [--epochs E] [--batch-size B] [--learning-rate LR]
- [--load LOAD] [--scale SCALE] [--validation VAL] [--amp]
-
- Train the UNet on images and target masks
-
- optional arguments:
- -h, --help show this help message and exit
- --epochs E, -e E Number of epochs
- --batch-size B, -b B Batch size
- --learning-rate LR, -l LR
- Learning rate
- --load LOAD, -f LOAD Load model from a .pth file
- --scale SCALE, -s SCALE
- Downscaling factor of the images
- --validation VAL, -v VAL
- Percent of the data that is used as validation (0-100)
- --amp Use mixed precision
训练完成后,默认会在checkpoints路径下保存每个epoch的中间模型。
2.4 预测
可以用训练出来的模型进行预测。预测默认使用的模型为“MODEL.pth”,可以把上一步保存的模型重命名为“MODEL.pth”,也可以通过-m选项指定一个模型。
预测的参数设置可参考如下说明:
- > python predict.py -h
- usage: predict.py [-h] [--model FILE] --input INPUT [INPUT ...]
- [--output INPUT [INPUT ...]] [--viz] [--no-save]
- [--mask-threshold MASK_THRESHOLD] [--scale SCALE]
-
- Predict masks from input images
-
- optional arguments:
- -h, --help show this help message and exit
- --model FILE, -m FILE
- Specify the file in which the model is stored
- --input INPUT [INPUT ...], -i INPUT [INPUT ...]
- Filenames of input images
- --output INPUT [INPUT ...], -o INPUT [INPUT ...]
- Filenames of output images
- --viz, -v Visualize the images as they are processed
- --no-save, -n Do not save the output masks
- --mask-threshold MASK_THRESHOLD, -t MASK_THRESHOLD
- Minimum probability value to consider a mask pixel white
- --scale SCALE, -s SCALE
- Scale factor for the input images
在这里,我们就按照默认的模型名称来做测试:
python predict.py -i test_img.jpg -o output.jpg我们来看一下预测结果:


