
- 1MCU学习笔记_SPI_mcu读取设置msb有什么用
- 2一文讲清Python的7大学习路线(建议收藏)_python技术栈学习路线
- 3R语言基础学习-02 (此语言用途小众 用于数学 生物领域 基因分析)
- 4揭秘AI魔法绘画:Stable Diffusion引领无限创意新纪元_ai绘画教程:文生图+图生图+提示词+模型训练+插件应用
- 5飞腾服务器通过KunLun BIOS 对JBOD模式的系统盘进行格式化,删除系统盘中残留数据的操作方法_飞腾服务器如何格式化硬盘
- 6AI:06-基于OpenCV的二维码识别技术的研究_opencv识别二维码原理
- 7若依ruoyi框架实现单点登录或者接入统一认证_若依单点登录
- 8pytorch并行报错RuntimeError: unable to write to file</torch_xxx>_runtimeerror: unable to write to file
- 9面试必备:分库分表经典15连问_分库分表面试题
- 102023年第2季社区Task挑战赛升级新玩法,等你来战!_bcos3 复杂查询
【WSL】[02] windows subsytem linux 配置和使用_适用于 linux 的 windows 子系统没有已安装的分发版。 可以通过访问 microsoft
赞
踩
第【2】章前言:
上一篇我们已经安装好了ubuntu在WSL下的GUI的桌面:我们现在继续进一步进行配置工作。同时也把,运用WSL的流程摸一把,以备后用。
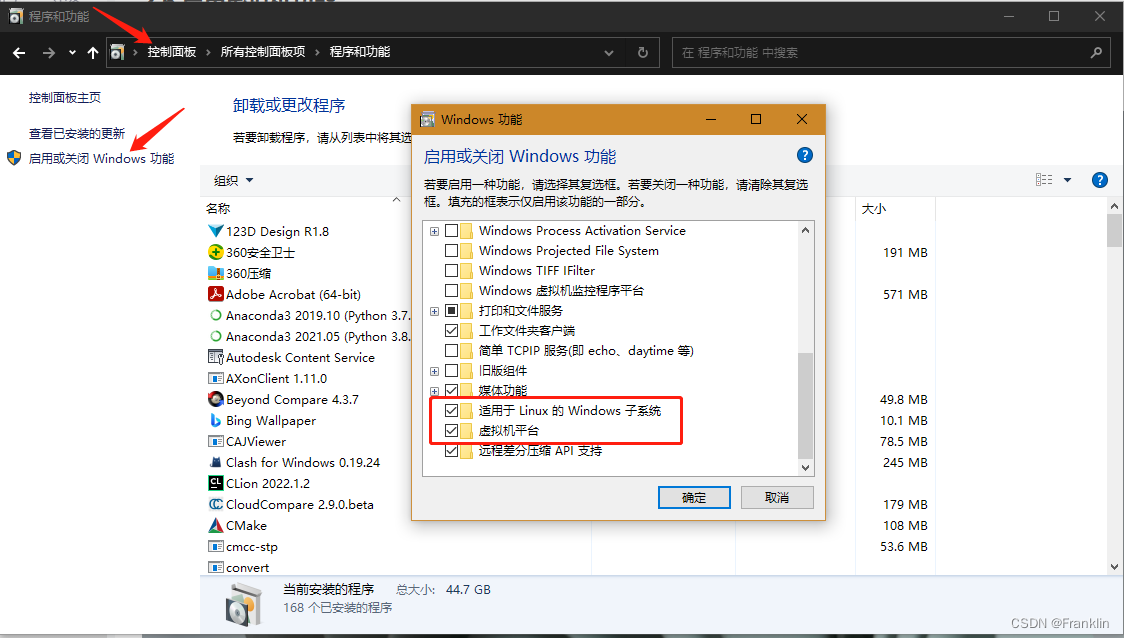
补充1: 彻底的关闭WSL的方法:
WSL使用后,原来Windows安装的传统虚拟机是用不了的,会报错:Vmware虚拟机报错的原因,其中WSL2是重要的一条,所以,我们先要学会WSL的关闭方法,以免之前的Vmware的资源都不能用了。
如,下图勾选掉这两项,就能够关闭WSL2的功能了
补充2 关闭WSL中某一个启动的Linxu子系统:
先查询一下:
- (base) PS C:\Users\frank_sj> wsl --list --verbose
- NAME STATE VERSION
- * Ubuntu Running 2
- Ubuntu-20.04 Running 2
命令:wsl --list --verbose 可以简写为: wsl -l
- (base) PS C:\Users\frank_sj> wsl -l -v
- NAME STATE VERSION
- * Ubuntu Running 2
- Ubuntu-20.04 Running 2
然后用: wsl -t Ubuntu 去停掉其中的Ubuntu的子系统
- (base) PS C:\Users\frank_sj> wsl -t Ubuntu
- (base) PS C:\Users\frank_sj> wsl --list --verbose
- NAME STATE VERSION
- * Ubuntu Stopped 2
- Ubuntu-20.04 Running 2
然后用, -d,又可以再打开
(base) PS C:\Users\frank_sj> wsl -d Ubuntu1 在windows的PowerShell终端进行配置和查询:
1.1 查询所有支持的可以支持的Linux发现版本:
wsl --list --online【案,必须科学上网,否则,会报错】
以下是可安装的有效分发的列表。
请使用“wsl --install -d <分发>”安装。NAME FRIENDLY NAME
Ubuntu Ubuntu
Debian Debian GNU/Linux
kali-linux Kali Linux Rolling
SLES-12 SUSE Linux Enterprise Server v12
SLES-15 SUSE Linux Enterprise Server v15
Ubuntu-18.04 Ubuntu 18.04 LTS
Ubuntu-20.04 Ubuntu 20.04 LTS
OracleLinux_8_5 Oracle Linux 8.5
OracleLinux_7_9 Oracle Linux 7.9
【这里,还给出来安装的方法】
wsl --install -d OracleLinux_8_5
1.2 查询本机的所有安装版本
wsl.exe --list --all(base) PS C:\Users\frank_sj> wsl.exe --list --all
适用于 Linux 的 Windows 子系统分发版:
Ubuntu-20.04 (默认)
1.3 注销用户名和密码:
在第【1】章,我们新建安装了ubuntu的版本,会自动要求你输入用户和密码,现在如果我们要修改用户密码怎么办?
1.3.1 注销用户和密码
--unregister <分发>
注销分发并删除根文件系统。
wsl --unregister Ubuntu-20.04会删除原有的Linux分发版本。
2 在Ubuntu终端进行配置:
2.1 首次设置用户密码(参照第一章)
2.2 修改用户密码:
donkeycar01@DESKTOP-M4INDEG:~$ sudo passwd
[sudo] password for donkeycar01:
New password:
Retype new password:
passwd: password updated successfully
2.2 设置root账号和密码
donkeycar01@DESKTOP-M4INDEG:~$ su root
Password:
root@DESKTOP-M4INDEG:/home/donkeycar01# sudo passwd
New password:
Retype new password:
passwd: password updated successfully
3 设置更新镜像源:
vi /etc/apt/source.list除了清华的源外,还有阿里和中科大的源可选
# 阿里源
deb http://mirrors.aliyun.com/ubuntu/ bionic main restricted universe multiverse
deb http://mirrors.aliyun.com/ubuntu/ bionic-security main restricted universe multiverse
deb http://mirrors.aliyun.com/ubuntu/ bionic-updates main restricted universe multiverse
deb http://mirrors.aliyun.com/ubuntu/ bionic-proposed main restricted universe multiverse
deb http://mirrors.aliyun.com/ubuntu/ bionic-backports main restricted universe multiverse
deb-src http://mirrors.aliyun.com/ubuntu/ bionic main restricted universe multiverse
deb-src http://mirrors.aliyun.com/ubuntu/ bionic-security main restricted universe multiverse
deb-src http://mirrors.aliyun.com/ubuntu/ bionic-updates main restricted universe multiverse
deb-src http://mirrors.aliyun.com/ubuntu/ bionic-proposed main restricted universe multiverse
deb-src http://mirrors.aliyun.com/ubuntu/ bionic-backports main restricted universe multiverse# 中科大源
deb https://mirrors.ustc.edu.cn/ubuntu/ bionic main restricted universe multiverse
deb-src https://mirrors.ustc.edu.cn/ubuntu/ bionic main restricted universe multiverse
deb https://mirrors.ustc.edu.cn/ubuntu/ bionic-updates main restricted universe multiverse
deb-src https://mirrors.ustc.edu.cn/ubuntu/ bionic-updates main restricted universe multiverse
deb https://mirrors.ustc.edu.cn/ubuntu/ bionic-backports main restricted universe multiverse
deb-src https://mirrors.ustc.edu.cn/ubuntu/ bionic-backports main restricted universe multiverse
deb https://mirrors.ustc.edu.cn/ubuntu/ bionic-security main restricted universe multiverse
deb-src https://mirrors.ustc.edu.cn/ubuntu/ bionic-security main restricted universe multiverse
deb https://mirrors.ustc.edu.cn/ubuntu/ bionic-proposed main restricted universe multiverse
deb-src https://mirrors.ustc.edu.cn/ubuntu/ bionic-proposed main restricted universe multiverse
4 GUI的安装和使用
(01章已经说明了 gnome-session 的GUI的使用办法)
这里再展示一下另外一个GUI的ubuntu界面:startxfce4
4.1 显示配置
- export DISPLAY=localhost:0
- export DISPLAY=`cat /etc/resolv.conf | grep nameserver | awk '{print $2}'`:0
4.2 运行startxfce4
这个界面感觉要简洁一点,但是,怎么找不到各种应用了...有兴趣可以研究一下
5 典型GUI应用的安装:
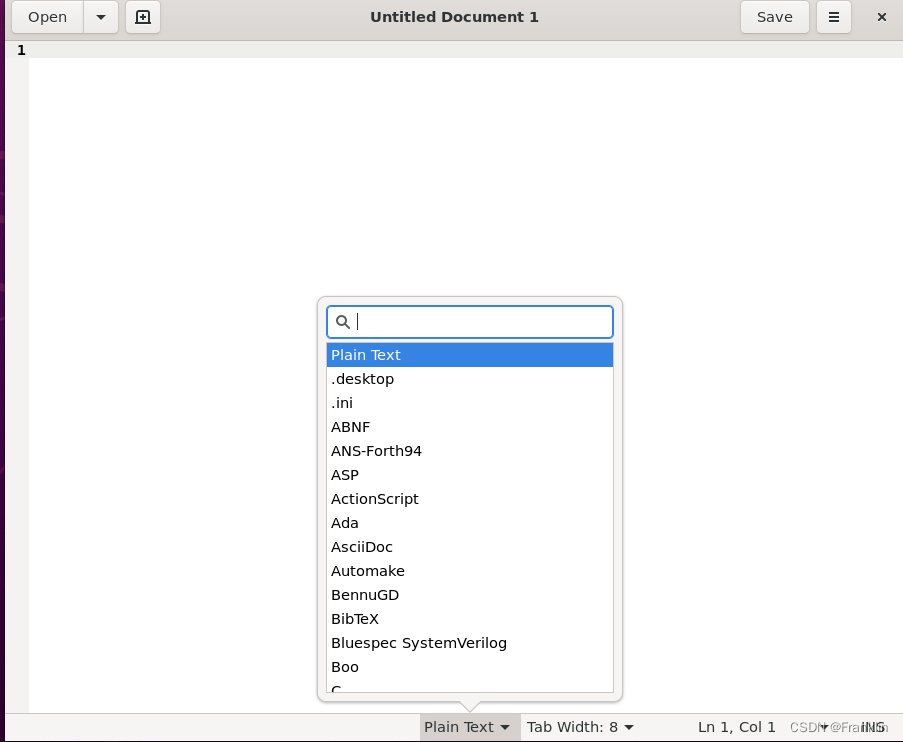
5.1 gedit
是 GNOME 桌面环境的默认文本编辑器
5.2 GIMP
GIMP 是一种免费的开源光栅图形编辑器,用于图像操作和图像编辑、自由形态绘图、不同图像文件格式之间的转码,以及更专业的任务。
sudo apt install gimp -y 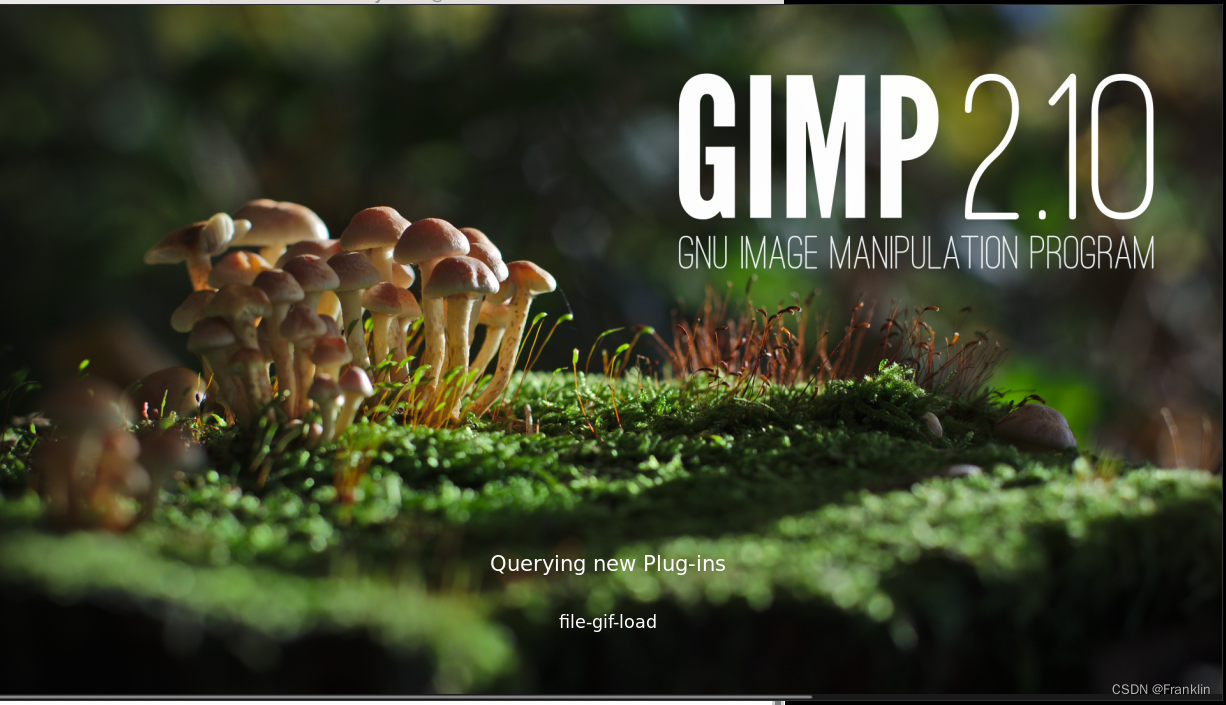

感觉就是个PS,在linux下,
5.3 VLC
VLC 是一种免费的开源跨平台多媒体播放器和框架,可播放大多数多媒体文件。
【案,这个程序直接在GNOME 的单main的VcXsrv 窗口里面是无法正常运行的】需要使用下面这个设定GUI,才能正常打开运行:

因为他有两个窗口:


5.4 octave
类似于matlab
sudo apt install octave
【现在,octave是一个多窗口的应用程序,我们需要用到VcXsrv的多窗口模式】
octave --gui &【案,这个程序直接在GNOME 的单main的VcXsrv 窗口里面是无法正常运行的】
运行后,如下:

在windows的任务栏里面,有三个octave的窗口,现在Ubuntu和windows,的运行环境已经完美的结合起来了。
上述傅里叶图运行的参考代码如下:
julia.m
- #{
-
- Inspired by the work of Bruno Girin ([Geek Thoughts: Fractals with Octave: Classic Mandelbrot and Julia](http://brunogirin.blogspot.com/2008/12/fractals-with-octave-classic-mandelbrot.html))
-
- Calculate a Julia set
-
- zmin: Minimum value of c
-
- zmax: Maximum value of c
-
- hpx: Number of horizontal pixels
-
- niter: Number of iterations
-
- c: A complex number
-
- #}
-
- function M = julia(zmin, zmax, hpx, niter, c)
-
- %% Number of vertical pixels
-
- vpx=round(hpx*abs(imag(zmax-zmin)/real(zmax-zmin)));
-
- %% Prepare the complex plane
-
- [zRe,zIm]=meshgrid(linspace(real(zmin),real(zmax),hpx),
-
- linspace(imag(zmin),imag(zmax),vpx));
-
- z=zRe+i*zIm;
-
- M=zeros(vpx,hpx);
-
- %% Generate Julia
-
- for s=1:niter
-
- mask=abs(z)<2;
-
- M(mask)=M(mask)+1;
-
- z(mask)=z(mask).^2+c;
-
- end
-
- M(mask)=0;
-
- end

juliatest.m
- Jc1=julia(-1.6+1.2i, 1.6-1.2i, 640, 128, -0.75+0.2i);
-
- imagesc(Jc1)
-
- axis off
-
- colormap('default');
6 docker:
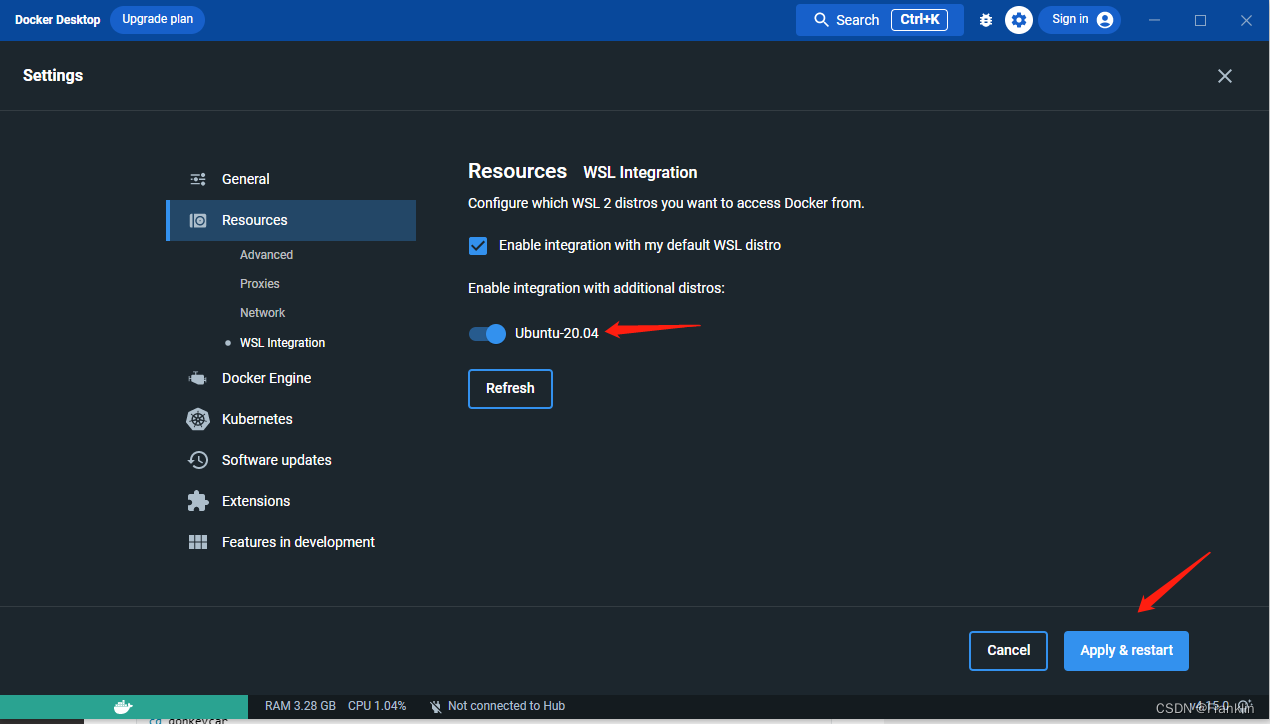
6.1 设置Docker对WSL的支持:
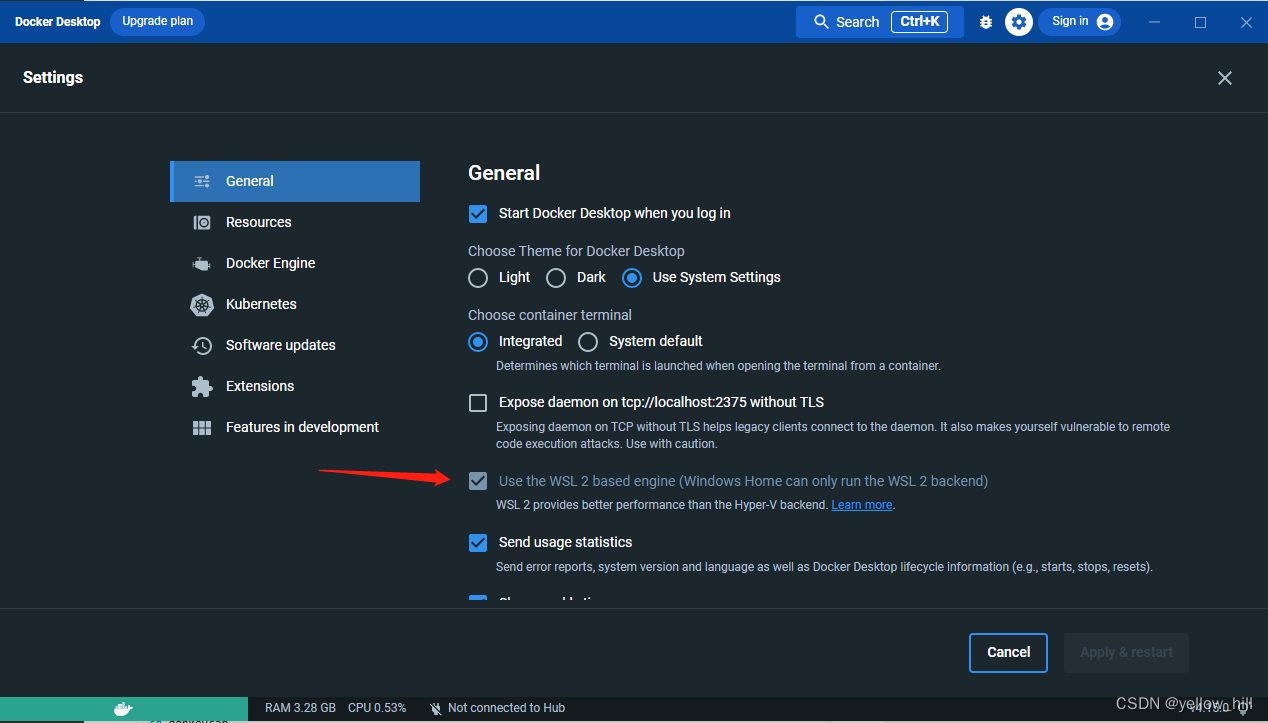
6.2 设置
ubuntu IN WSL
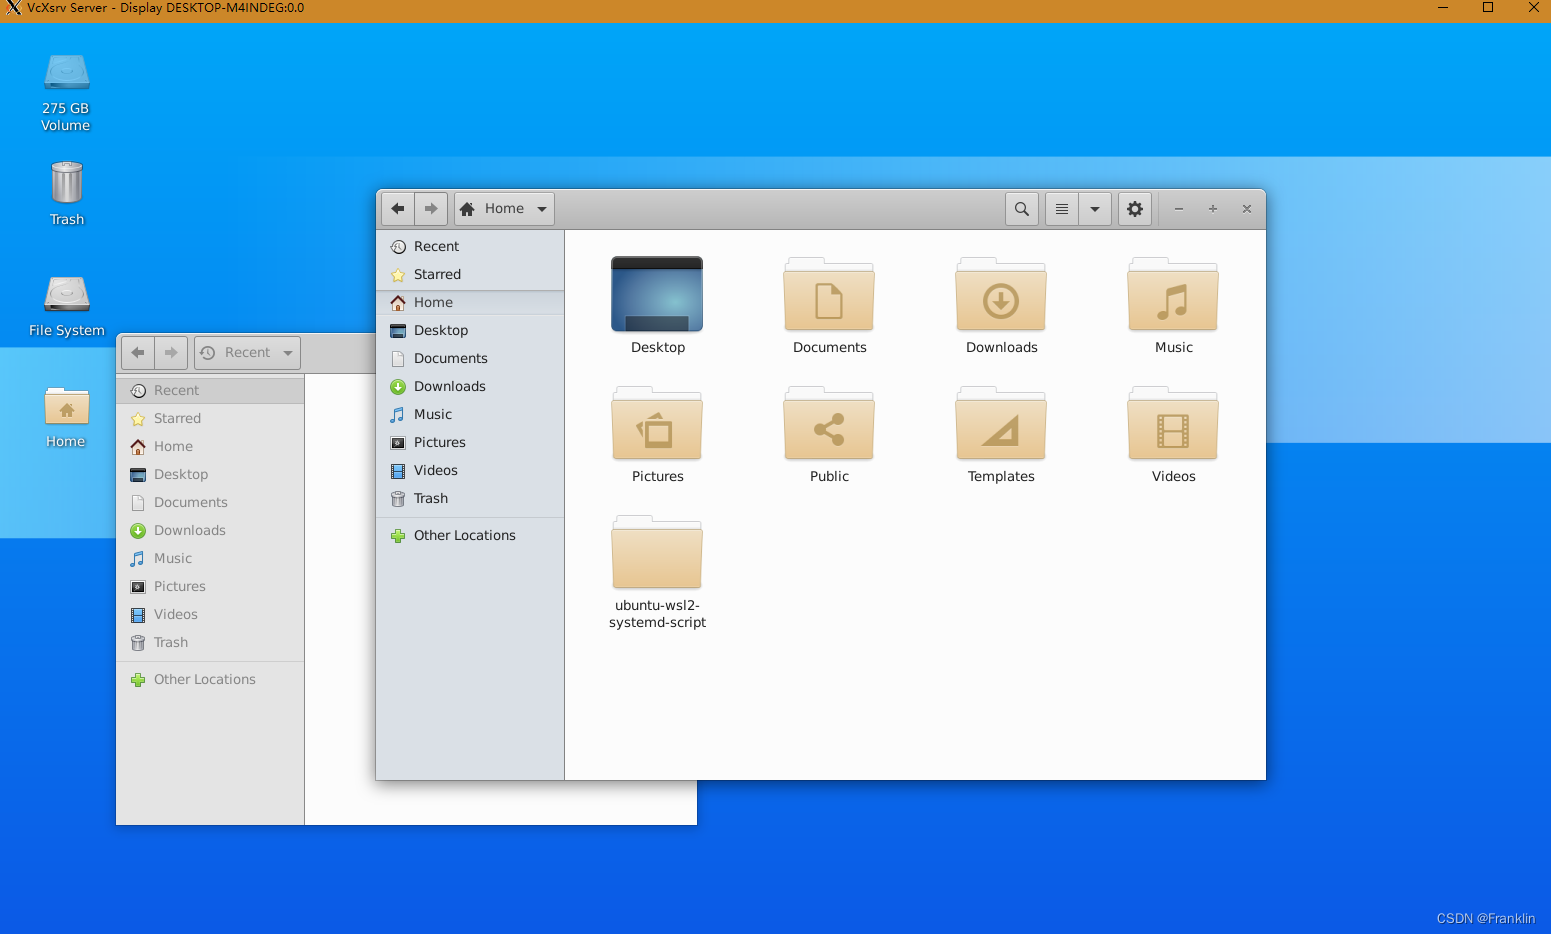
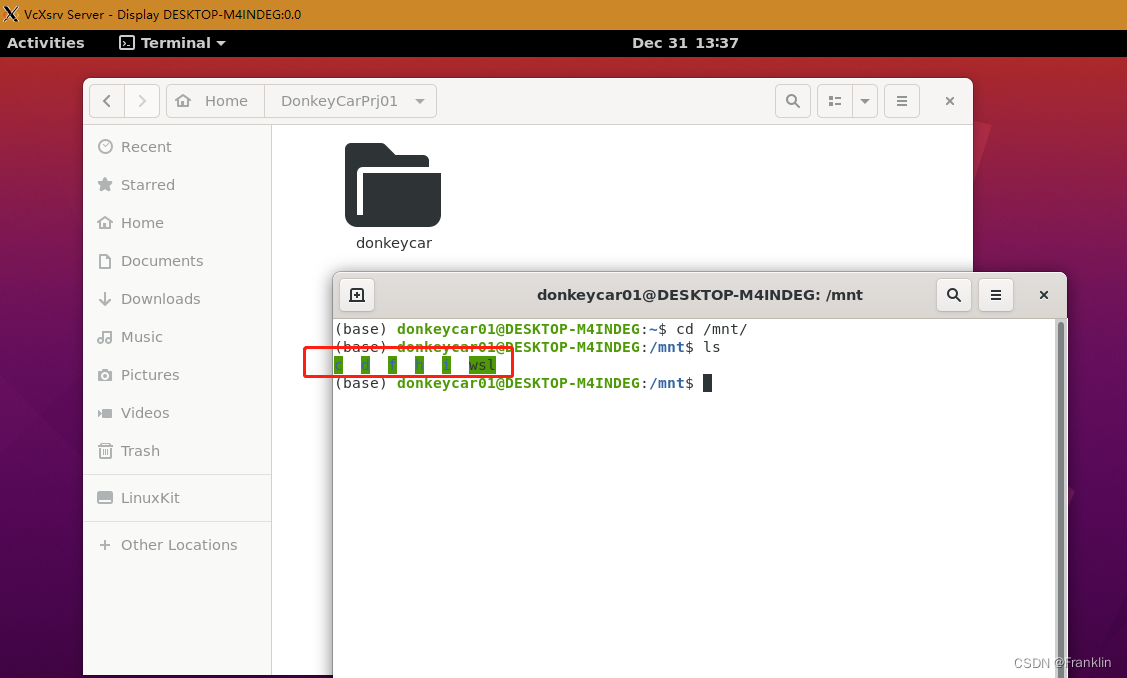
7 windows 和 WSL 的文件互通:
WSL和windows的互通很简单,就是进入到WSL安装的ubuntu里面,直接进到linux的标准/mnt目录,里面windows的盘符,一个不少都mount好勒,在那里
8 WSL的备份与还原:
8.1 备份:
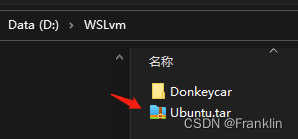
在windows下,我们只要运行这个:
(base) PS C:\Users\frank_sj> wsl --export Ubuntu D:\WSLvm\Ubuntu.tar就能够备份了,极其简单
8.2 还原:
案,还原,要做的事情,就是要先把之前的各注销掉,再还原
- (base) PS C:\Users\frank_sj> wsl --list --verbose
- NAME STATE VERSION
- * Ubuntu Stopped 2
- (base) PS C:\Users\frank_sj> wsl --unregister Ubuntu
- 正在注销...
- (base) PS C:\Users\frank_sj> wsl --list --verbose
- 适用于 Linux 的 Windows 子系统没有已安装的分发版。
- 可以通过访问 Microsoft Store 来安装分发版:
- https://aka.ms/wslstore
- (base) PS C:\Users\frank_sj> wsl --import Ubuntu D:\WSL D:\WSLvm\Ubuntu-xfce4ok.tar
8.3 还原为当前用户
系统还原后,会默认到root用户,通过下面命令转回来:【案,注意目录位置】
(base) PS C:\Users\frank_sj\AppData\Local\Microsoft\WindowsApps> ubuntu.exe config --default-user donkeycar参考:
1 使用 WSL 运行 Linux GUI 应用 | Microsoft Learn
2
Set up a WSL development environment | Microsoft Learn
3 (1条消息) win10 WSL2 Ubuntu图像化界面安装和配置_到瑞米法扫拉西的博客-CSDN博客_wsl图像


