
- 1【Linux】锁的简单封装以及原理解析
- 2云计算在企业中的运用的优势
- 3【IDEA】idea一直处于scanning files to index状态然后闪退_idea indexing 闪退
- 4opencv[c++] findContours()轮廓特征分析大全(求面积、周长、几何矩、质心、凸包、最小外接矩形、最小外接三角形、最小外接椭圆等)---后续完善总结版本_opencv findcontours
- 5Pikachu靶场全级别通关教程详解
- 6mysql_Day02_10-1 查询年龄18-20之间的学生信息
- 7Stable Diffusion AI绘画系列【21】:写实女孩--圣诞主题风
- 8Gateway全局异常处理及请求响应监控_gateway 如何处理后端微服务返回的json
- 9一张图看懂 USDT三种类型地址 Omni、ERC20、TRC20的区别_usdt地址
- 10摆烂三年,我从普通二本到春招华为OD上岸啦_普通二本去华为od难吗
yolov5-pytorch模型转onnx模型再转tensorflow savedmode模型进行tfserving部署_pytorch models.yolo5 頧是nnx
赞
踩
pytorch框架下的yolov5模型部署到tensorflow serving,需要将pytorch的pt模型转换为onnx模型,再将onnx模型转换为tfserving的savedmode模型。
1. pytorch的pt模型转onnx模型
使用yolov5中自带的 export.py 脚本(在models下)可以将模型导出为 TorchScript, ONNX, CoreML。
环境: yolov5-5.0的requirements.txt dependencies, including Python>=3.8 and PyTorch==1.7。
转换模型需要的包:
pip install coremltools=4.1 (>=4.1)
pip install onnx=1.9.0 (>=1.9.0)
pip install scikit-learn==0.19.2
pip install onnx-tf (最新版本,我的是1.8.0)
pip install tensorflow-gpu (我安装的最新版本的,cpu版本应该也可以)
注意:以上依赖包版本不对可能会报错,我的之前在onnx转pb模型时一直报错:NotImplementedError: Constant version 12 is not implemented.
yolov5 pt转换onnx的命令如下:
python models/export.py --weights yolov5s.pt --img 640 --batch 1 # export at 640x640 with batch size 1
- 1
此命令将预训练的YOLOv5s模型导出为ONNX,TorchScript和CoreML格式。 yolov5s.pt是最小,最快的模型。 其他选项是yolov5m.pt,yolov5l.pt和yolov5x.pt,或者您通过训练自定义数据集run / exp0 / weights / best.pt拥有检查点。命令如下:
python models/export.py --weights runs/train/exp/weights/best.pt --img 640 --batch 1 # export at 640x640 with batch size 1
- 1
输出过程如下:
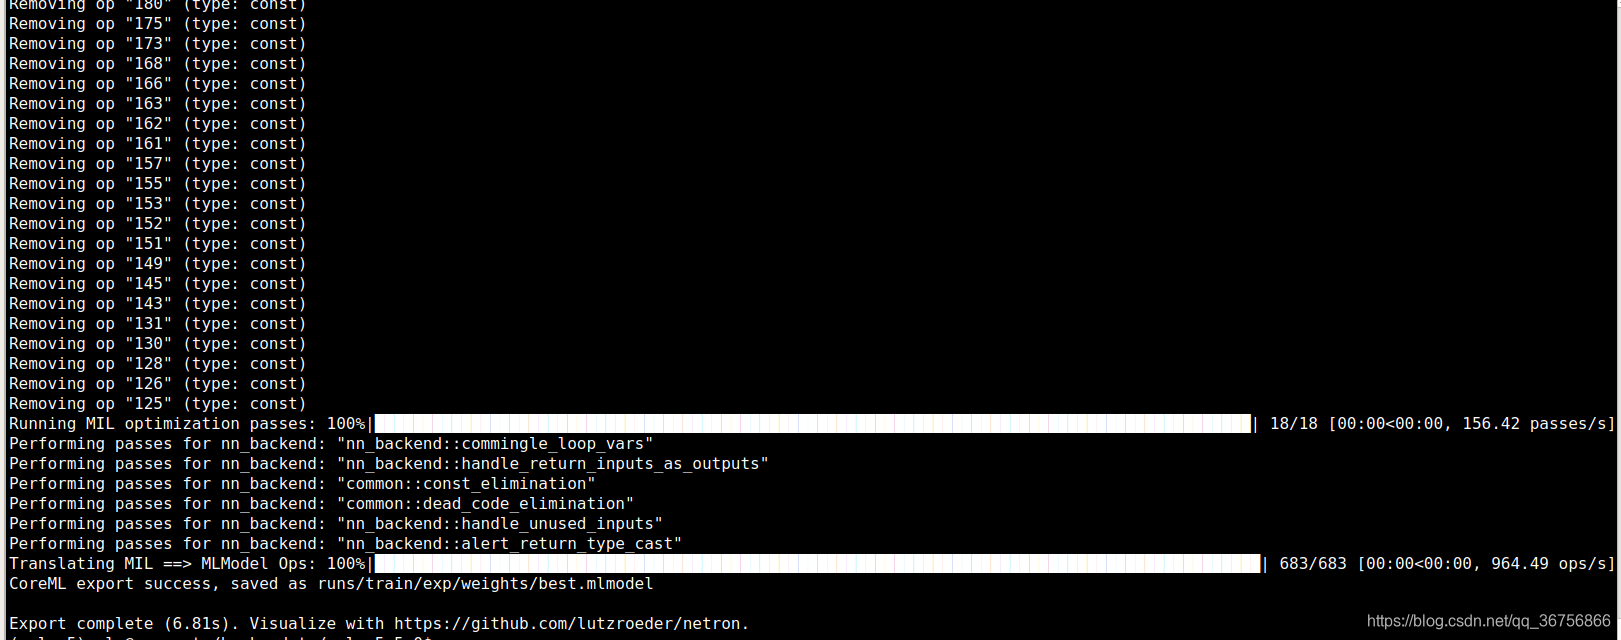
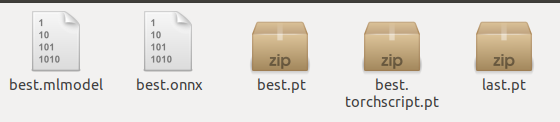
转换结果如下:
2. 使用Netron来查看你的ONNX文件模型
netron现已支持大部分格式的模型文件,都是可以查看的。
PaddlePaddle、OpenVINO、TensorFlow 、Caffe…
安装netron
pip install netron
- 1
进入python,运行netron.start(‘模型路径’),如下:
import netron
netron.start('best.onnx')
- 1
- 2
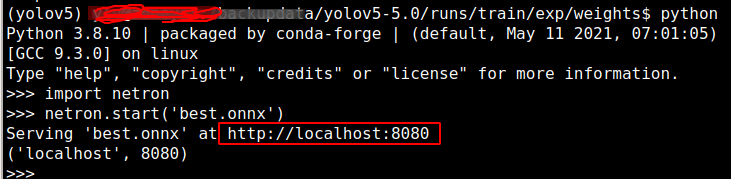
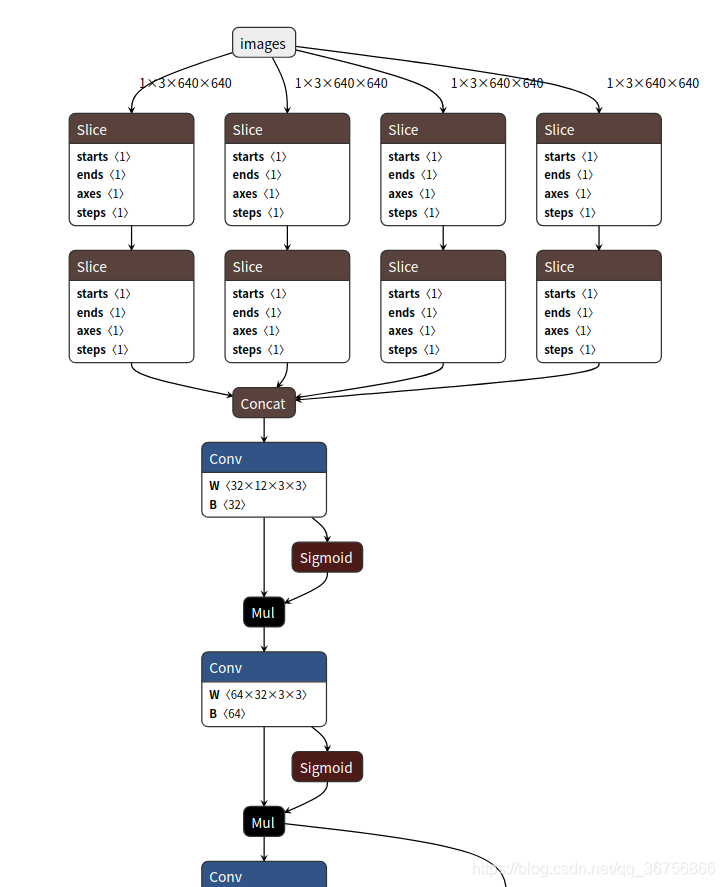
然后复制红框中的链接浏览器打开即可看到模型的网络结构,如下:
3. onnx模型转换为tfserving的savedmode模型
在模型路径下创建一个onnx2pb.py脚本,转换代码如下:
import onnx
import numpy as np
from onnx_tf.backend import prepare

model = onnx.load('best.onnx')      # yolov5 pt模型转换得到的onnx模型
tf_model = prepare(model)
tf_model.export_graph('yolov5_saved_model')     #  onnx模型转换为tfserving的savedmode模型
- 1
- 2
- 3
- 4
- 5
- 6
- 7
运行python onnx2pb.py即可,转换结果如下:

导出模型可直接用于 tensorflow_server, 签名默认 default_serving, 输入输出如下:
"inputs": [{'node_name': 'images', 'node_type': 'DT_FLOAT', 'node_shape': [1, 3, 640, 640]}],
"outputs": [{'node_name': 'output_0', 'node_type': 'DT_FLOAT', 'node_shape': [1, 3, 20, 20, 8]}]
- 1
- 2
下面是savemodel pb模型的输入、输出节点的具体信息:
"metadata": {"signature_def": {
 "signature_def": {
  "__saved_model_init_op": {
   "inputs": {},
   "outputs": {
    "__saved_model_init_op": {
     "dtype": "DT_INVALID",
     "tensor_shape": {
      "dim": [],
      "unknown_rank": true
     },
     "name": "NoOp"
    }
   },
   "method_name": ""
  },
  "serving_default": {
   "inputs": {
    "images": {
     "dtype": "DT_FLOAT",
     "tensor_shape": {
      "dim": [
       {
        "size": "1",
        "name": ""
       },
       {
        "size": "3",
        "name": ""
       },
       {
        "size": "640",
        "name": ""
       },
       {
        "size": "640",
        "name": ""
       }
      ],
      "unknown_rank": false
     },
     "name": "serving_default_images:0"
    }
   },
   "outputs": {
    "output_0": {
     "dtype": "DT_FLOAT",
     "tensor_shape": {
      "dim": [
       {
        "size": "1",
        "name": ""
       },
       {
        "size": "3",
        "name": ""
       },
       {
        "size": "80",
        "name": ""
       },
       {
        "size": "80",
        "name": ""
       },
       {
        "size": "8",
        "name": ""
       }
      ],
      "unknown_rank": false
     },
     "name": "StatefulPartitionedCall:0"
    },
    "output_1": {
     "dtype": "DT_FLOAT",
     "tensor_shape": {
      "dim": [
       {
        "size": "1",
        "name": ""
       },
       {
        "size": "3",
        "name": ""
       },
       {
        "size": "40",
        "name": ""
       },
       {
        "size": "40",
        "name": ""
       },
       {
        "size": "8",
        "name": ""
       }
      ],
      "unknown_rank": false
     },
     "name": "StatefulPartitionedCall:1"
    },
    "output_2": {
     "dtype": "DT_FLOAT",
     "tensor_shape": {
      "dim": [
       {
        "size": "1",
        "name": ""
       },
       {
        "size": "3",
        "name": ""
       },
       {
        "size": "20",
        "name": ""
       },
       {
        "size": "20",
        "name": ""
       },
       {
        "size": "8",
        "name": ""
       }
      ],
      "unknown_rank": false
     },
     "name": "StatefulPartitionedCall:2"
    }
   },
   "method_name": "tensorflow/serving/predict"
  }
 }
}
}
}

- 1
- 2
- 3
- 4
- 5
- 6
- 7
- 8
- 9
- 10
- 11
- 12
- 13
- 14
- 15
- 16
- 17
- 18
- 19
- 20
- 21
- 22
- 23
- 24
- 25
- 26
- 27
- 28
- 29
- 30
- 31
- 32
- 33
- 34
- 35
- 36
- 37
- 38
- 39
- 40
- 41
- 42
- 43
- 44
- 45
- 46
- 47
- 48
- 49
- 50
- 51
- 52
- 53
- 54
- 55
- 56
- 57
- 58
- 59
- 60
- 61
- 62
- 63
- 64
- 65
- 66
- 67
- 68
- 69
- 70
- 71
- 72
- 73
- 74
- 75
- 76
- 77
- 78
- 79
- 80
- 81
- 82
- 83
- 84
- 85
- 86
- 87
- 88
- 89
- 90
- 91
- 92
- 93
- 94
- 95
- 96
- 97
- 98
- 99
- 100
- 101
- 102
- 103
- 104
- 105
- 106
- 107
- 108
- 109
- 110
- 111
- 112
- 113
- 114
- 115
- 116
- 117
- 118
- 119
- 120
- 121
- 122
- 123
- 124
- 125
- 126
- 127
- 128
- 129
- 130
- 131
- 132
- 133
- 134
- 135
- 136
- 137
- 138
- 139

