
热门标签
热门文章
- 1【送书活动四期】被GitHub 要求强制开启 2FA 双重身份验证,我该怎么办?_github 开启了2fa无法登录
- 2今天面试了几家高级测试工程师,面试题整理(含答案)_高级测试工程师面试题
- 3周志华:“数据、算法、算力”人工智能三要素,在未来要加上“知识”| CCF-GAIR 2020...
- 4【opencv】计算机视觉:实时目标追踪_add(tracker, frame, box)
- 5Apsara Clouder云计算专项技能认证:云服务器ECS入门
- 6Flink 输出至 Elasticsearch
- 7浅析人工智能的数学基础(文末送书!)
- 8【数据结构】C语言实现单链表的基本操作
- 9出现 login.error.passwordAuthenticationIsProhibited 访问公网IP地址需要在实例安全组白名单中添加 Workbench的服务器白名单 解决方法_访问公网ip地址需要在实例安全组白名单中增加
- 10基于STM32的ADC采样及各式滤波实现(HAL库,含VOFA+教程)_stm32adc采样方波
当前位置: article > 正文
基于Paddle的计算机视觉入门教程——第12讲 实战:PaddleDeteciton实现目标检测_paddlepaddle做目标检测 csdn
作者:笔尖舞者 | 2024-01-31 20:34:27
赞
踩
paddlepaddle做目标检测 csdn
B站教程地址
https://www.bilibili.com/video/BV18b4y1J7a6/
下载链接
链接:https://pan.baidu.com/s/1ydUkMBOUQtaIaNJrjbCjGQ
提取码:qxp9
数据集
数据集结构
在实际项目中最常用的是voc数据集格式,我们以voc数据集为例,进行介绍。
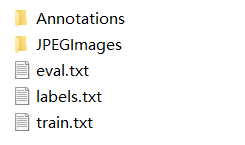
JPEGImages存放所有数据集图片,Annotations中存放所有标注文件。
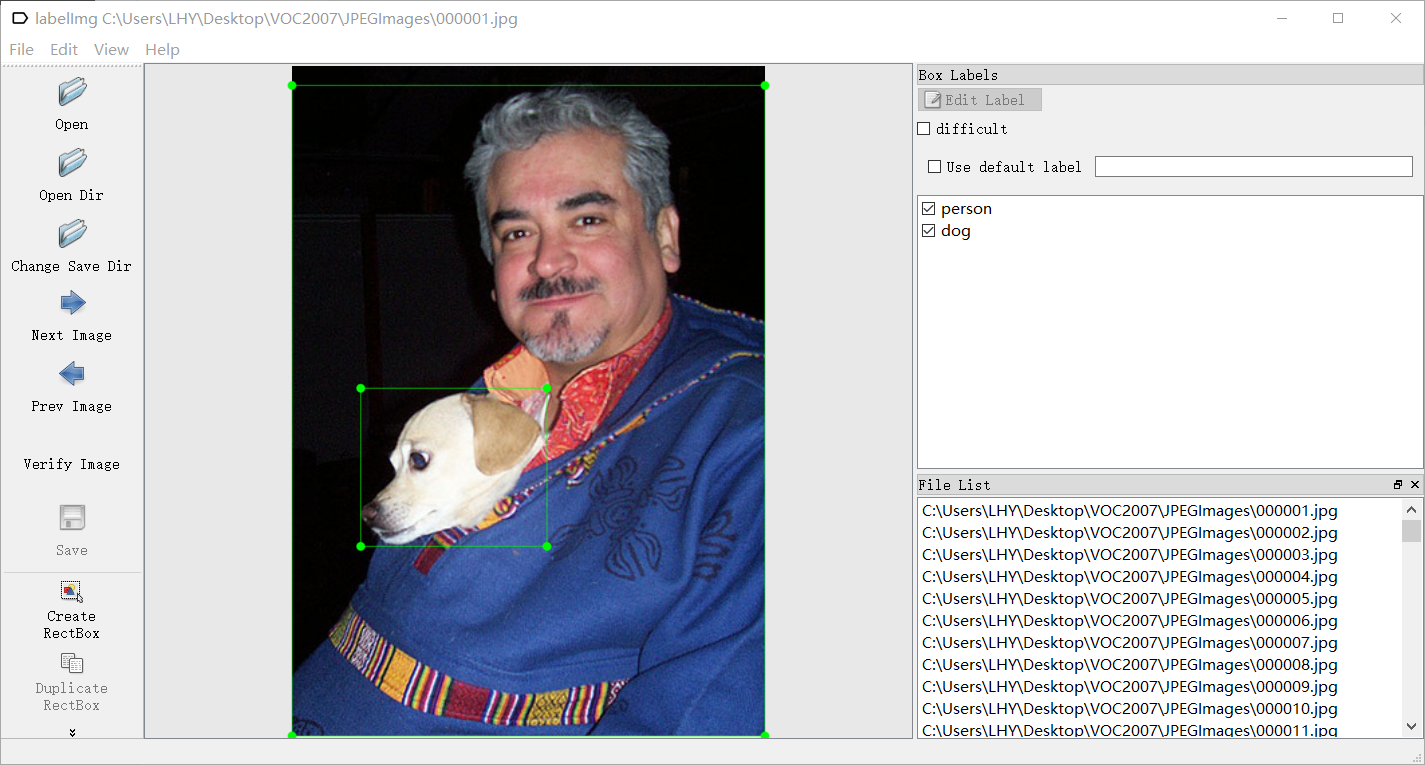
如图片000001.jpg,它对应的标注就是000001.xml

这张图片对应的标注信息如下:
<annotation>
	<folder>VOC2007</folder>
	<filename>000001.jpg</filename>
	<source>
		<database>The VOC2007 Database</database>
		<annotation>PASCAL VOC2007</annotation>
		<image>flickr</image>
		<flickrid>341012865</flickrid>
	</source>
	<owner>
		<flickrid>Fried Camels</flickrid>
		<name>Jinky the Fruit Bat</name>
	</owner>
	<size>
		<width>353</width>
		<height>500</height>
		<depth>3</depth>
	</size>
	<segmented>0</segmented>
	<object>
		<name>dog</name>
		<pose>Left</pose>
		<truncated>1</truncated>
		<difficult>0</difficult>
		<bndbox>
			<xmin>48</xmin>
			<ymin>240</ymin>
			<xmax>195</xmax>
			<ymax>371</ymax>
		</bndbox>
	</object>
	<object>
		<name>person</name>
		<pose>Left</pose>
		<truncated>1</truncated>
		<difficult>0</difficult>
		<bndbox>
			<xmin>8</xmin>
			<ymin>12</ymin>
			<xmax>352</xmax>
			<ymax>498</ymax>
		</bndbox>
	</object>
</annotation>
- 1
- 2
- 3
- 4
- 5
- 6
- 7
- 8
- 9
- 10
- 11
- 12
- 13
- 14
- 15
- 16
- 17
- 18
- 19
- 20
- 21
- 22
- 23
- 24
- 25
- 26
- 27
- 28
- 29
- 30
- 31
- 32
- 33
- 34
- 35
- 36
- 37
- 38
- 39
- 40
- 41
- 42
- 43
- 44
制作数据集
使用labelImg软件制作目标检测数据集。
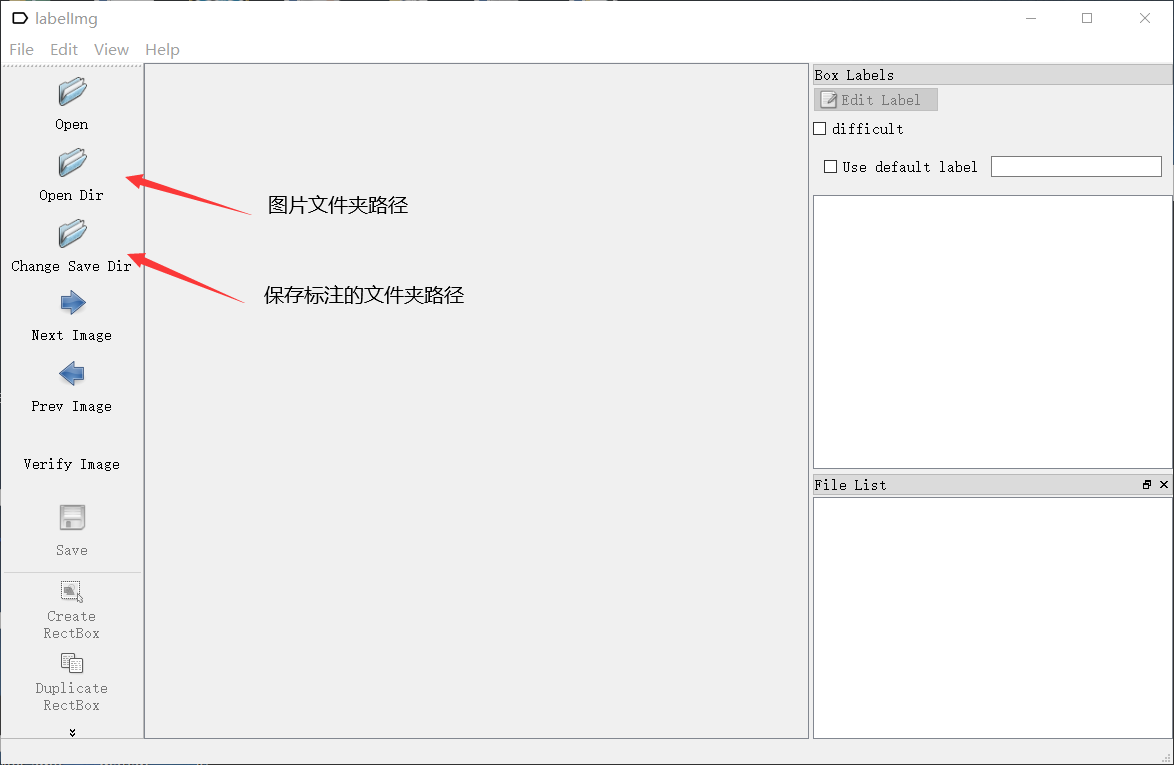
键盘A和D代表上一张和下一张,W为标注工具,标注完成后CTRL+S保存,这样一张图片就标注完成了。所有的图片都需要进行标注,而且不能遗漏目标物体,这一过程是非常耗时耗力的。
PaddleDetection
把制作好的数据集放在dataset文件夹下,然后修改configs里面的标注文件,对应你想要修改的模型,特别需要注意修改dataset相关的参数,如果对模型不做特别修改,其他大多数参数都不需要改变。
模型训练
python tools/train.py -c configs/yolov3/yolov3_darknet53_270e_voc.yml --use_vdl=True --eval
- 1
断点训练
python tools/train.py -c configs/yolov3/yolov3_darknet53_270e_voc.yml -r output/yolov3_darknet53_270e_voc/100
- 1
模型评估
python tools/eval.py -c configs/yolov3/yolov3_darknet53_270e_voc.yml -o weights=output/yolov3_darknet53_270e_voc/best_model
- 1
模型导出
python tools/export_model.py -c configs/yolov3/yolov3_darknet53_270e_voc.yml --output_dir=./inference_model -o weights=output/yolov3_darknet53_270e_voc/best_model
- 1
模型预测
python deploy/python/infer.py --model_dir=./inference_model/yolov3_darknet53_270e_voc --image_file=./street.jpg --device=GPU --threshold=0.2
- 1
生成train.txt和eval.txt代码
import os
import random

def ReadFileDatas():
    FileNamelist = []
    file = open('train.txt','r+')
    for line in file:
        line=line.strip('\n')
        FileNamelist.append(line)
    file.close()
    return FileNamelist

def WriteDatasToFile(listInfo,cls_num):
    train_file_handle=open('train.txt',mode='w')
    eval_file_handle=open('eval.txt',mode='w')
    i = 0
    for idx in range(len(listInfo)):
        i += 1
        str = listInfo[idx]
        str_Result = str  + '\n'
        if(i % (cls_num+1) == 0):
            eval_file_handle.write(str_Result)
        else:
            train_file_handle.write(str_Result)
    train_file_handle.close()
    eval_file_handle.close()


with open("train.txt", 'w') as f:
    res = os.listdir('./annotations')             			 #修改为自己的标注路径
    for j in res:
        j = j[:-4]
        f.write("./photos/"+str(j)+'.jpg ')					 #修改为自己的图片路径
        f.write("./annotations/"+str(j)+'.xml'+'\n')		 #修改为自己的标注路径

listFileInfo = ReadFileDatas()
random.shuffle(listFileInfo)
WriteDatasToFile(listFileInfo,6)   #训练集和测试集 6 : 1
- 1
- 2
- 3
- 4
- 5
- 6
- 7
- 8
- 9
- 10
- 11
- 12
- 13
- 14
- 15
- 16
- 17
- 18
- 19
- 20
- 21
- 22
- 23
- 24
- 25
- 26
- 27
- 28
- 29
- 30
- 31
- 32
- 33
- 34
- 35
- 36
- 37
- 38
- 39
注意修改最后的图片和标注文件路径!
声明:本文内容由网友自发贡献,不代表【wpsshop博客】立场,版权归原作者所有,本站不承担相应法律责任。如您发现有侵权的内容,请联系我们。转载请注明出处:https://www.wpsshop.cn/article/detail/52091
推荐阅读
相关标签

