
热门标签
热门文章
- 1python OSError: [Errno 24] Too many open files_scrapy to many open file
- 2C++变量的存储类别(动态存储、静态存储、自动变量、寄存器变量、外部变量)_c++动态变量和静态变量
- 3论文笔记:多任务学习模型:渐进式分层提取(PLE)含pytorch实现
- 4React中的虚拟DOM和diff算法_react dom diff
- 5自动化运维环境搭建过程_eipwork/etcd-host
- 6python中安装缺少Microsoft Visual C++ 环境解决方案_error: no microsoft visual c++ version found
- 7金融行业现场故障处理实录
- 8react hooks的useContext
- 9让python程序开机自启动(可自行扩展到其他程序)(附带取消控制台显示)_python bat写入软件自启动
- 10【网络安全 -> 防御与保护】信息安全概述
当前位置: article > 正文
IDEA如何配置Tomcat_idea配置tomcat
作者:代码架构师 | 2024-01-30 19:57:21
赞
踩
idea配置tomcat
一、使用IDEA配置Tomcat的步骤
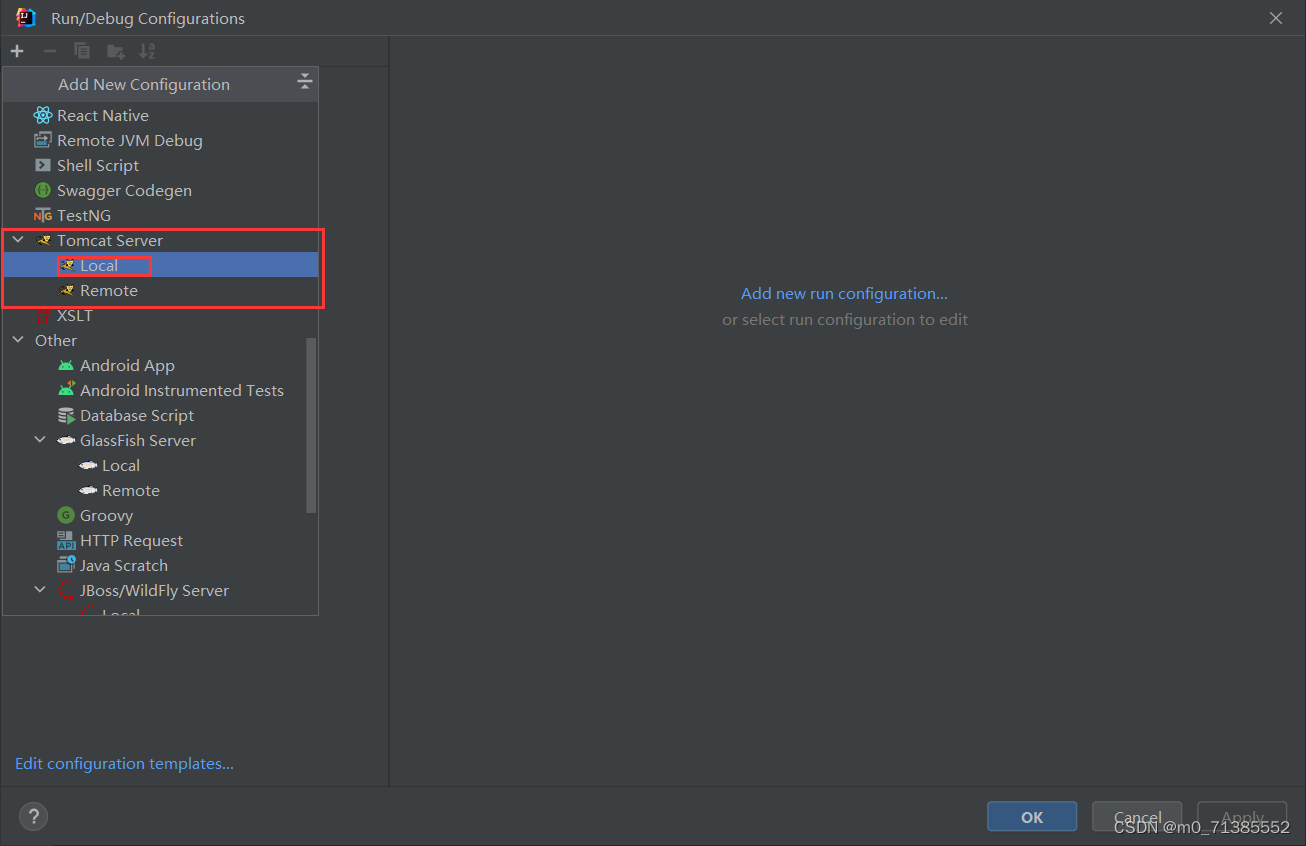
1、在IDEA右上角的项目运行列表中选中 Edit Configurations

2、进入新的窗口点击"+"

3、找到Toncat Server中的Local进行点击
4、配置Tomcat路径
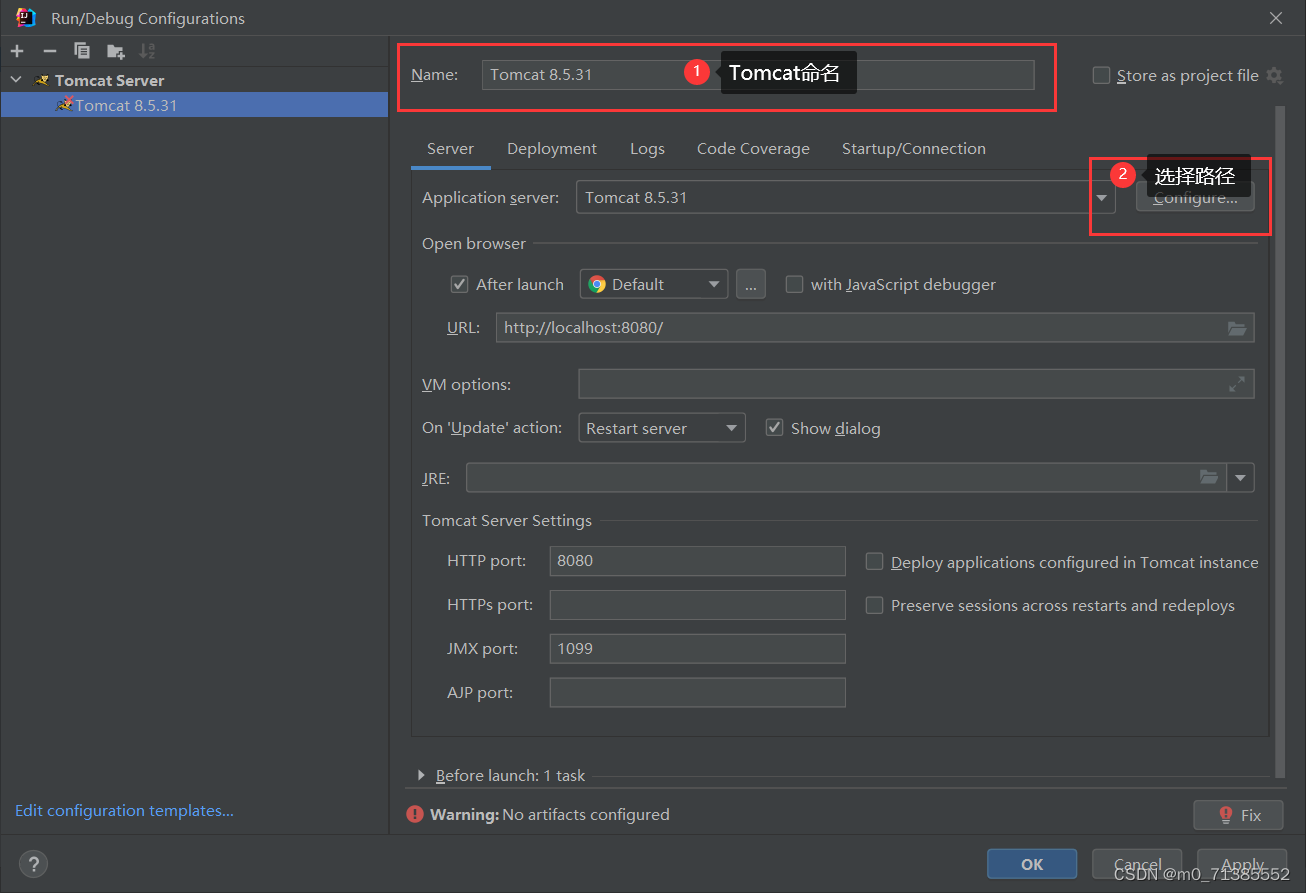
选择路径点击ok
然后应用Tomcat点击确定
这样我们的Tomcat就配置好了
二、使用Serclet,通过浏览器访问Servlet程序
1、首先我们新建一个模板进行右击选择 Add Framework Support

2、勾选Web Applicataion然后点击ok
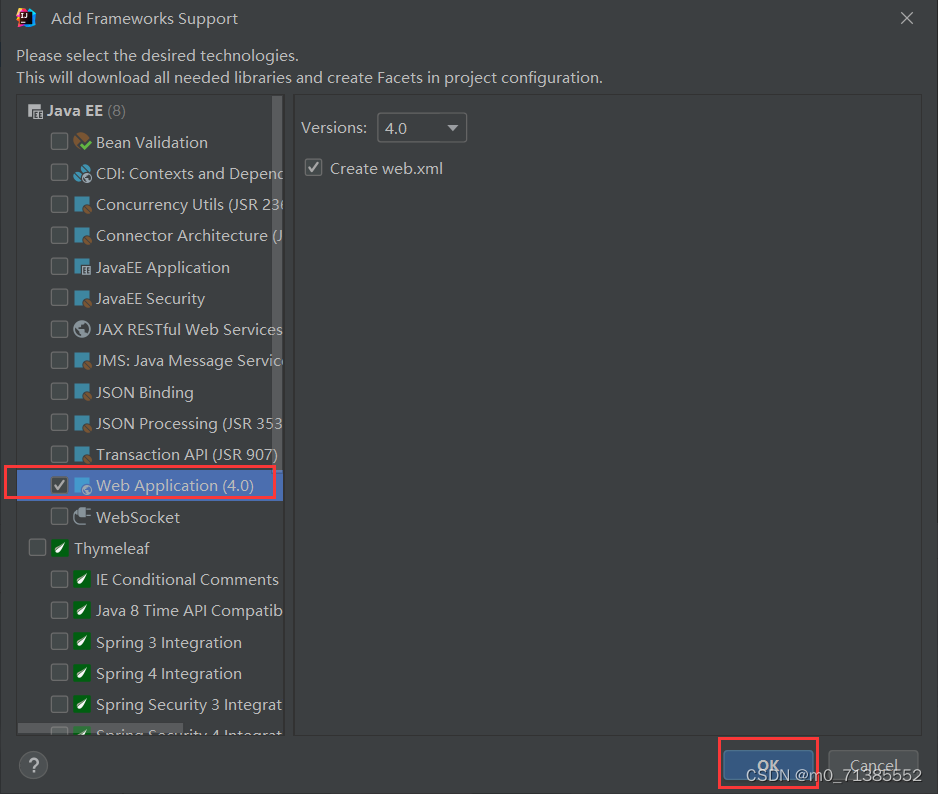
这时候我们创建的模板里会出现一个名为Web的文件夹就表示成功了

3、创建一个名为lib的文件夹

4、把所需要的jar包导入lib文件夹中,选中架包右击 Add as library,接下来会弹出一个弹框点击ok

5、在src下创建一个Java类实现Servlet类并且实现接口中的方法

实现Servlet接口代码如下:
- import javax.servlet.*;
- import java.io.IOException;
-
- public class Login implements Servlet {
- @Override
- public void init(ServletConfig servletConfig) throws ServletException {
-
- }
-
- @Override
- public ServletConfig getServletConfig() {
- return null;
- }
-
- @Override
- public void service(ServletRequest servletRequest, ServletResponse servletResponse) throws ServletException, IOException {
-
- }
-
- @Override
- public String getServletInfo() {
- return null;
- }
-
- @Override
- public void destroy() {
-
- }
- }

6、在Web文件夹下的index.jsp中写入如下代码

代码如下:
- <%--
- Created by IntelliJ IDEA.
- User: DELL
- Date: 2023/2/13
- Time: 19:45
- To change this template use File | Settings | File Templates.
- --%>
- <%@ page contentType="text/html;charset=UTF-8" language="java" %>
- <html>
- <head>
- <title>Java Web</title>
- </head>
- <body>
- <a href="login">登录</a>
- </body>
- </html>
7、在 WEB-INF 下的 web.xml 中来配置Servlet类并判断进行那个请求
- <?xml version="1.0" encoding="UTF-8"?>
- <web-app xmlns="http://xmlns.jcp.org/xml/ns/javaee"
- xmlns:xsi="http://www.w3.org/2001/XMLSchema-instance"
- xsi:schemaLocation="http://xmlns.jcp.org/xml/ns/javaee http://xmlns.jcp.org/xml/ns/javaee/web-app_4_0.xsd"
- version="4.0">
- <!-- 配置servlet类 -->
- <servlet>
- <!--起别名-->
- <servlet-name>login</servlet-name>
- <!-- servlet类所在的位置:类的全类名就是 包名.类名 -->
- <servlet-class>Login</servlet-class>
- </servlet>
-
- <!-- Servlet类的映射:Servlet用来处理哪个请求 -->
- <servlet-mapping>
- <servlet-name>login</servlet-name>
- <url-pattern>/login</url-pattern>
- </servlet-mapping>
- </web-app>
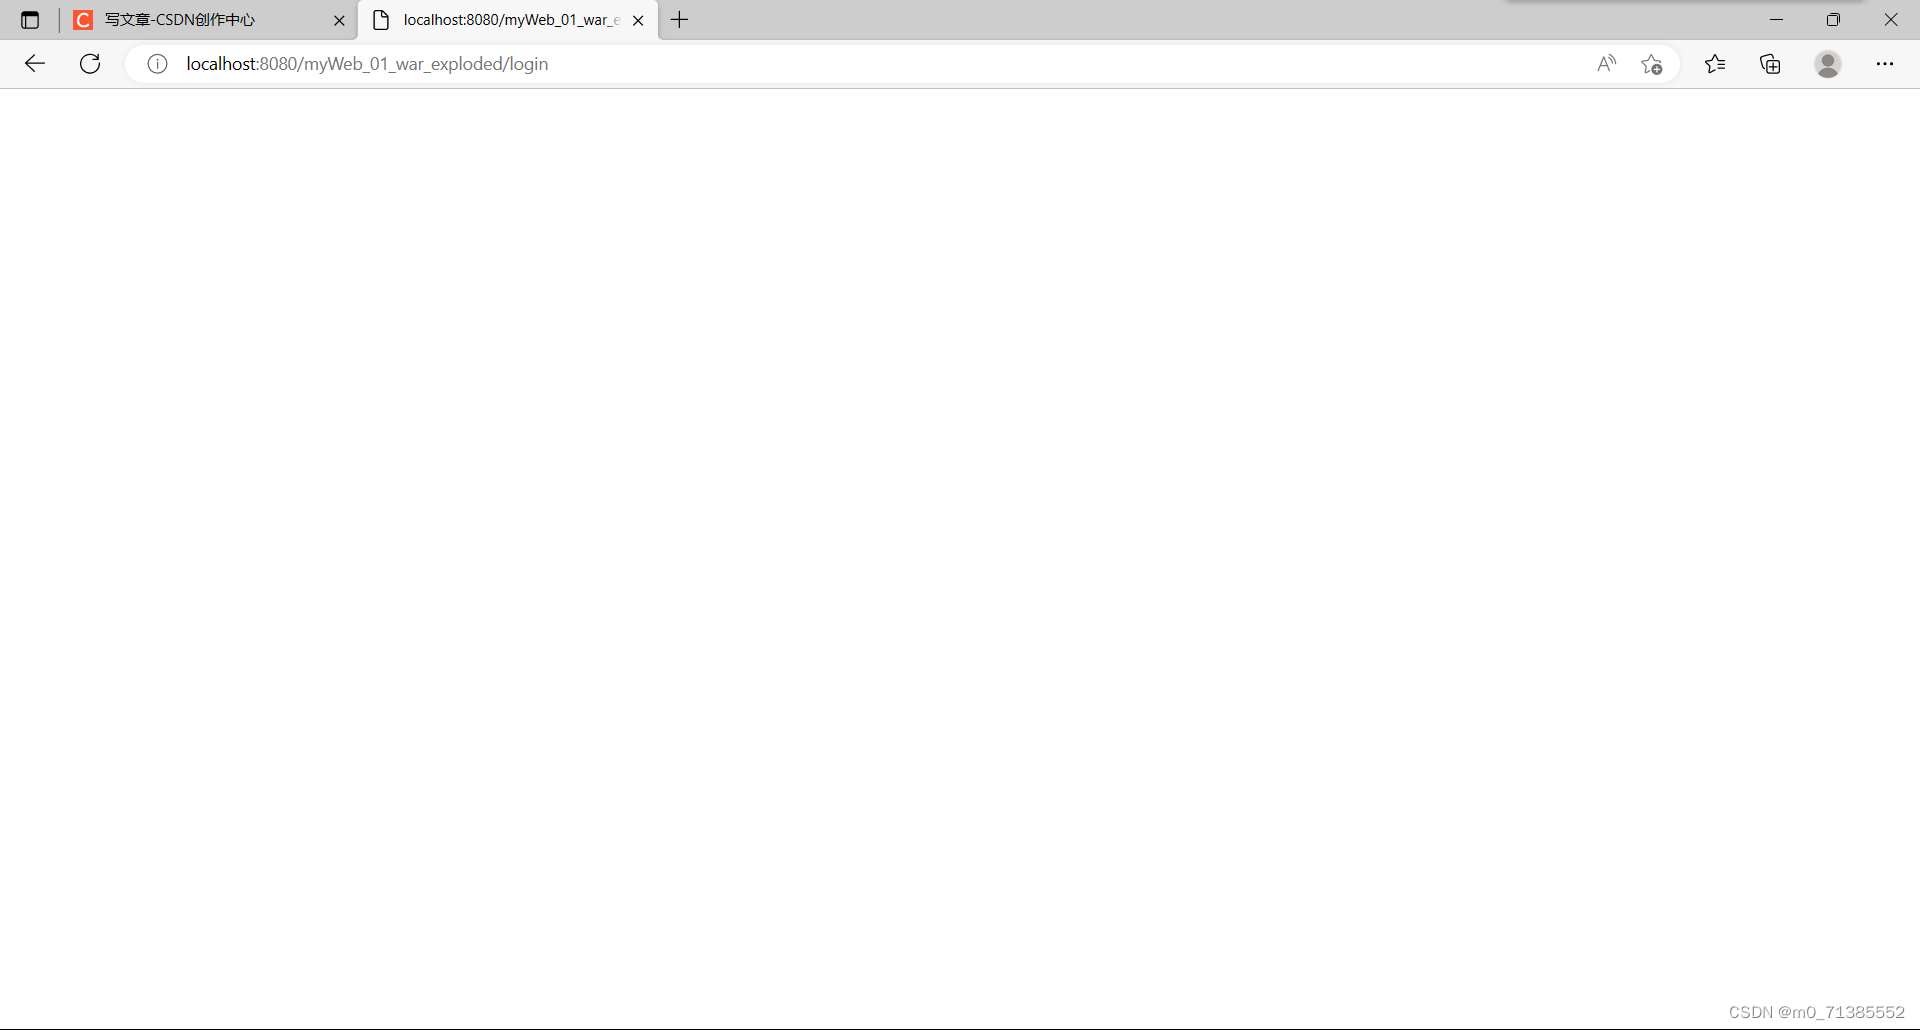
8、运行代码,自动跳转浏览器

9、点击登录跳转新的页面
声明:本文内容由网友自发贡献,转载请注明出处:【wpsshop】
推荐阅读

相关标签

