
热门标签
热门文章
- 1最全BT介绍_tracker服务器
- 2python入门教程(非常详细)从零基础入门到精通,看完这一篇就够了_零基础学python从入门到精通
- 3使用filter使session失效的用户,重新跳转到登录页面_filter 校验失败跳转 login
- 4TensorFlow2实战-系列教程13:Resnet实战1
- 5C++实现数字翻转算法及其应用_c++数字反转
- 6【ASP.NET Core 基础知识】--前端开发--集成前端框架
- 7Intel RealSense D400系列摄像头 Linux下部署SDK(开发库)_深度相机d405 linux用sdk
- 8Arduino 常用函数参考文档_arduino attach函数
- 9破局人工智能:构建AI,与腾讯云一起探索语音应用场景
- 10JAVA安装教程 (windows)_windows java
当前位置: article > 正文
2021-03-29-SpringBoot_spring boot 2021年哪个版本稳定
作者:沉思者 | 2024-01-30 11:56:19
赞
踩
spring boot 2021年哪个版本稳定
一、概述
springboot是用于整合springframwork以及其他框架,避免版本不兼容,开发速度慢等问题的一个高级框架。
可以通过官方文档,配置文档来学习springboot,也可应通过github在查看springboot的版本更新内容
二、入门
参考尚硅谷笔记
三、依赖管理以及自动配置
依赖管理
- 该依赖是springboot项目的父依赖,他也有父依赖,规定了springboot中所有能引入的依赖以及其版本号
<parent>
        <groupId>org.springframework.boot</groupId>
        <artifactId>spring-boot-starter-parent</artifactId>
        <version>2.3.4.RELEASE</version>
</parent>
- 1
- 2
- 3
- 4
- 5
- 可以把该段内容复制下来以使用该依赖
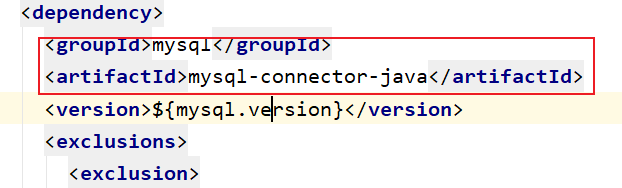
- 我们也可以通过properties标签更改其中某个以来的版本号
<properties>
	<mysql.version>5.1.43</mysql.version>
</properties>
- 1
- 2
- 3
- springboot给我们要实现某些功能(比如web)的相关依赖打成了单独的依赖,只导这一个依赖就可以实现相应的功能
<!--这是实现web功能的依赖-->
<dependency>
            <groupId>org.springframework.boot</groupId>
            <artifactId>spring-boot-starter-web</artifactId>
</dependency>
- 1
- 2
- 3
- 4
- 5
- 这些官方提供的依赖内都有一个共同的依赖,用于整合其他依赖
<dependency>
      <groupId>org.springframework.boot</groupId>
      <artifactId>spring-boot-starter</artifactId>
      <version>2.3.4.RELEASE</version>
      <scope>compile</scope>
    </dependency>
- 1
- 2
- 3
- 4
- 5
- 6
自动配置
- 自动配好Web常见功能
- springboot帮我们配置好了所有web开发的常用场景
- 默认配置好要扫描的包结构
- mvc默认扫描主程序(SpringBootApplication)所在包的所有子包及其以下的包
- 按需加载所有自动配置项
- springboot会导入父依赖中的所有的依赖,但引入了哪些场景这个场景的自动配置才会开启
容器功能
@Configuration
- 作用:放到配置类上,声明其是一个配置类
- 配置类也会作为组件放到容器中
- 该注解有一个属性proxyBeanMethods是SpringBoot2特有的,默认为true
- 该属性为true时,配置类中所有方法都是被代理的,调用这些方法时会先从容器中查找是否有对应的组件,有的话使用容器中的,当容器中组件有依赖时,优先使用容器中的,该模式被称为Full,程序运行慢
- 属性为false时,配置类种方法没有被代理,是Lite,轻量级模式,程序运行快。
@Configuration(proxyBeanMethods = false)
public class MyConfig {
    @Bean
    public User user01(){
        User user01=new User("张三",1,true);
        user01.setPet(tomcat());
        return user01;
    }
    @Bean
    public Pet tomcat(){
        return new Pet("tomcat",3);
    }
}
- 1
- 2
- 3
- 4
- 5
- 6
- 7
- 8
- 9
- 10
- 11
- 12
- 13
@Bean @Component @Controller @Service@Repository
这些组件都可像Spring中那样使用,被@Bean注解的方法的参数会从容器中找
@ComponentScan @Import
- SpringBootApplication包含ComponentScan,也可以更改ComponentScan
- @Import
- 该注解用在配置类上,通过类名给容器导入其他组件
@Import(User.class) @Import({User.class, EvaluatorTemplate.class})- 1
- 2
- 还有一些高级用法
- //该类是一个实现了ImportSelector接口的一个类,并实现了他的selectImports()方法,该方法会返回一个String数组,其中是全类名的字符串,Import会把这些类都到入到容器中
@Import({xxxSelector.class})- 1
- 该类是一个实现了ImportBeanDefinitionRegistrar接口的一个类并实现了registerBeanDefinitions方法,该方法会通过BeanDefinitionRegistry对象手动注册组件
@Import(xxxxRegistrar)- 1
@ConditionalOn…
- 这是一类注解,用在配置类及其方法上,用于控制该配置类或该方法对应的组件是否存到容器中
- 例如ConditionalOnBean(name={“user01”}),表示当容器中有user01这个组件时该配置类生效
@ImportResource
- 写在配置类上,通过该注解导入原生Spring的配置文件(xml)中的组件
@ImportResource("classpath:bean.xml")
- 1
@ConfigurationProperties
- 写在domain的某个类上,通过application.properties(prefix=“前缀”)这个配置文件给该类的属性进行赋值,springboot会将有前缀的配置给属性赋值
- 该注解不能将被修饰的类导入到容器中
- 可以使用@Component组件进行导入
- 也可以使用@EnableConfigurationProperties(User.class)写在配置类上,用来启用配置
自动配置原理
流程
SpringBoot的主类也就是xxxxxApplication上面有一个很重要的注解:@SpringBootApplication
而这个注解被三个主要注解注释:SpringBootConfiguration,EnableAutoConfiguration,ComponentScan
- SpringBootConfiguration
该注解被Configuration注解,也就是说xxxApplication是一个配置类
- 1
- ComponentScan
上面说到过,这是一个设置Springboot扫描包的一个注解,他指定SpringBoot要扫描主类所在包的
所有注解
- 1
- 2
- EnableAutoConfiguration
SpringBoot的自动配置原理就在这个注解中,他有两个注解@AutoConfigurationPackage @Import({AutoConfigurationImportSelector.class})
其中AutoConfigurationPackage其实就是一个Import注解,用于给SpringBoot注册主类所在包中所有组件
剩下的Import({AutoConfigurationImportSelector.class})用于导入该选择器的所有组件,
这个组件没有在我们的包下,是我们导入的包。
getAutoConfigurationEntry(AnnotationMetadata annotationMetadata)
this.getCandidateConfigurations(annotationMetadata, attributes);
SpringFactoriesLoader.loadFactoryNames(this.getSpringFactoriesLoaderFactoryClass(), this.getBeanClassLoader());
(List)loadSpringFactories(classLoaderToUse).getOrDefault(factoryTypeName, Collections.emptyList());
classLoader.getResources("META-INF/spring.factories");
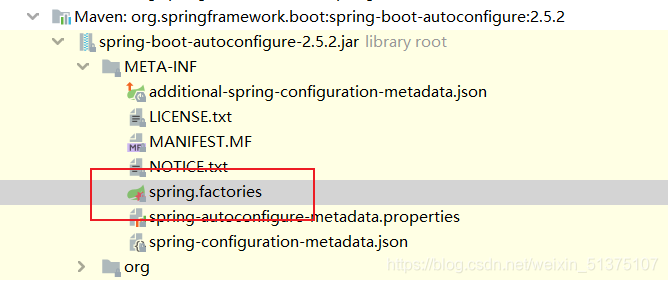
经过一通调用,我们发现他是从META-INF/spring.factories这个包下导入的
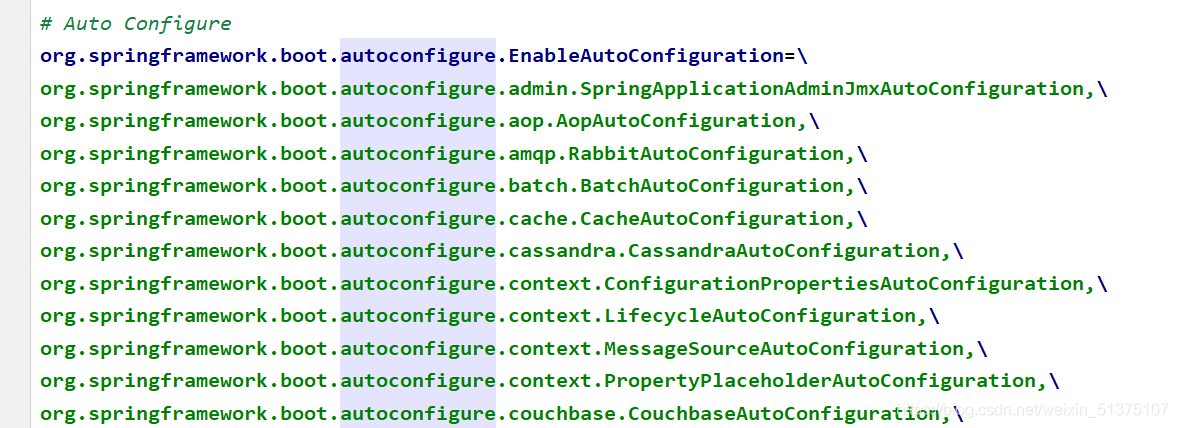
而这个包都是我们导的jar包,我们在spring-boot-aotuconfigure这个包下发现了spring.factories
其中有大量的自动配置类,用于自动配置我们的环境
- 1
- 2
- 3
- 4
- 5
- 6
- 7
- 8
- 9
- 10
- 11
- 12
配置类的参数注入
- 当配置类只有一个有参构造器时,它的参数都会从容器中获取
总结
- springboot先加载我们自己写的配置类
- SpringBoot加载所有的自动配置类
- 每个自动配置类按照规定的ConditionalOn…注解选择是否生效
- 生效的配置类根据EnableConfigurationProperties注解获取xxxxProperties类中的配置信息
- 该类与application.properties配置文件通过ConfigurationProperties注解进行了绑定
- 生效的配置类给容器配置很多组件,相当于相应的功能就有了
- 自定义配置的方法
- 用户用@Bean替换底层的组件
- 用户去看这个组件是获取的配置文件什么值就去修改。
过程:xxxxxAutoConfiguration —> 组件 —> xxxxProperties里面拿值 ----> application.properties
springboot使用过程
- 创建工程
- 导入相关依赖
- 查看自动配置了哪写
- 自己分析,引入场景对应的自动配置一般都生效了
- 配置文件中debug=true开启自动配置报告。Negative(不生效)\Positive(生效)
- 是否需要修改
- 参照文档修改配置项
- 自定义加入或者替换组件
- 自定义器 XXXXXCustomizer;
四、简化开发的插件
Lombok
- 导入相关jar包
<dependency>
	 <groupId>org.projectlombok</groupId>
	 <artifactId>lombok</artifactId>
</dependency>
- 1
- 2
- 3
- 4
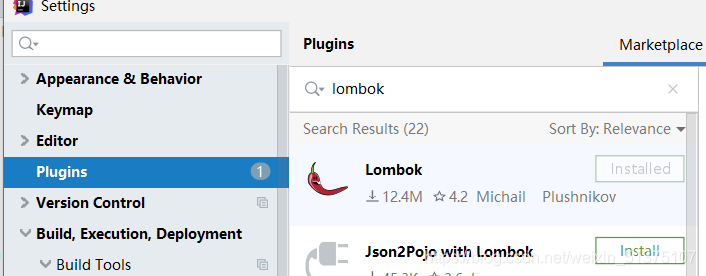
- 在idea上下载lombok插件
- 功能
- 简化JavaBean开发
- @Data:帮助生成getter和setter方法
- @ToString:帮助生成ToString方法
- @AllArgsConstructor:帮助生成所有参数的构造器
- @NoArgsConstructor:帮助生成无参构造器
- 简化日志开发
- @Slf4j写在Controller上
- log.info() 生成日志
- @Slf4j写在Controller上
- 简化JavaBean开发
div-look
<dependency>
    <groupId>org.springframework.boot</groupId>
    <artifactId>spring-boot-devtools</artifactId>
    <optional>true</optional>
</dependency>
- 1
- 2
- 3
- 4
- 5
按ctrl+f9,重启项目
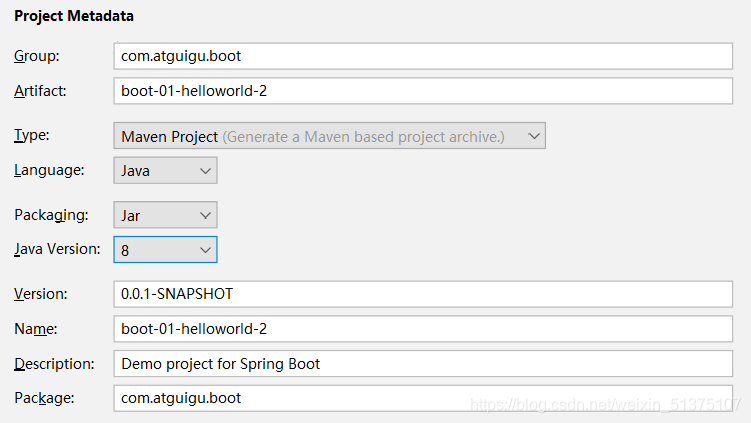
Spring Initailizr(项目初始化向导)
五、配置文件
properties
同以前的properties用法
yaml
简介
yaml非常适合用来做以数据为中心的配置文件
语法
- key: value;kv之间有空格
- 大小写敏感
- 使用缩进表示层级关系
- 缩进的空格数不重要,只要相同层级的元素左对齐即可
- '#'表示注释
- 字符串无需加引号,如果要加,’'与""表示字符串内容 会被 转义/不转义
数据类型
- 数据可以是:字符串,数字,boolean,date,数组,对象
- date: birth: 2021/3/30
- 数组:
#行内写法:
k: [v1,v2,v3]
#多行写法
k:
 - v1
 - v2
 - v3
- 1
- 2
- 3
- 4
- 5
- 6
- 7
- 对象:
#行内写法:
k: {k1:v1,k2:v2,k3:v3}
#或
k:
  k1: v1
  k2: v2
  k3: v3
- 1
- 2
- 3
- 4
- 5
- 6
- 7
示例
具体例子参考尚硅谷笔记
配置提示
自定义的类和配置文件绑定一般没有提示。
 <!--使得在编写自定义类的配置有提示-->
 <dependency>
     <groupId>org.springframework.boot</groupId>
     <artifactId>spring-boot-configuration-processor</artifactId>
     <optional>true</optional>
 </dependency>
 <build>
        <plugins>
            <plugin>
                <groupId>org.springframework.boot</groupId>
                <artifactId>spring-boot-maven-plugin</artifactId>
                <!--在打包时把以下包去掉,这些包可能是只在编写程序时需要使用-->
                <configuration>
                    <excludes>
                        <exclude>
                            <groupId>org.springframework.boot</groupId>
                            <artifactId>spring-boot-configuration-processor</artifactId>
                        </exclude>
                    </excludes>
                </configuration>
            </plugin>
        </plugins>
    </build>

- 1
- 2
- 3
- 4
- 5
- 6
- 7
- 8
- 9
- 10
- 11
- 12
- 13
- 14
- 15
- 16
- 17
- 18
- 19
- 20
- 21
- 22
- 23
六、web开发
1.简单功能分析
静态资源访问
- 静态资源的默认访问路径为: /**
- 静态资源想要能被访问到就应该放到: 根路径 /static (or /public or /resources or /META-INF/resources)这些文件下
- 这些配置都可以通过配置文件更改
#更改静态资源的访问路径
spring:
  mvc:
    static-path-pattern: /res/**
#更改静态资源放置路径
  resources:
    static-locations: [classpath:/haha/]
- 1
- 2
- 3
- 4
- 5
- 6
- 7
- webjars: 把jquery一类的资源打成jar包供我们使用,他的访问路径为 /webjars/**
欢迎页面支持
写在static里
- index.html页面即为该工程的首页
- favicon.ico 是网页上的小图标
静态资源处理原理
- 详情请参照尚硅谷笔记05-2.4静态资源配置原理,以及视频
- SpringMvc的配置通过WebMvcAutoConfiguration自动配置类,来进行配置
- 相关的配置文件的映射类有: WebMvcProperties=spring.mvc、ResourceProperties=spring.resources
- 静态资源的和欢迎页的访问路径都在配置类的方法中有相应的配置,其中规定了主页的访问路径只能时"/"
2.请求参数处理
请求映射
rest使用与原理
- 详情请参照尚硅谷笔记05-3-0,rest使用与原理,以及视频
- REST风格支持使用http请求方式来表示对资源的操作
- 以前:/getUser 获取用户 /deleteUser 删除用户 /editUser 修改用户 /saveUser 保存用户
- 现在: /user GET-获取用户 DELETE-删除用户 PUT-修改用户 POST-保存用户
- 当我们提交表单,但表单中没有put和delete时这样用HiddenHttpMethodFilter
- 用法: 表单method=post,隐藏域 _method=put
- 该做法需要在配置中把spring.mvc.hiddenmethod.filter.enabled改为true,已启用该功能
- 原理:表单提交上来会带上_method,当表单请求方式是post时,会查看_method的值,把请求的方式改成_method的值
- 当我们可以发送put,delete请求时,我们不需要写_method
请求映射原理
- 详情请参照尚硅谷笔记05-3-0,请求映射原理,以及视频
- 所有的请求映射都在HandlerMapping中。
- SpringBoot自动配置欢迎页的 WelcomePageHandlerMapping 。
- 我们写的RequestMapping在 RequestMappingHandlerMapping中
- 请求进来,挨个尝试所有的HandlerMapping看是否有请求信息。
- 找到对应的handlerMapping就进行映射
- 找不到就找不到
- 我们可以自定义一些handlermapping供我们自己使用
普通参数与基本注解
注解
- @PathVariable 路径参数,获取请求行信息
- @RequestHeader 获取请求头信息
- @RequestParam 获取请求参数
- @RequestBody 获取请求体
- @CookieValue 获取Cookie
@GetMapping("/car/{id}/owner/{username}")
    public Map<String,Object> getCar(@PathVariable Integer id,//请求行
                                     @PathVariable String username,//请求行
                                     @PathVariable Map<String,String> pv,//请求行
                                     @RequestHeader("User-Agent") String userAgent,//请求头
                                     @RequestHeader Map<String,String> headers,//请求头
                                     @RequestParam("name") String name,//请求参数
                                     @RequestParam("age") Integer age,//请求参数
                                     @RequestParam Map<String,String> params,//请求参数
                                     @CookieValue Cookie cookie,//cookie
                                     @CookieValue("_ge") String _ge//cookie
                                     ){
        Map<String,Object> map=new HashMap<String,Object>();
//        map.put("id", id);
//        map.put("username", username);
//        map.put("pv", pv);
//        map.put("userAgent", userAgent);
//        map.put("headers", headers);
//        map.put("name", name);
//        map.put("age", age);
//        map.put("params", params);
        map.put("cookie", cookie);
        map.put("_ge", _ge);
        return map;
    }
    @PostMapping("/car")
    public Map<String,Object> postCar(@RequestBody String body){
        HashMap<String, Object> map = new HashMap<>();
        map.put("body", body);
        return map;
    }
- 1
- 2
- 3
- 4
- 5
- 6
- 7
- 8
- 9
- 10
- 11
- 12
- 13
- 14
- 15
- 16
- 17
- 18
- 19
- 20
- 21
- 22
- 23
- 24
- 25
- 26
- 27
- 28
- 29
- 30
- 31
- @RequestAttribute 获取request域中数据
- @MatriVariable 根据矩阵变量获取参数
请求路径
/cars/path;brand=benchi;price=123
获取
@GetMapping("/cars/{path}")
    public Map matriVariable(@MatrixVariable("brand") String brand,
                             @MatrixVariable("price") Integer price,
                             @PathVariable() String path){
@GetMapping("/boss/{bossId}/{empId}")
  public Map boss(@MatrixVariable(value = "age",pathVar = "bossId") Integer bossAge,
                  @MatrixVariable(value = "age",pathVar = "empId") Integer empAge){
      Map<String,Object> map = new HashMap<>();

      map.put("bossAge",bossAge);
      map.put("empAge",empAge);
      return map;
  }
- 1
- 2
- 3
- 4
- 5
- 6
- 7
- 8
- 9
- 10
- 11
- 12
- 13
- 14
- 15
- 16
3.数据响应与内容协商
4.视图解析与模板引擎
拦截器
基本语法
- 和filter有些相似,通过拦截请求,对请求进行放行或数据更改
- preHandle请求接收前拦截
- postHandle请求接收后拦截
- afterCompletion:postHandle拦截后拦截
public class LoginInterceptor implements HandlerInterceptor {
    @Override
    public boolean preHandle(HttpServletRequest request, HttpServletResponse response, Object handler) throws Exception {
        HttpSession session = request.getSession();
        User user =(User) session.getAttribute("user");
        log.info("我拦截到的请求是:"+request.getRequestURI());
        if(!StringUtils.hasLength(user.getUsername())){
                request.setAttribute("errMsg", "请登录");
                request.getRequestDispatcher("/").forward(request, response);

            return false;
        }
        //放行
        return true;
    }

    @Override
    public void postHandle(HttpServletRequest request, HttpServletResponse response, Object handler, ModelAndView modelAndView) throws Exception {

    }

    @Override
    public void afterCompletion(HttpServletRequest request, HttpServletResponse response, Object handler, Exception ex) throws Exception {

    }
- 1
- 2
- 3
- 4
- 5
- 6
- 7
- 8
- 9
- 10
- 11
- 12
- 13
- 14
- 15
- 16
- 17
- 18
- 19
- 20
- 21
- 22
- 23
- 24
- 25
给服务器配置拦截器
- 写一个配置类,继承WebMvcConfiguer接口,放到容器中
- 实现addInterceptors方法
- 给拦截配置拦截和不拦截的请求
@Configuration
public class AdminWebConfig implements WebMvcConfigurer {
    @Override
    public void addInterceptors(InterceptorRegistry registry) {
        registry.addInterceptor(new LoginInterceptor())
                .addPathPatterns("/**")
                .excludePathPatterns("/","/login","/css/**","/js/**","/fonts/**","/images/**");
    }
}
- 1
- 2
- 3
- 4
- 5
- 6
- 7
- 8
- 9
Thymeleaf
详细内容可参考官方文档
基本语法
- 表达式
| 表达式名字 | 语法 | 用途 |
|---|---|---|
| 变量取值 | ${} | 获取请求域 |
| 选择变量 | *{…} | 获取上下文对象值 |
| 消息 | #{…} | 获取国际化等值 |
| 链接 | @{…} | 生成链接//…里写链接,不是变量名 |
| 片段表达式 | ~{…} | jsp:include 作用,引入公共页面片段 |
- 字面量
- 文本值: ‘one text’ , ‘Another one!’ ,…数字: 0 , 34 , 3.0 , 12.3 ,…布尔值: true , false
- 空值: null
- 变量: one,two,… 变量不能有空格
- 文本操作
- 字符串拼接:+
- 变量替换: |the name is${name}|
- 数字运算
- 预算符:+ - * / %
- 布尔运算
- 运算符: and,or
- 一元运算: !,not
- 比较运算
- 比较: > , < , >= , <= ( gt , lt , ge , le )等式: == , != ( eq , ne )
- 条件运算
- if-then:(if)?(then)
- if-then-else:(if)?(then):(else)
- Default:(value)?:(defaultvalue)
- 循环
- th:each="变量名 : ${数组/集合} "
- 行内写法(不在标签的属性中写)
- 加两个中括号 [[${session.user.username}]]
抽取公共内容
- 定义: th:fragment=“公共内容名称/id”
- 使用:
- th:insert/include/replace="~{文件名 :: 公共内容名称/#标签id}"
- th:insert/include/replace=“文件名 :: 公共内容名称/#标签id”
- insert 代表把公共内容直接放到标签内部
- include 代表把公共内容标签内的内容放到标签内部
- replace 代表直接把标签替换成公共内容
<!--定义-->
<div th:fragment="head">...</div>
<!--引用-->
<div th:replace="~{common::head}"></div>
- 1
- 2
- 3
- 4
文件上传
- 通过表单进行文件上传
- 文件上传的表单必须写这个enctype="multipart/form-data"表明自己是文件上传的
- 上传文件的type是file
- 上传多个文件时要写multiple
- Controller在接收的时候用@RequestPart注解,用MutipartFile类来储存
- MutipartFile对象有许多使用的方法
- isEmpty()判断文件是否为空的
- getOriginalFilename()获取文件原始名称
- transferTo(File file) 把文件储存到本地
- springboot 的一些配置
- spring.servlet.multipart.max-file-size 设置单个文件上传最大大小
- spring.servlet.multipart.max-request-size=100MB 设置单个文件上传最大大小
声明:本文内容由网友自发贡献,不代表【wpsshop博客】立场,版权归原作者所有,本站不承担相应法律责任。如您发现有侵权的内容,请联系我们。转载请注明出处:https://www.wpsshop.cn/article/detail/46268
推荐阅读

相关标签

