
热门标签
热门文章
- 1华为云云耀云服务器L实例评测|Python Selenium加Chrome Driver构建UI自动化测试实践
- 2Stable Diffusion XL搭建
- 3Stable Diffusion——尝试如何正确的使用【AnimateDiff】生成动图——4种方法测试
- 4简单易懂:SSM入门级项目整合实例教程+附项目源码_ssm框架项目免费实例源码
- 5Android保存图片到相册,兼容Android10及以上版本_android 保存图片到相册
- 6RabbitMQ安装、端口修改、基本操作详解!_rabbitmq修改端口
- 7【从零开始学习Linux】一文带你了解yum周边生态及vim常见模式
- 8HarmonyOS云开发基础认证【最新题库 满分答案】_harmonyos应用开发者基础认证答案
- 9selenium查找网页如何处理网站资源一直加载非常卡或者失败的情况_selenium网页有时刷新不出来
- 10Python Get()函数用法介绍_python中get函数用法
当前位置: article > 正文
Android项目中okhttp3的简易封装和使用_android okhttp3
作者:opred | 2024-01-29 23:46:38
赞
踩
android okhttp3
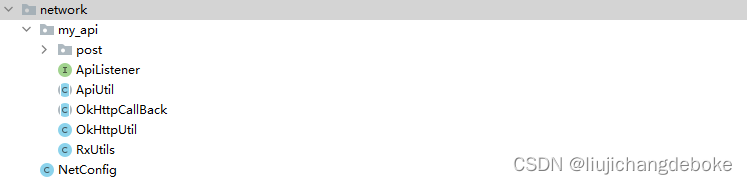
1、所有文件:
2、OkHttpUtil类
这个类主要用于初始化okhttp和发送http请求。
- public class OkHttpUtil{
- private static OkHttpClient mOkHttpClient = null;
-
- //Call this method in the Application class. ---> onCreate() method.
- //Thus we can get only one instance of httpClient in the whole app.
- public static void init(){
- if (mOkHttpClient == null) {
- OkHttpClient.Builder builder = new OkHttpClient().newBuilder()
- .connectTimeout(5000, TimeUnit.MILLISECONDS)
- .readTimeout(5000, TimeUnit.MILLISECONDS)
- .writeTimeout(5000, TimeUnit.MILLISECONDS)
- .sslSocketFactory(RxUtils.createSSLSocketFactory(),new RxUtils.TrustAllManager())
- .hostnameVerifier(new RxUtils.TrustAllHostnameVerifier());
- mOkHttpClient = builder.build();
- }
- }
-
-
- //If GET method needs some other params, just need to add a HaspMap. Refer to:https://www.imooc.com/video/18685
- public static void get(String url, OkHttpCallBack okHttpCallback){
- Call call = null;
-
- try{
- Request request = new Request.Builder().url(url).build();
- call = mOkHttpClient.newCall(request);
- call.enqueue(okHttpCallback);
-
- }catch(Exception ex){
- ex.printStackTrace();
- }
- }
-
- public static void post(String url, OkHttpCallBack okHttpCallback, HashMap<String, String> bodyMap){
- Call call = null;
- try{
- FormBody.Builder builder = new FormBody.Builder();
- for (HashMap.Entry<String, String> entry : bodyMap.entrySet()) {
- builder.add(entry.getKey(), entry.getValue());
- }
- RequestBody body = builder.build();
- Request.Builder builderRequest = new Request.Builder();
- // builderRequest.headers(new Headers())
- Request request = builderRequest.post(body).url(url).build();
- call = mOkHttpClient.newCall(request);
- call.enqueue(okHttpCallback);
-
- }catch(Exception ex){
- ex.printStackTrace();
- }
- }
- public static void postHasFile(String url, OkHttpCallBack okHttpCallback, HashMap<String, String> bodyMap, String filesKey, List<File> files){
- Call call = null;
- try{
-
- MultipartBody.Builder multipartBodyBuilder = new MultipartBody.Builder();
- multipartBodyBuilder.setType(MultipartBody.FORM);
- for (HashMap.Entry<String, String> entry : bodyMap.entrySet()) {
- multipartBodyBuilder.addFormDataPart(entry.getKey(), entry.getValue());
- }
- //遍历paths中所有图片绝对路径到builder,并约定key如“upload”作为后台接受多张图片的key
- if (files != null){
- for (File file : files) {
- multipartBodyBuilder.addFormDataPart(filesKey, file.getName(), RequestBody.create(MediaType.parse("image/png"), file));
- }
- }
- RequestBody body = multipartBodyBuilder.build();
- Request.Builder builderRequest = new Request.Builder();
- // builderRequest.headers(new Headers())
- Request request = builderRequest.post(body).url(url).build();
- call = mOkHttpClient.newCall(request);
- call.enqueue(okHttpCallback);
-
- }catch(Exception ex){
- ex.printStackTrace();
- }
- }
-
- }

1、在application中调用init方法初始化okhttp。
2、使用post方法:
(1)第一个(post)是不上传图片的请求,只需传入请求url、map形式的上传参数,一个请求监听。
(2)第二个(postHasFile)为上传文件请求,本人项目中只需上传一个图片列表,所以只增加了
String filesKey, List<File> files
两个参数。如果有其他需求,可以修改此处代码:
MultipartBody.Builder multipartBodyBuilder = new MultipartBody.Builder();
multipartBodyBuilder.setType(MultipartBody.FORM);
for (HashMap.Entry<String, String> entry : bodyMap.entrySet()) {
    multipartBodyBuilder.addFormDataPart(entry.getKey(), entry.getValue());
}
//遍历paths中所有图片绝对路径到builder,并约定key如“upload”作为后台接受多张图片的key
if (files != null){
    for (File file : files) {
        multipartBodyBuilder.addFormDataPart(filesKey, file.getName(), RequestBody.create(MediaType.parse("image/png"), file));
    }
}
2、OkHttpCallBack
这个类简单封装了Okhttp的callback方法并以jsonObject回调给请求。
- import android.util.Log;
-
- import com.google.gson.Gson;
-
- import org.json.JSONException;
- import org.json.JSONObject;
- import org.json.JSONTokener;
-
- import java.io.IOException;
-
- import okhttp3.Call;
- import okhttp3.Callback;
- import okhttp3.Response;
-
- //The class to deal with the OkHttpCallback
- public abstract class OkHttpCallBack implements Callback {
-
- public abstract void onSuccess(final Call call, JSONObject jsonObject);
-
- @Override
- public void onResponse(Call call, Response response) throws IOException {
- Log.d("OkHttpCallBackResponse:",call.toString()+"\r\n//reponse"+response.toString()+"\r\nresponse.headers:"+response.headers()
- +"\r\nreponse.message:"+response.message());
- if (response != null) {
- String str = response.body().string().trim();
- Log.d("OkHttpCallBackResponse","//body::"+str);
- if (response.isSuccessful()) {
- try{
- JSONObject object = (JSONObject)new JSONTokener(str).nextValue();
- if (object != null) {
- onSuccess(call, object);
- }else{
- onFailure(call, null);
- }
- }catch(JSONException e) {
- e.printStackTrace();
- onFailure(call, null);
- }
-
- }else{
- onFailure(call, null);
- }
- }
- }
-
-
- @Override
- public void onFailure(Call call, IOException e){
- Log.d("OkHttpCallBackFail",call.toString()+"//"+e.toString());
- }
- }
3、RxUtils
这个类是为了配置请求证书 (https需要)。
- import java.security.SecureRandom;
- import java.security.cert.CertificateException;
- import java.security.cert.X509Certificate;
-
- import javax.net.ssl.HostnameVerifier;
- import javax.net.ssl.SSLContext;
- import javax.net.ssl.SSLSession;
- import javax.net.ssl.SSLSocketFactory;
- import javax.net.ssl.TrustManager;
- import javax.net.ssl.X509TrustManager;
-
- //在okhttp中设置信任所有证书
- public class RxUtils {
-
- @SuppressLint("TrulyRandom")
- public static SSLSocketFactory createSSLSocketFactory() {
- SSLSocketFactory sSLSocketFactory = null;
- try {
- SSLContext sc = SSLContext.getInstance("TLS");
- sc.init(null, new TrustManager[]{new TrustAllManager()},
- new SecureRandom());
- sSLSocketFactory = sc.getSocketFactory();
- } catch (Exception ignored) {
- }
- return sSLSocketFactory;
- }
-
- public static class TrustAllManager implements X509TrustManager {
- @SuppressLint("TrustAllX509TrustManager")
- @Override
- public void checkClientTrusted(X509Certificate[] chain, String authType)
- throws CertificateException {
- }
-
- @SuppressLint("TrustAllX509TrustManager")
- @Override
- public void checkServerTrusted(X509Certificate[] chain, String authType)
- throws CertificateException {
- }
-
- @Override
- public X509Certificate[] getAcceptedIssuers() {
- return new X509Certificate[0];
- }
- }
-
- public static class TrustAllHostnameVerifier implements HostnameVerifier {
- @SuppressLint("BadHostnameVerifier")
- @Override
- public boolean verify(String hostname, SSLSession session) {
- return true;
- }
- }
- }
4、 NetConfig
此类主要写了baseurl和各个请求接口url。
- public class NetConfig {
-
-
- public static String BASE_URL = "http://111.111.1.111:8081/";
-
- //登录
- public static String LOGIN = BASE_URL+"mobileApi/user/login";
- }
5、ApiUtil
这个类为每个请求的基类
- import android.os.Handler;
- import android.os.Message;
- import android.util.Log;
-
- import androidx.annotation.NonNull;
-
- import org.json.JSONObject;
-
- import java.io.File;
- import java.io.IOException;
- import java.util.HashMap;
- import java.util.List;
-
- import okhttp3.Call;
-
- public abstract class ApiUtil {
- private ApiListener mApiListener = null;
- private static final int SUCCESS = 1;
- private static final int FAIRURE = 2;
- private Handler handler = new Handler(){
- @Override
- public void handleMessage(@NonNull Message msg) {
- super.handleMessage(msg);
- switch (msg.what){
- case SUCCESS:
- mApiListener.success(ApiUtil.this);
- break;
- case FAIRURE:
- mApiListener.failrure(ApiUtil.this);
- break;
- }
- }
- };
- public boolean mStatus = false;
- public String msg = "请求失败";
- public String TAG = this.getClass().toString();
- private OkHttpCallBack mSendListener = new OkHttpCallBack(){
-
- @Override
- public void onSuccess(Call call, JSONObject jsonObject) {
- ApiUtil.this.mStatus = jsonObject.optBoolean("status");
- ApiUtil.this.msg = jsonObject.optString("msg");
- if (mStatus) {
- try{
- parseData(jsonObject);
- handler.sendEmptyMessage(SUCCESS);
-
- }catch(IOException e){
- handler.sendEmptyMessage(FAIRURE);
- e.printStackTrace();
- } catch (Exception e) {
- handler.sendEmptyMessage(FAIRURE);
- e.printStackTrace();
- }
-
- }else{
- handler.sendEmptyMessage(FAIRURE);
- }
- }
-
- @Override
- public void onFailure(Call call, IOException e){
- ApiUtil.this.msg = "链接失败";
- ApiUtil.this.mStatus = false;
- handler.sendEmptyMessage(FAIRURE);
- }
- };
-
- // public boolean isSuccess(){
- // return "0".equals(mStatus) || "200".equals(mStatus);
- // }
-
- protected abstract void parseData(JSONObject jsonObject) throws Exception;
-
- protected abstract String getUrl();
-
- //Send GET request
- //Listener: Tell the app whether the GET reqeust is success.
- public void get(ApiListener listener){
- mApiListener = listener;
- OkHttpUtil.get(getUrl(), mSendListener);
- }
-
-
- private HashMap<String, String> mBodyMap = new HashMap<>();
- public void addParams(String key, String value){
- mBodyMap.put(key, value);
- }
- public void clearParams(){
- mBodyMap.clear();
- }
-
- //Send POST request
- //Listener: Tell the app whether the POST reqeust is success.
- public void post(ApiListener listener){
- mApiListener = listener;
- OkHttpUtil.post(getUrl(), mSendListener, mBodyMap);
- }
- public void postFiles(ApiListener listener, String fileKey, List<File> fileList){
- mApiListener = listener;
-
- OkHttpUtil.postHasFile(getUrl(),mSendListener,mBodyMap,fileKey,fileList);
- }
- @Override
- public String toString() {
- return "ApiUtil{" +
- "mApiListener=" + mApiListener +
- ", mStatus=" + mStatus +
- ", msg='" + msg + '\'' +
- ", TAG='" + TAG + '\'' +
- ", mSendListener=" + mSendListener +
- ",\r\n mBodyMap=" + mBodyMap +
- '}';
- }
- }
1、设置参数请求
public void addParams(String key, String value){
    mBodyMap.put(key, value);
}
2、发送请求
public void post(ApiListener listener){
    mApiListener = listener;
    OkHttpUtil.post(getUrl(), mSendListener, mBodyMap);
}
public void postFiles(ApiListener listener, String fileKey, List<File> fileList){
    mApiListener = listener;

    OkHttpUtil.postHasFile(getUrl(),mSendListener,mBodyMap,fileKey,fileList);
}
以登陆接口为例

- public class PostLogin extends ApiUtil {
-
- public UserBeans mResponse;
- public PostLogin(String userName, String passWord){
- addParams("userCode", userName);
- addParams("userPassword", passWord);
- }
- @Override
- protected void parseData(JSONObject jsonObject) throws Exception {
- mResponse = new Gson().fromJson(jsonObject.optString("data"),UserBeans.class);
- }
-
- @Override
- protected String getUrl() {
- return NetConfig.LOGIN;
- }
- }
1、可以在初始化时添加参数,或者生成postLogin实例后传参。
2、在getUrl()方法中回调给父类请求URL。
3、可以在parseData(JSONObject jsonObject)中解析返回的数据,然后定义实体类作为接收:
public UserBeans mResponse;
@Override
protected void parseData(JSONObject jsonObject) throws Exception {
    mResponse = new Gson().fromJson(jsonObject.optString("data"),UserBeans.class);
}
在LoginActivity中调用
- private void login() {
- if (TextUtils.isEmpty(edtUserName.getText().toString())) {
- toShortToast("请输入用户名");
- return;
- }
- if (TextUtils.isEmpty(edtPassword.getText().toString())) {
- toShortToast("请输入密码");
- return;
- }
- showLoadingDialog("登录中...");
- new PostLogin(edtUserName.getText().toString(), edtPassword.getText().toString()).post(new ApiListener() {
- @Override
- public void success(ApiUtil apiUtil) {
- toShortToast(apiUtil.msg);
- PostLogin postLogin = (PostLogin) apiUtil;
- SPUtil.put(context, SpKeys.KEY_LOGIN_USER_NAME, edtUserName.getText().toString());
- SPUtil.put(context, SpKeys.KEY_USER_ID, postLogin.mResponse.getUserId());
- SPUtil.put(context, SpKeys.KEY_USER_TYPE, postLogin.mResponse.getUserType());
- if (isRememberPw) {
- SPUtil.put(context, SpKeys.KEY_LOGIN_PASSWORD, edtPassword.getText().toString());
- } else {
- SPUtil.put(context, SpKeys.KEY_LOGIN_PASSWORD, "");
- }
- Intent intent = new Intent();
- intent.setClass(context, MainActivity.class);
- context.startActivity(intent);
- stopLoadingDialog();
- finish();
- }
-
- @Override
- public void failrure(ApiUtil apiUtil) {
- stopLoadingDialog();
- toShortToast(apiUtil.msg);
- }
- });
-
- }
请求监听接口中 success(ApiUtil apiUtil)方法回调 接收的数据
PostLogin postLogin = (PostLogin) apiUtil;
postLogin.mResponse为已经解析好的实体类。
后补:ApiListener
- public interface ApiListener {
-
- //Request success
- void success(ApiUtil apiUtil);
-
- //Request failed
- void failrure(ApiUtil apiUtil);
-
-
- }
声明:本文内容由网友自发贡献,不代表【wpsshop博客】立场,版权归原作者所有,本站不承担相应法律责任。如您发现有侵权的内容,请联系我们。转载请注明出处:https://www.wpsshop.cn/article/detail/45664
推荐阅读
![Android Termux安装MySQL,并使用cpolar实现公网安全远程连接[内网穿透]](https://img-blog.csdnimg.cn/fabd1c92d58f4f5b8946e9b8f6b49f50.jpeg?x-oss-process=image/resize,m_fixed,h_300,image/format,png)


相关标签

