- 1华为云云耀云服务器L实例评测|Python Selenium加Chrome Driver构建UI自动化测试实践
- 2Stable Diffusion XL搭建
- 3Stable Diffusion——尝试如何正确的使用【AnimateDiff】生成动图——4种方法测试
- 4简单易懂:SSM入门级项目整合实例教程+附项目源码_ssm框架项目免费实例源码
- 5Android保存图片到相册,兼容Android10及以上版本_android 保存图片到相册
- 6RabbitMQ安装、端口修改、基本操作详解!_rabbitmq修改端口
- 7【从零开始学习Linux】一文带你了解yum周边生态及vim常见模式
- 8HarmonyOS云开发基础认证【最新题库 满分答案】_harmonyos应用开发者基础认证答案
- 9selenium查找网页如何处理网站资源一直加载非常卡或者失败的情况_selenium网页有时刷新不出来
- 10Python Get()函数用法介绍_python中get函数用法
springBoot配置文件(四)application常见配置
赞
踩
一、命令行参数:
1、server.address=xxx.xxx.xx.xxx
服务器绑定ip地址,多网卡时可以指定
2、server.port=xxx
可以指定springboot内嵌容器启动的端口,默认使用tomcat容器时在8080端口,右键run- java application/springboot..,可以支持不同的容器,在引入不同的依赖时。当server.port=0时,表示自动扫面获取一个可用的端口。
3、ssl的安全访问配置:
- server.port=8443
- #ssl的安全访问配置
- server.ssl.key-store=classpath:keystore.jks
- server.ssl.key-store-password=secret
- server.ssl.key-password=another-secret
注意: 目前spring-boot不支持http和https同时启用的情况,只支持使用其中一个,如果需要同时使用,可以使用其他形式的实现方式。
该部分对应org.springframework.boot.autoconfigure.webServerProperties类。
此外还有一些不是很常用的如:server.http2.enable=true/false//该属性可以支持http2的协议类型,目前只支持tomcat和undertow的容器并且需要JDK1.8+,官文上对于内嵌tomcat的配置参数也有很多。
二、开发/测试/生产环境配置:
1、语法:
spring.profiles.active=xxxx//该系统变量可以指明要使用的配置文件,一般应用于多环境配置分离,如生产环境(production),开发环境(development),测试环境(test)等,可以自定义,如开发环境配置文件为application-dev.properties,则spring.profiles.active=dev,在启动时会加载application-dev.properties配置文件。
2、使用方法:
(1)手动指定:这种方法切换环境需要修改配置文件,不够方便
- spring.profiles.active = {profile}
- #如spring.profiles.active = prod
(2)打包自动指定。
spring.profiles.active=@spring.profiles.active@3、demo:
启动类:
- package com;
-
- import org.springframework.boot.SpringApplication;
- import org.springframework.boot.autoconfigure.SpringBootApplication;
-
- @SpringBootApplication
- public class ProfilesApplication {
-
- public static void main(String args[]){
- SpringApplication.run(ProfilesApplication.class,args);
- }
- }
多环境配置文件:
开发环境application-dev.properties:
zt.profiles = this is dev测试环境application-test.properties
zt.profiles = this is test生产环境application-prod.properties
zt.profiles = this is prod接口:
- package com.controller;
-
- import org.springframework.beans.factory.annotation.Value;
- import org.springframework.web.bind.annotation.RequestMapping;
- import org.springframework.web.bind.annotation.RestController;
-
- @RestController
- public class TestController {
-
- @Value("${zt.common}")
- private String common;
-
- @Value("${zt.profiles}")
- private String profilesStr;
-
- @RequestMapping("/test")
- public String getStr(){
- return "公共:"+common+";环境:"+profilesStr;
- }
- }

下面分别列下手动、自动方法的区别写法:
(1)手动方法:
pom:
- <?xml version="1.0" encoding="UTF-8"?>
- <project xmlns="http://maven.apache.org/POM/4.0.0"
- xmlns:xsi="http://www.w3.org/2001/XMLSchema-instance"
- xsi:schemaLocation="http://maven.apache.org/POM/4.0.0 http://maven.apache.org/xsd/maven-4.0.0.xsd">
- <modelVersion>4.0.0</modelVersion>
-
- <groupId>com.profiles</groupId>
- <artifactId>profiles-demo</artifactId>
- <version>1.0-SNAPSHOT</version>
-
- <parent>
- <groupId>org.springframework.boot</groupId>
- <artifactId>spring-boot-starter-parent</artifactId>
- <version>1.4.1.RELEASE</version>
- </parent>
-
- <dependencies>
- <dependency>
- <groupId>org.springframework.boot</groupId>
- <artifactId>spring-boot-starter-web</artifactId>
- </dependency>
- </dependencies>
- </project>
默认配置文件:
- server.port= 8888
- server.context-path=/profiles
- spring.profiles.active=prod
-
- zt.common = conmmon
mvn clean package打包测试一下:

这时候我们打包带参数,如mvn clean package -Ptest、mvn clean package -Pdev、mvn clean package -Pprod,打包后的仍然是prod,就是说必须手动修改application.properties中的环境。
(2)自动方法:
在pom中添加以下配置:
- <profiles>
- <!-- 测试环境 -->
- <profile>
- <id>test</id>
- <activation>
- <activeByDefault>true</activeByDefault>
- </activation>
- <properties>
- <spring.profiles.active>test</spring.profiles.active>
- </properties>
- </profile>
- <!-- 开发环境 -->
- <profile>
- <id>dev</id>
- <activation>
- <activeByDefault>false</activeByDefault>
- </activation>
- <properties>
- <spring.profiles.active>dev</spring.profiles.active>
- </properties>
- </profile>
- <!-- 生产环境 -->
- <profile>
- <id>prod</id>
- <activation>
- <activeByDefault>false</activeByDefault>
- </activation>
- <properties>
- <spring.profiles.active>prod</spring.profiles.active>
- </properties>
- </profile>
- </profiles>
并把application.properties中的profiles指定改为
spring.profiles.active=@spring.profiles.active@这时候打包使用mvn clean package -Ptest、mvn clean package -Pdev、mvn clean package -Pprod,打出来的就是指定环境的包了。pom文件中test一项默认是true,所以如果不指定环境直接使用mvn clean package打包就是test环境。
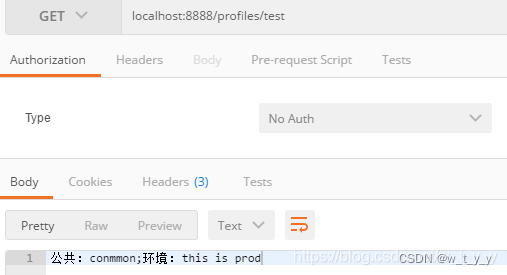
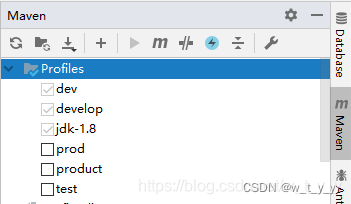
idea启动则可以点击右侧的maven,选择环境勾上,再启动服务即可:

启动服务访问的为prod环境:

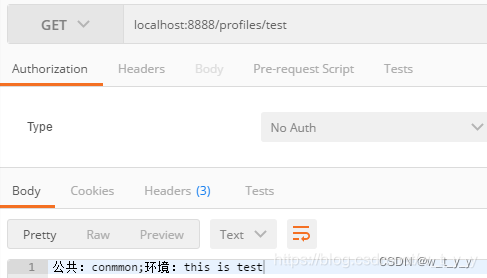
再去掉prod,勾上test:

重启服务访问的为test: