
- 1【C语言】魔方阵的实现(最全)_魔方阵c语言程序设计
- 2很好的推荐书籍
- 3【工具使用】——MSF使用_MSF中kiwi(mimikatz)模块的使用_load kiwi
- 4单片机能运行操作系统吗?_单片机操作系统
- 556. 合并区间 - 力扣(LeetCode)
- 6Golang:监听binlog日志_golang监听binlog
- 7【全文】狼叔:如何正确的学习Node.js
- 8常用经典SQL语句大全完整版--详解+实例
- 9【Copilot】登录报错 Extension activation failed: “No auth flow succeeded.“(VSCode)
- 10因果推断7--深度因果模型综述(个人笔记)
零基础手把手教你如何使用Laf免费玩转Midjourney
赞
踩
一、什么是Laf?
Laf 是一个 Serverless 框架,提供开箱即用的云函数,云数据库,对象存储等能力,是一个非常干净清爽的开发平台,不仅入门简单,还能像写博客一样写代码!最重要的是,敲重点,三分钟即可上线 ChatGPT 应用!
若想深入了解可点击 介绍 | laf 云开发![]() https://doc.laf.run/guide/
https://doc.laf.run/guide/
二、入门Laf开发应用前的准备
在正式开发应用前需要先进行账号注册和新建应用,具体操作方法可访问Web IDE | laf 云开发![]() https://doc.laf.run/guide/web-ide/
https://doc.laf.run/guide/web-ide/
说明:下面讲解的Midjourney需要访问 laf.dev 域名进行注册
三、正式接入Midjourney
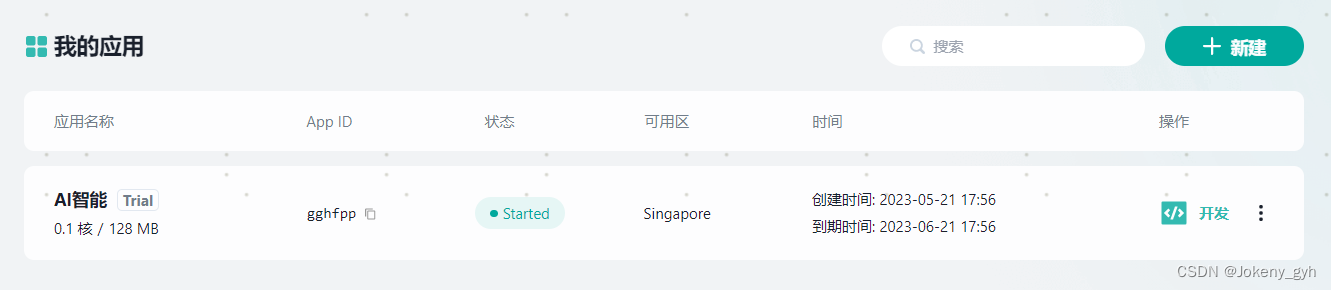
在应用列表点击「开发」按钮即可进入 Laf 应用开发 IDE
直接Web IDE在线开发,连安装软件的工作都省了,不得不说,十分亲民
1.添加NPM依赖
点击左下角【NPM依赖】处的“+”按钮,在弹框中搜索“midjourney”,选中第一个后再点击“保存并重启”,等待3秒左右依赖会添加完成

2.添加函数
点击左上角【函数列表】处的“+”按钮,在弹框中输入函数名(比如:mj-func),其他默认,完成后点击“确认”按钮,等待3秒左右函数会添加完成

说明:关于云函数的入门,可点击下面链接了解详情云函数入门 | laf 云开发![]() https://doc.laf.run/guide/function/
https://doc.laf.run/guide/function/
3.初始化Midjourney
上面已经添加了midjourney的依赖,接着需要在刚刚添加的函数中引入midjourney,并进行初始化
- import { Midjourney, MidjourneyMessage } from 'midjourney'
- const SERVER_ID = '' // Midjourney 服务 ID
- const CHANNEL_ID = '' // Midjourney 频道 ID
- const SALAI_TOKEN = '' // Midjourney 服务 Token
-
- const Limit = 100
- const MaxWait = 3
-
- //初始化
- const client = new Midjourney({
- ServerId: SERVER_ID,
- ChannelId: CHANNEL_ID,
- SalaiToken: SALAI_TOKEN,
- Debug: true,
- SessionId: SALAI_TOKEN,
- Limit: Limit,
- MaxWait: MaxWait
- });

其中服务ID、频道ID和服务Token可在 人人都能接入 Midjourney,赚取自己的第一桶金 中找大佬单独获取
4.生成图片
“export default async function”可以理解成函数的主入口,在其方法内我们可以根据传入的参数去实现不同的业务逻辑
- //主入口
- export default async function (ctx: FunctionContext) {
- const { type, param } = ctx.body
- //参数校验
- if (!type) {
- return resultData(0, '参数type不能为空!')
- }
-
- switch (type) {
- case 'imagine':
- //生成图片
- return await imagine(param)
- }
- }
下面为【生成图片】的具体实现,需要question和msg_Id两个参数
question:其实就是prompt(提示),需要输入英文
msg_Id:可以理解成会话ID
- // 创建生图任务
- async function imagine(param) {
- console.log("imagine", param)
- const { question, msg_Id } = param
- //参数校验
- if (!question || !msg_Id) {
- return resultData(0, '参数question或msg_Id不能为空!')
- }
-
- try {
- const obj = await client.Imagine(
- `[${msg_Id}] ${question}`,
- (uri: string, progress: string) => {
- console.log("loading", uri, "progress", progress);
- }
- );
- console.log("imagine success ", obj)
- return resultData(200, 'imagine success', obj)
- }
- catch (e) {
- return resultData(0, '参数错误!', e)
- }
- }
为了让前端在调用接口时接收到的数据风格统一化,故这里在返回数据时进行了统一的封装处理
- //返回结果数据
- async function resultData(code = 0, msg = '', data = null) {
- return { code, msg, data }
- }
以上完成后可点击上方的“发布”按钮,等待3秒左右,复制“发布”按钮旁的链接,即可在apipost或者前端中进行调用,如下图:
- {
- "type": "imagine",
- "param": {
- "question": "a beautiful girl",
- "msg_Id": "20230523_G001"
- }
- }

说明:在返回的结果数据中code为200时表示请求成功,data为null不用理会,请求成功后大约等待30秒到一分钟左右的时间, Midjourney会自动在后台生成我们想要的图片,届时我们再调用【查询最近消息】的接口获取生成的图片。
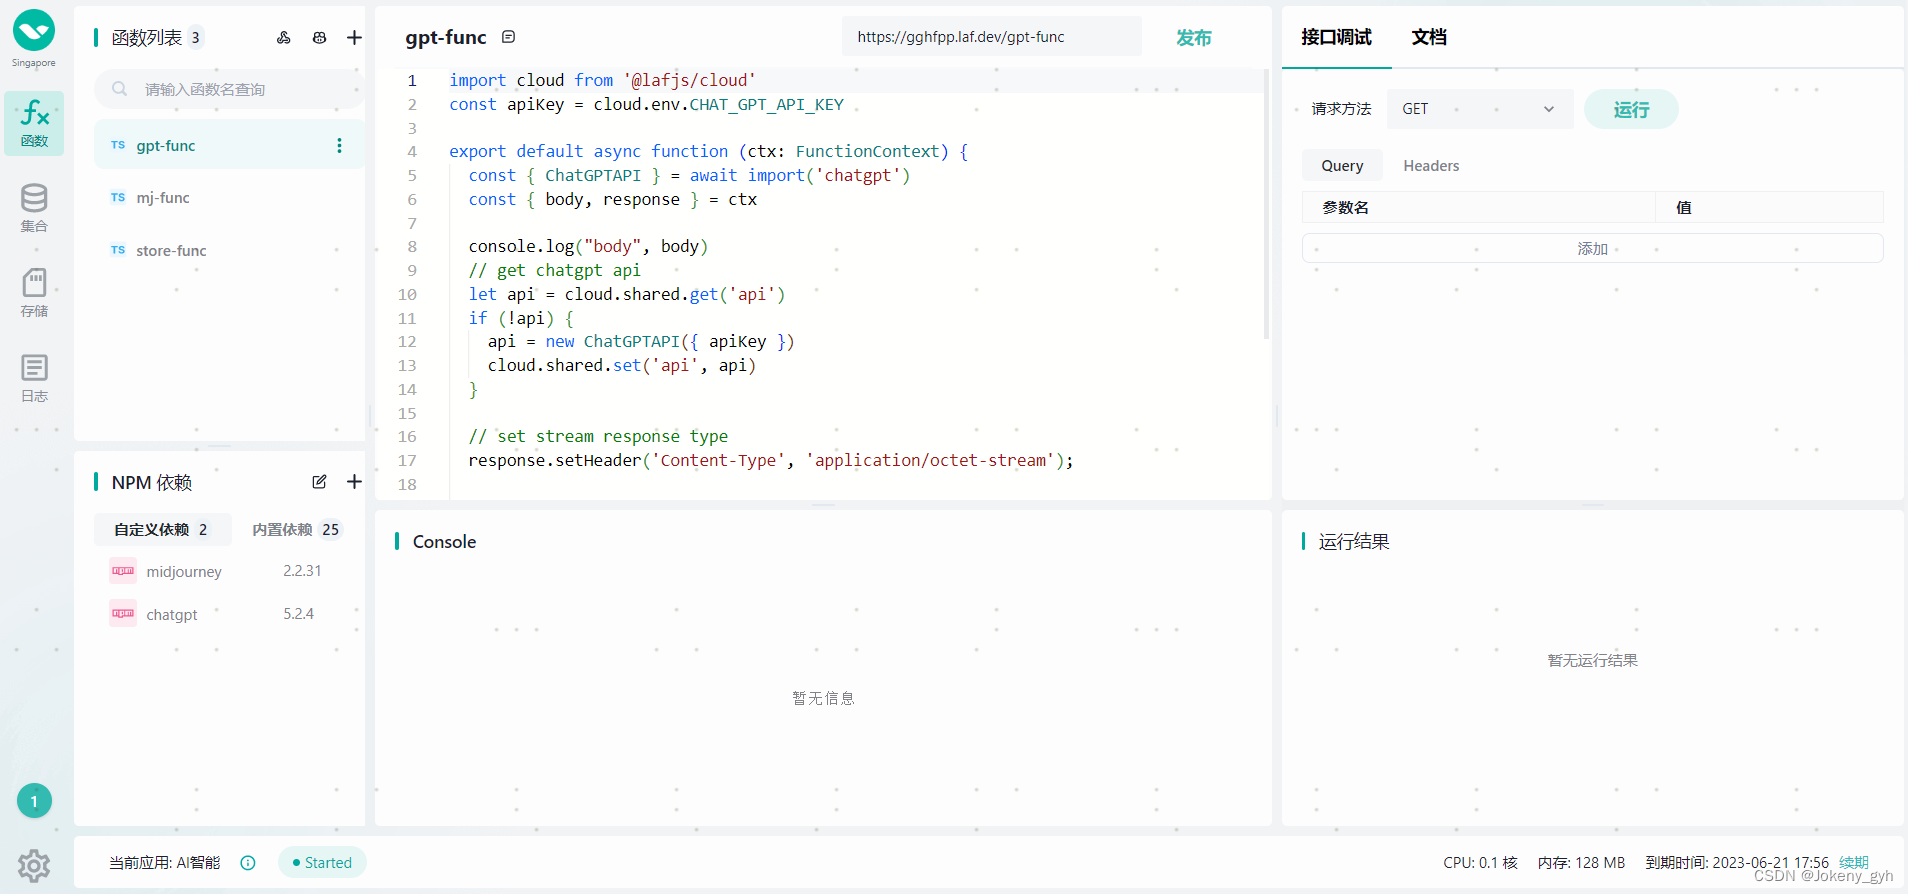
另外,除了通过apipost或postman调用接口,我们还可以使用Web IDE自带的接口调试进行调用,不仅可以清晰的看到运行的结果,还能在控制台打印出我们想要的日志信息,十分的便利,如下图:

5.查询最近消息
在主入口方法中增加【查询最近消息】的业务逻辑
- //主入口
- export default async function (ctx: FunctionContext) {
- const { type, param } = ctx.body
- //参数校验
- if (!type) {
- return resultData(0, '参数type不能为空!')
- }
-
- switch (type) {
- case 'retrieveMessages':
- //查询最近消息
- return await retrieveMessages(param)
- case 'imagine':
- //生成图片
- return await imagine(param)
- }
- }
下面为【查询最近消息】的具体实现,由于默认查询的是所有用户最近50条的消息,所以这里根据msg_Id进行了数据筛选(若想查询所有的可以去掉这个限制)
msg_Id:会话ID(需与生成图片时传的msg_Id一致)
- // 查询消息(最近50条)
- async function retrieveMessages(param) {
- console.log("retrieveMessages", param)
- const { msg_Id } = param
- //参数校验
- if (!msg_Id) {
- return resultData(0, '参数msg_Id不能为空!')
- }
-
- try {
- const client = new MidjourneyMessage({
- ChannelId: CHANNEL_ID,
- SalaiToken: SALAI_TOKEN,
- });
- const obj = await client.RetrieveMessages();
- console.log("retrieveMessages success ", obj)
- //解析返回的list数据,获取图片信息
- if (obj) {
- //查找满足当前会话的消息
- let info = obj.find(x => x.content.indexOf(msg_Id) > -1);
- //校验是否完成了图片的生成,条件:attachments节点下的第一个子对象,且width大于512
- if (info && info.attachments && info.attachments.length > 0 && info.attachments[0].width > 512) {
- let d = info.attachments[0];
-
- //调用云函数获取网络图片并存储
- const res = await cloud.invoke('store-func', {
- body: {
- type: 'fetchImg',
- param: {
- fileName: d.filename,
- fileUrl: d.url,
- contentType: d.content_type
- }
- }
- });
- if (res.code == 200) {
- d.pic = res.data
- res.data = d
- }
- return res;
- }
- }
- return resultData(0, '未获取到数据!')
- }
- catch (e) {
- return resultData(0, '参数错误!', e)
- }
- }
其中,这里“调用云函数获取网络图片并存储”是写在另一个云函数中,所以需要另外再创建一个云函数“store-func”,具体实现如下:
- import cloud from "@lafjs/cloud";
- import { GetObjectCommand, S3 } from "@aws-sdk/client-s3";
- import { getSignedUrl } from "@aws-sdk/s3-request-presigner";
-
- //初始化
- const s3Client = new S3({
- endpoint: process.env.OSS_EXTERNAL_ENDPOINT,
- region: process.env.OSS_REGION,
- credentials: {
- accessKeyId: process.env.OSS_ACCESS_KEY,
- secretAccessKey: process.env.OSS_ACCESS_SECRET
- },
- forcePathStyle: true,
- })
- //存储空间名称,不带 Laf 应用 appid
- const bucketName = 'store-file'
-
- //主入口
- export default async function (ctx: FunctionContext) {
- const { type, param } = ctx.body
- //参数校验
- if (!type) {
- return resultData(0, '参数type不能为空!')
- }
-
- switch (type) {
- case 'fetchImg':
- //存储网络图片
- return await fetchImgToStore(param)
- }
- }
-
- //获取网络图片并存储
- async function fetchImgToStore(param) {
- console.log("fetchImgToStore", param);
- const { fileName, fileUrl, contentType } = param
- //参数校验
- if (!fileName || !fileUrl || !contentType) {
- return resultData(0, '参数fileName、fileUrl或contentType不能为空!')
- }
-
- try {
- //下载url图片二进制数据
- const ret = await cloud.fetch({
- url: fileUrl,
- method: "get",
- responseType: "arraybuffer"
- });
- // console.log(ret.data);
- if (ret.data) {
- //图片存储
- const res = await uploadAppFile(fileName, ret.data, contentType);
- console.log('文件存储结果:', res)
- if (res && res.$metadata && res.$metadata.httpStatusCode == 200) {
- //获取图片存储的绝对路径
- const fileUrl = await getAppFileUrl(fileName);
- return resultData(200, '成功', fileUrl)
- }
- return resultData(0, '文件存储失败!')
- }
- return resultData(0, '获取网络图片失败!')
- }
- catch (e) {
- return resultData(0, '出现异常!', e)
- }
- }
-
- //拼接文件桶名字
- function getInternalBucketName() {
- const appid = process.env.APP_ID;
- return `${appid}-${bucketName}`;
- }
-
- //上传文件
- async function uploadAppFile(key, body, contentType) {
- const bucket = getInternalBucketName();
- const res = await s3Client
- .putObject({
- Bucket: bucket,
- Key: key,
- ContentType: contentType,
- Body: body,
- })
- return res;
- }
-
- //获取文件 url
- async function getAppFileUrl(key) {
- const bucket = getInternalBucketName();
- const res = await getSignedUrl(s3Client, new GetObjectCommand({
- Bucket: bucket,
- Key: key,
- }));
- return res;
- }
-
- //返回结果数据
- async function resultData(code = 0, msg = '', data = null) {
- return { code, msg, data }
- }
这里涉及到了云函数的调用,以及云存储,详细资料可在下面链接中进行查阅云存储简介 | laf 云开发![]() https://doc.laf.run/guide/oss/
https://doc.laf.run/guide/oss/
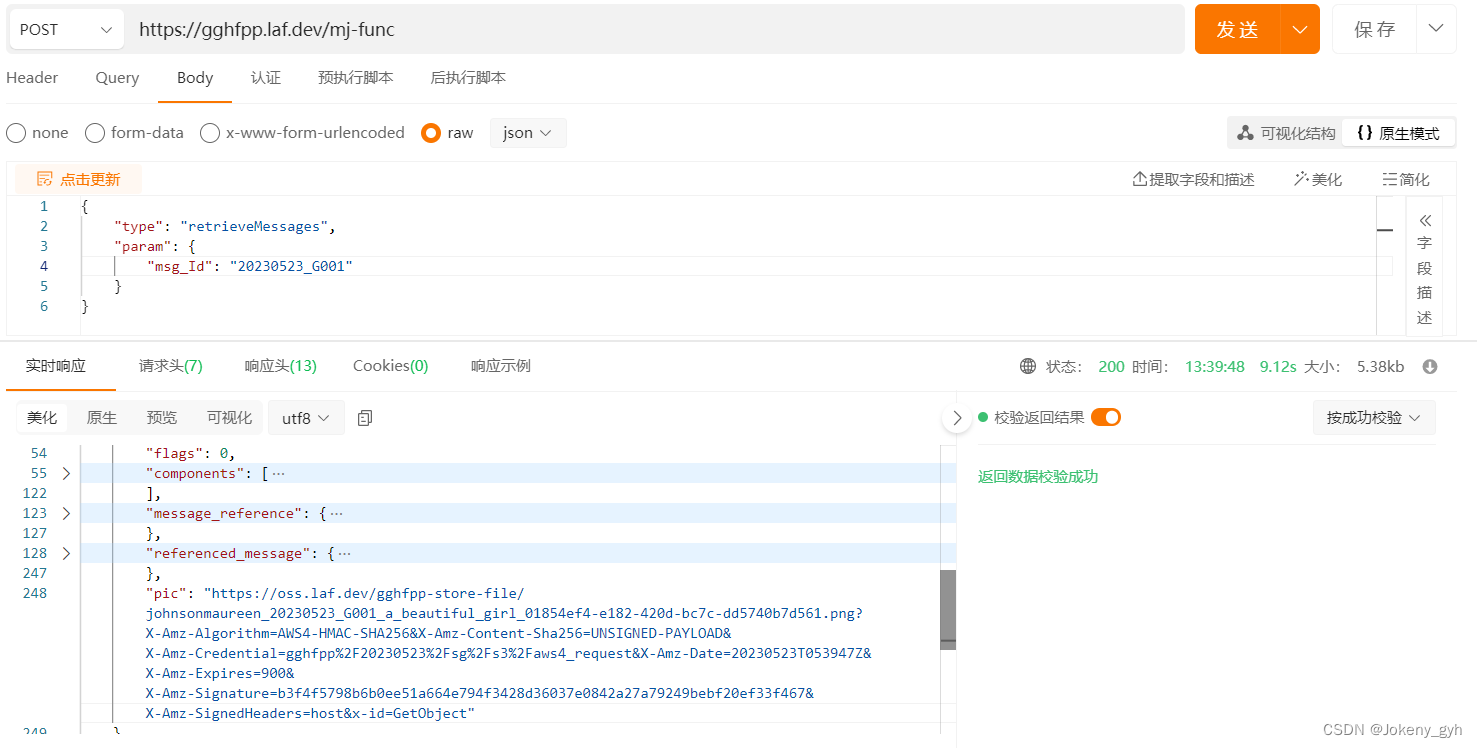
以上完成后可点击上方的“发布”按钮,等待3秒左右,复制“发布”按钮旁的链接,即可在apipost或者前端中进行调用,如下图:
- {
- "type": "retrieveMessages",
- "param": {
- "msg_Id": "20230523_G001"
- }
- }

返回的data中pic的链接即为生成的图片


6.放大图片
在主入口方法中增加【放大图片】的业务逻辑
- //主入口
- export default async function (ctx: FunctionContext) {
- const { type, param } = ctx.body
- //参数校验
- if (!type) {
- return resultData(0, '参数type不能为空!')
- }
-
- switch (type) {
- case 'retrieveMessages':
- //查询最近消息
- return await retrieveMessages(param)
- case 'imagine':
- //生成图片
- return await imagine(param)
- case 'upscale':
- //放大图片
- return await upscale(param)
- }
- }
下面为【放大图片】的具体实现,需要question、index、id和url四个参数
question:与生成图片时的参数,需要输入英文
index:你想要的第几张图(默认生成的4张图,按1234的顺序)
id:查询最近消息接口返回的数据体中的id
url:查询最近消息接口返回的数据体中attachments节点下的url
- // upscale 放大图片
- async function upscale(param) {
- console.log("upscale", param)
- const { question, index, id, url } = param
- //参数校验
- if (!question || !index || !id || !url) {
- return resultData(0, '参数question、index、id或url不能为空!')
- }
-
- try {
- const hash = url.split("_").pop()?.split(".")[0] ?? ""
- const obj = await client.Upscale(
- question,
- index,
- id,
- hash,
- (uri: string, progress: string) => {
- console.log("loading", uri, "progress", progress);
- }
- );
- console.log("upscale success ", obj)
- return resultData(200, 'upscale success', obj)
- }
- catch (e) {
- return resultData(0, '参数错误!', e)
- }
- }
以上完成后可点击上方的“发布”按钮,等待3秒左右,复制“发布”按钮旁的链接,即可在apipost或者前端中进行调用,如下图:
- {
- "type": "upscale",
- "param": {
- "question": "a beautiful girl",
- "index": 2,
- "id": "1110429562023723048",
- "url": "https://cdn.discordapp.com/attachments/1110206663958466611/1110429561428135976/johnsonmaureen_20230523_G001_a_beautiful_girl_1925266c-7937-4b8d-8150-c16f013d0dca.png"
- }
- }

成功后,大约等待30秒到一分钟,重新再调用一下【查询最近消息】的接口,获取可访问的放大后的图片


或者,也可以在【放大图片】的接口中将新生成的图片进行云存储后再返回给前端,两种方式都可以
7.变换图片
在主入口方法中增加【变换图片】的业务逻辑
- //主入口
- export default async function (ctx: FunctionContext) {
- const { type, param } = ctx.body
- //参数校验
- if (!type) {
- return resultData(0, '参数type不能为空!')
- }
-
- switch (type) {
- case 'retrieveMessages':
- //查询最近消息
- return await retrieveMessages(param)
- case 'imagine':
- //生成图片
- return await imagine(param)
- case 'upscale':
- //放大图片
- return await upscale(param)
- case 'variation':
- //变换图片
- return await variation(param)
- }
- }
下面为【变换图片】的具体实现,需要question、index、id和url四个参数
question:与生成图片时的参数,需要输入英文
index:你想要的第几张图(默认生成的4张图,按1234的顺序)
id:查询最近消息接口返回的数据体中的id
url:查询最近消息接口返回的数据体中attachments节点下的url
- // variation 变换图片
- async function variation(param) {
- console.log("variation", param)
- const { question, index, id, url } = param
- //参数校验
- if (!question || !index || !id || !url) {
- return resultData(0, '参数question、index、id或url不能为空!')
- }
-
- try {
- const hash = url.split("_").pop()?.split(".")[0] ?? ""
- const obj = await client.Variation(
- question,
- index,
- id,
- hash,
- (uri: string, progress: string) => {
- console.log("loading", uri, "progress", progress);
- }
- );
- console.log("variation success ", obj)
- return resultData(200, 'variation success', obj)
- }
- catch (e) {
- return resultData(0, '参数错误!', e)
- }
- }
以上完成后可点击上方的“发布”按钮,等待3秒左右,复制“发布”按钮旁的链接,即可在apipost或者前端中进行调用,如下图:
- {
- "type": "variation",
- "param": {
- "question": "a beautiful girl",
- "index": 3,
- "id": "1110429562023723048",
- "url": "https://cdn.discordapp.com/attachments/1110206663958466611/1110429561428135976/johnsonmaureen_20230523_G001_a_beautiful_girl_1925266c-7937-4b8d-8150-c16f013d0dca.png"
- }
- }
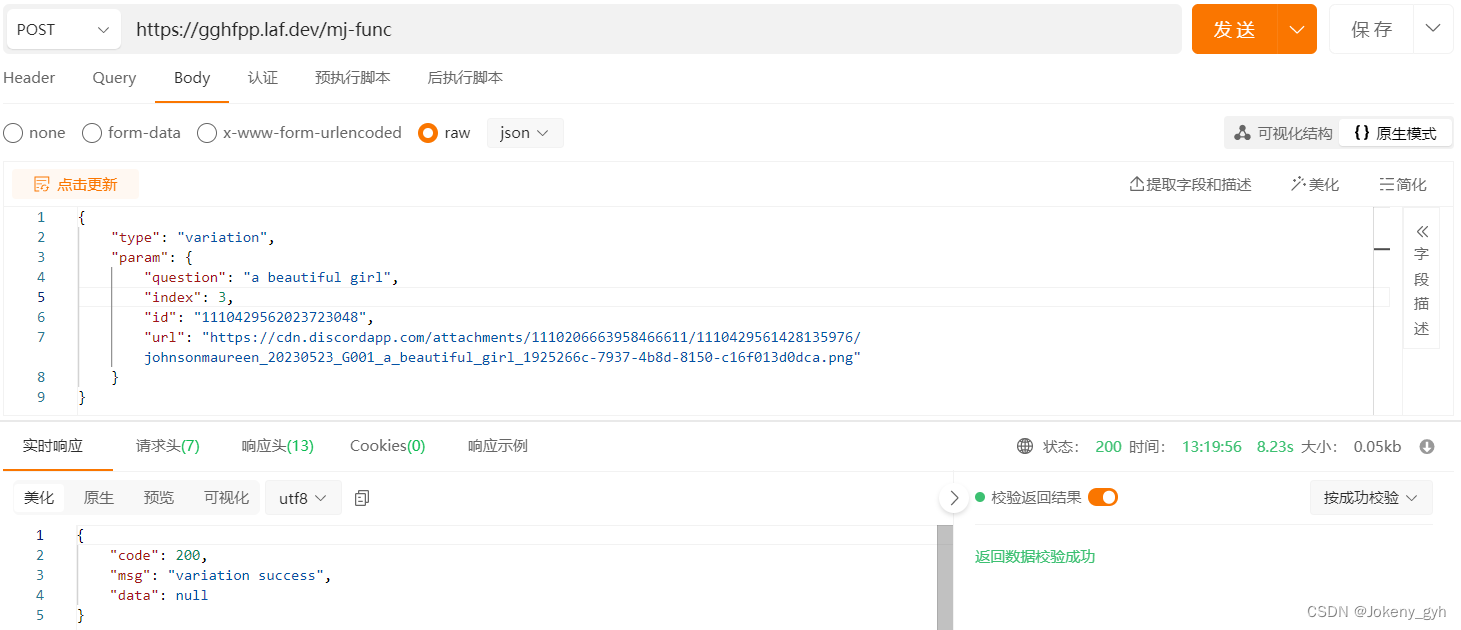
说明:在返回的结果数据中code为200时表示请求成功,data为null不用理会,请求成功后大约等待30秒到一分钟左右的时间, Midjourney会自动在后台重新生成我们想要的图片,届时我们再调用【查询最近消息】的接口获取变换后的图片。

8.关于云存储
如使用云存储,需在云存储中新建Bucket,如下图:

下面为云函数mj-func的完整代码:
- import cloud from '@lafjs/cloud'
- import { Midjourney, MidjourneyMessage } from 'midjourney'
- const SERVER_ID = '' // Midjourney 服务 ID
- const CHANNEL_ID = '' // Midjourney 频道 ID
- const SALAI_TOKEN = '' // Midjourney 服务 Token
-
- const Limit = 100
- const MaxWait = 3
-
- //初始化
- const client = new Midjourney({
- ServerId: SERVER_ID,
- ChannelId: CHANNEL_ID,
- SalaiToken: SALAI_TOKEN,
- Debug: true,
- SessionId: SALAI_TOKEN,
- Limit: Limit,
- MaxWait: MaxWait
- });
-
- //主入口
- export default async function (ctx: FunctionContext) {
- const { type, param } = ctx.body
- //参数校验
- if (!type) {
- return resultData(0, '参数type不能为空!')
- }
-
- switch (type) {
- case 'retrieveMessages':
- //查询最近消息
- return await retrieveMessages(param)
- case 'imagine':
- //生成图片
- return await imagine(param)
- case 'upscale':
- //放大图片
- return await upscale(param)
- case 'variation':
- //变换图片
- return await variation(param)
- }
- }
-
- // 查询消息(最近50条)
- async function retrieveMessages(param) {
- console.log("retrieveMessages", param)
- const { msg_Id } = param
- //参数校验
- if (!msg_Id) {
- return resultData(0, '参数msg_Id不能为空!')
- }
-
- try {
- const client = new MidjourneyMessage({
- ChannelId: CHANNEL_ID,
- SalaiToken: SALAI_TOKEN,
- });
- const obj = await client.RetrieveMessages();
- console.log("retrieveMessages success ", obj)
- //解析返回的list数据,获取图片信息
- if (obj) {
- //查找满足当前会话的消息
- let info = obj.find(x => x.content.indexOf(msg_Id) > -1);
- //校验是否完成了图片的生成,条件:attachments节点下的第一个子对象,且width大于512
- if (info && info.attachments && info.attachments.length > 0 && info.attachments[0].width > 512) {
- let d = info.attachments[0];
-
- //调用云函数获取网络图片并存储
- const res = await cloud.invoke('store-func', {
- body: {
- type: 'fetchImg',
- param: {
- fileName: d.filename,
- fileUrl: d.url,
- contentType: d.content_type
- }
- }
- });
- if (res.code == 200) {
- info.pic = res.data
- res.data = info
- }
- return res;
- }
- }
- return resultData(0, '未获取到数据!')
- }
- catch (e) {
- return resultData(0, '参数错误!', e)
- }
- }
-
- // 创建生图任务
- async function imagine(param) {
- console.log("imagine", param)
- const { question, msg_Id } = param
- //参数校验
- if (!question || !msg_Id) {
- return resultData(0, '参数question或msg_Id不能为空!')
- }
-
- try {
- const obj = await client.Imagine(
- `[${msg_Id}] ${question}`,
- (uri: string, progress: string) => {
- console.log("loading", uri, "progress", progress);
- }
- );
- console.log("imagine success ", obj)
- return resultData(200, 'imagine success', obj)
- }
- catch (e) {
- return resultData(0, '参数错误!', e)
- }
- }
-
- // upscale 放大图片
- async function upscale(param) {
- console.log("upscale", param)
- const { question, index, id, url } = param
- //参数校验
- if (!question || !index || !id || !url) {
- return resultData(0, '参数question、index、id或url不能为空!')
- }
-
- try {
- const hash = url.split("_").pop()?.split(".")[0] ?? ""
- const obj = await client.Upscale(
- question,
- index,
- id,
- hash,
- (uri: string, progress: string) => {
- console.log("loading", uri, "progress", progress);
- }
- );
- console.log("upscale success ", obj)
- return resultData(200, 'upscale success', obj)
- }
- catch (e) {
- return resultData(0, '参数错误!', e)
- }
- }
-
- // variation 变换图片
- async function variation(param) {
- console.log("variation", param)
- const { question, index, id, url } = param
- //参数校验
- if (!question || !index || !id || !url) {
- return resultData(0, '参数question、index、id或url不能为空!')
- }
-
- try {
- const hash = url.split("_").pop()?.split(".")[0] ?? ""
- const obj = await client.Variation(
- question,
- index,
- id,
- hash,
- (uri: string, progress: string) => {
- console.log("loading", uri, "progress", progress);
- }
- );
- console.log("variation success ", obj)
- return resultData(200, 'variation success', obj)
- }
- catch (e) {
- return resultData(0, '参数错误!', e)
- }
- }
-
- //返回结果数据
- async function resultData(code = 0, msg = '', data = null) {
- return { code, msg, data }
- }
以上即为使用Laf接入Midjourney的完整演示,如有疑问,欢迎提出!


