
热门标签
热门文章
- 1Linux常用的备份及性能排查工具汇总_linux系统备份工具
- 2醒醒,你的 Macbook真的能玩 2077 了!_macbook air 赛博朋克2077
- 3php 账本,记账本(示例代码)
- 4Termux: 超28k stars,Android终端下的强大Linux环境_termux安卓linux
- 5深入探索Android应用数据共享之ContentProvider_contentprovider数据共享
- 6SpringSecurity与JWT整合_jjwt spring-jwt
- 7微信小程序获取位置信息_微信小程序获取当前位置
- 8Spark SQL on Hive配置_springboot 远程 spark on hive
- 9AutoCAD制图下载安装_autocad 安装 csdn
- 102024年华为OD机试真题-二叉树的广度优先遍历-Java-OD统一考试(C卷)
当前位置: article > 正文
es数据备份和迁移Elasticsearch_es备份
作者:小惠珠哦 | 2024-08-11 00:38:33
赞
踩
es备份
Elasticsearch数据备份与恢复
前提
- # 注意:
- 1.在进行本地备份时使用--type需要备份索引和数据(mapping,data)
- 2.在将数据备份到另外一台ES节点时需要比本地备份多备份一种数据类型(analyzer,mapping,data,template)
一.本地备份与恢复
- # 前提:
- · 必须要有Node环境和npm软件:nodejs,npm
-
- 1.:下载包
- wget https://nodejs.org/dist/v14.17.1/node-v14.17.1-linux-x64.tar.xz
-
- 2.:安装包(如果本身有node包但是不是新版本建议卸载重装)
- xz -d node-v14.17.1-linux-x64.tar.xz
- tar -xvf node-v14.17.1-linux-x64.tar
- echo "export NODE_HOME=/home/workspaces/node-v14.17.1-linux-x64
- export PATH=$PATH:$NODE_HOME/bin
- export NODE_PATH=$NODE_HOME/lib/node_modules" >>/etc/profile
- source /etc/profile
-
- 3.:验证安装是否成功
- node -v
-
- 4.:设置淘宝镜像
- npm config set registry http://registry.npm.taobao.org
-
- 5.:安装npm(只需要在一个节点安装即可,如果前端还有nginx做反向代理可以每个节点都装)
- [root@elkstack01 ~]# yum install -y npm
-
- 6.:进入下载head插件代码目录
- [root@elkstack01 src]# cd /usr/local/
-
- 7.:从GitHub上克隆代码到本地(或者直接从找es-head的包)
- [root@elkstack01 local]# git clone git://github.com/mobz/elasticsearch-head.git
-
- 8.:克隆完成后,进入elasticsearch插件目录
- [root@elkstack01 local]# cd elasticsearch-head/
-
- 9.:清除缓存
- [root@elkstack01 elasticsearch-head]# npm cache clean -f
- #使用npm安装n模块(不同的项目js脚本所需的node版本可能不同,所以就需要node版本管理工具)
-
- 10.安装elasticdump
- [root@db04 ~]# npm install elasticdump -g
-
- 11.本地目录备份
-
- ## 第一次进行的是索引的备份
- ## 第二次进行的是数据的备份
- [root@db04 bin]# ./elasticdump --input=http://10.0.0.54:9200/student/user --output=/tmp/student_mapping.json --type=mapping
- Wed, 12 Aug 2020 07:41:59 GMT | starting dump
- Wed, 12 Aug 2020 07:41:59 GMT | got 1 objects from source elasticsearch (offset: 0)
- Wed, 12 Aug 2020 07:41:59 GMT | sent 1 objects to destination file, wrote 1
- Wed, 12 Aug 2020 07:41:59 GMT | got 0 objects from source elasticsearch (offset: 1)
- Wed, 12 Aug 2020 07:41:59 GMT | Total Writes: 1
- Wed, 12 Aug 2020 07:41:59 GMT | dump complete
- [root@db04 bin]# ./elasticdump --input=http://10.0.0.54:9200/student/user --output=/tmp/student_data.json --type=data
- Wed, 12 Aug 2020 07:42:21 GMT | starting dump
- Wed, 12 Aug 2020 07:42:21 GMT | got 8 objects from source elasticsearch (offset: 0)
- Wed, 12 Aug 2020 07:42:21 GMT | sent 8 objects to destination file, wrote 8
- Wed, 12 Aug 2020 07:42:21 GMT | got 0 objects from source elasticsearch (offset: 8)
- Wed, 12 Aug 2020 07:42:21 GMT | Total Writes: 8
- Wed, 12 Aug 2020 07:42:21 GMT | dump complete
-
-
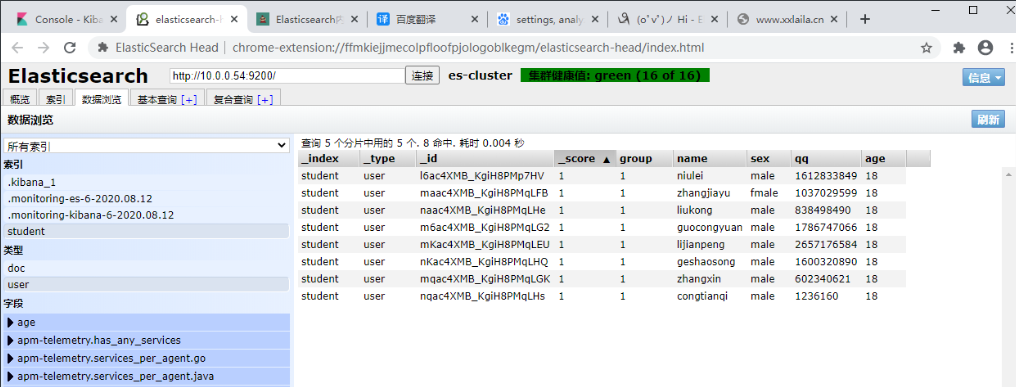
- ##备份之后用Elasticsearch Head插件模拟数据丢失,误删除student索引和数据并用elasticdump恢复
-
-
- [root@db04 bin]# ./elasticdump --output=http://10.0.0.54:9200/student --input=/tmp/student_mapping.json --type=mapping
- Wed, 12 Aug 2020 07:46:21 GMT | starting dump
- Wed, 12 Aug 2020 07:46:21 GMT | got 1 objects from source file (offset: 0)
- Wed, 12 Aug 2020 07:46:21 GMT | sent 1 objects to destination elasticsearch, wrote 1
- Wed, 12 Aug 2020 07:46:21 GMT | got 0 objects from source file (offset: 1)
- Wed, 12 Aug 2020 07:46:21 GMT | Total Writes: 1
- Wed, 12 Aug 2020 07:46:21 GMT | dump complete
- [root@db04 bin]# ./elasticdump --output=http://10.0.0.54:9200/student --input=/tmp/student_data.json --type=data
- Wed, 12 Aug 2020 07:46:40 GMT | starting dump
- Wed, 12 Aug 2020 07:46:40 GMT | got 8 objects from source file (offset: 0)
- Wed, 12 Aug 2020 07:46:40 GMT | sent 8 objects to destination elasticsearch, wrote 8
- Wed, 12 Aug 2020 07:46:40 GMT | got 0 objects from source file (offset: 8)
- Wed, 12 Aug 2020 07:46:40 GMT | Total Writes: 8
- Wed, 12 Aug 2020 07:46:40 GMT | dump complete

# 根据索引名和类型进行备份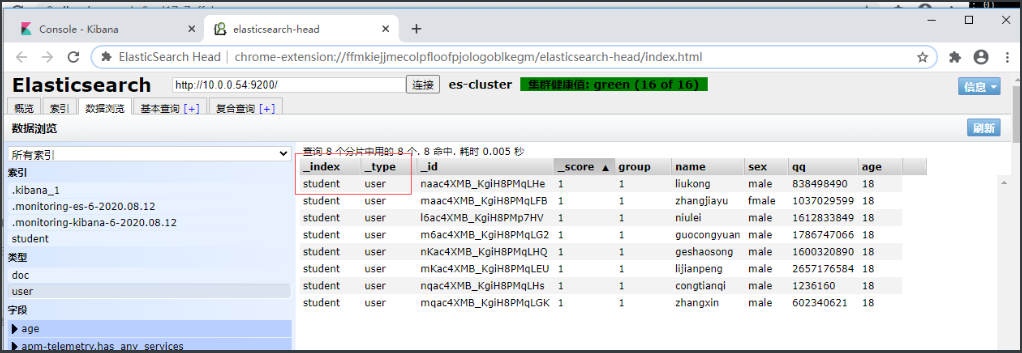
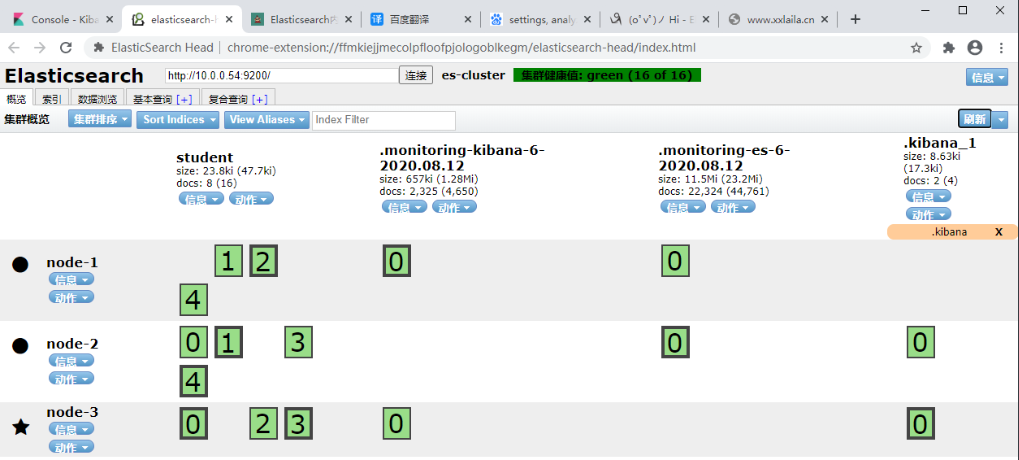
#备份成功。数据恢复成功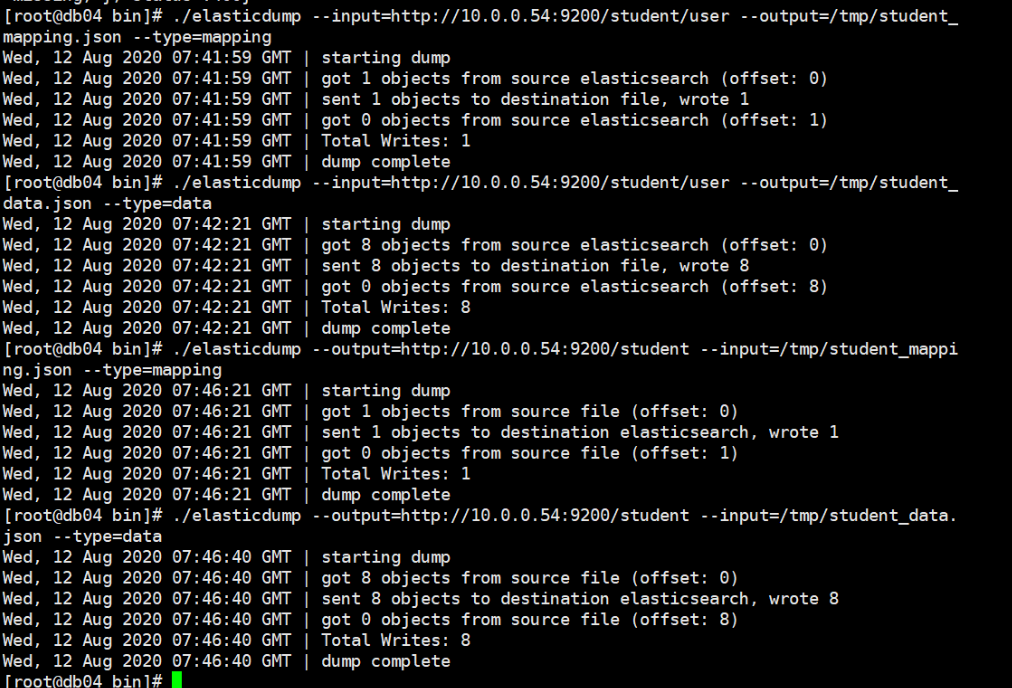
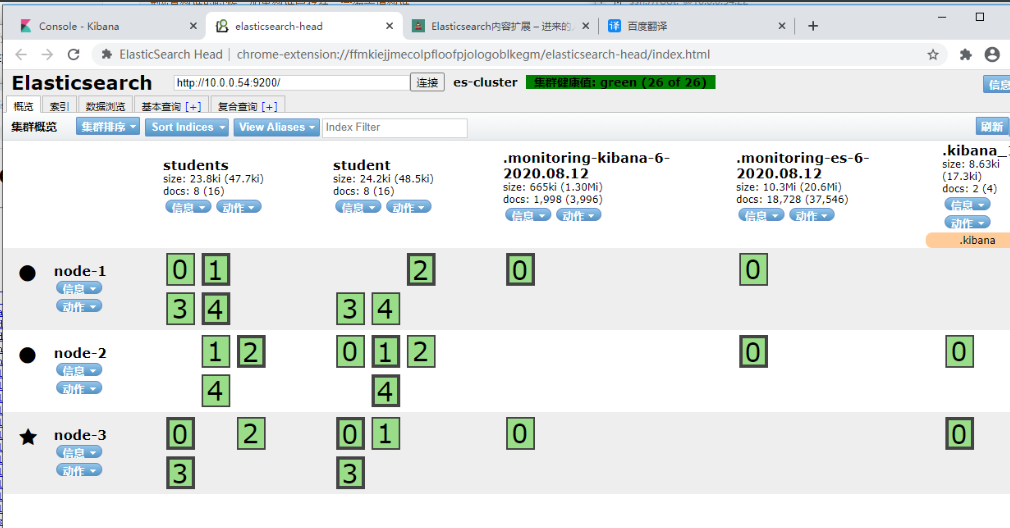
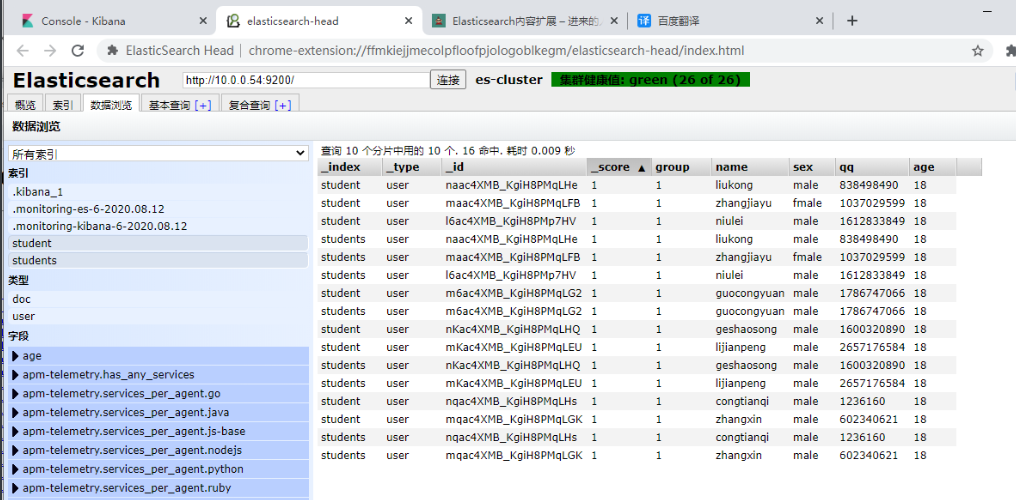
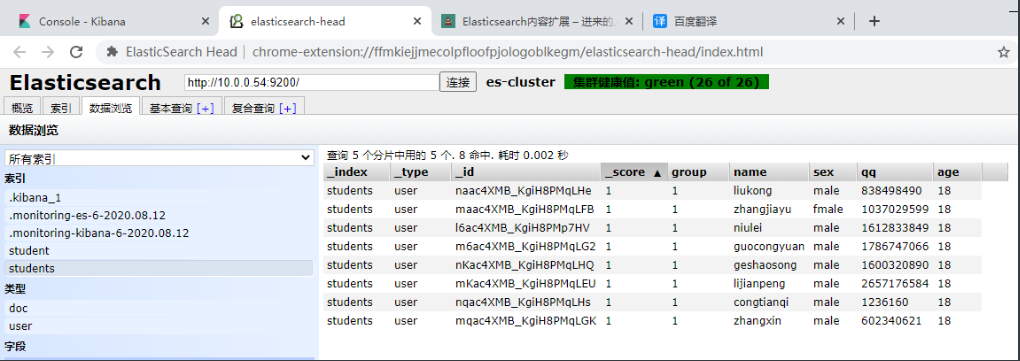
二.备份到另一台ES节点(如果是同一集群的节点索引不能重名)
- # 备份到另一台ES节点(同一集群索引不能重名)
- [root@db04 bin]# ./elasticdump --input=http://10.0.0.54:9200/student --output=http://10.0.0.55:9200/students --type=analyzer
- Wed, 12 Aug 2020 08:14:00 GMT | starting dump
- Wed, 12 Aug 2020 08:14:00 GMT | got 1 objects from source elasticsearch (offset: 0)
- Wed, 12 Aug 2020 08:14:01 GMT | sent 1 objects to destination elasticsearch, wrote 1
- Wed, 12 Aug 2020 08:14:01 GMT | got 0 objects from source elasticsearch (offset: 1)
- Wed, 12 Aug 2020 08:14:01 GMT | Total Writes: 1
- Wed, 12 Aug 2020 08:14:01 GMT | dump complete
- [root@db04 bin]# ./elasticdump --input=http://10.0.0.54:9200/student --output=http://10.0.0.55:9200/students --type=mapping
- Wed, 12 Aug 2020 08:14:10 GMT | starting dump
- Wed, 12 Aug 2020 08:14:10 GMT | got 1 objects from source elasticsearch (offset: 0)
- Wed, 12 Aug 2020 08:14:10 GMT | sent 1 objects to destination elasticsearch, wrote 1
- Wed, 12 Aug 2020 08:14:10 GMT | got 0 objects from source elasticsearch (offset: 1)
- Wed, 12 Aug 2020 08:14:10 GMT | Total Writes: 1
- Wed, 12 Aug 2020 08:14:10 GMT | dump complete
- [root@db04 bin]# ./elasticdump --input=http://10.0.0.54:9200/student --output=http://10.0.0.55:9200/students --type=data
- Wed, 12 Aug 2020 08:14:15 GMT | starting dump
- Wed, 12 Aug 2020 08:14:15 GMT | got 8 objects from source elasticsearch (offset: 0)
- Wed, 12 Aug 2020 08:14:15 GMT | sent 8 objects to destination elasticsearch, wrote 8
- Wed, 12 Aug 2020 08:14:15 GMT | got 0 objects from source elasticsearch (offset: 8)
- Wed, 12 Aug 2020 08:14:15 GMT | Total Writes: 8
- Wed, 12 Aug 2020 08:14:15 GMT | dump complete
- [root@db04 bin]#elasticdump --input=http://10.0.0.54:9200/student --output=http://100.10.0.55:9200/students --type=template
三.本地备份与恢复脚本
- # 1.本地备份脚本
- [root@db04 ~]# vim output_Es.sh
- #!/bin/bash
- read -p '要备份的机器是:'${1}
- #要导出的索引名
- index_name='
- student
- '
- for index in `echo $index_name`
- do
- echo "start input index ${index}"
- elasticdump --input=http://${1}:9200/${index} --output=/data/${index}_alias.json --type=alias &> /dev/null
- elasticdump --input=http://${1}:9200/${index} --output=/data/${index}_analyzer.json --type=analyzer &> /dev/null
- elasticdump --input=http://${1}:9200/${index} --output=/data/${index}_data.json --type=data &> /dev/null
- elasticdump --input=http://${1}:9200/${index} --output=/data/${index}_alias.json --type=alias &> /dev/null
- elasticdump --input=http://${1}:9200/${index} --output=/data/${index}_template.json --type=template &> /dev/null
- done
-
- # 2.恢复脚本
- [root@db04 ~]# vim input_Es.sh
- #!/bin/bash
- read -p '要导入的机器是:'${1}
- #要导入的索引名
- index_name='
- student
- '
- for index in `echo $index_name`
- do
- echo "start input index ${index}"
- elasticdump --input=/data/${index}_alias.json --output=http://${1}:9200/${index} --type=alias &> /dev/null
- elasticdump --input=/data/${index}_analyzer.json --output=http://${1}:9200/${index} --type=analyzer &> /dev/null
- elasticdump --input=/data/${index}_data.json --output=http://${1}:9200/${index} --type=data &> /dev/null
- elasticdump --input=/data/${index}_template.json --output=http://${1}:9200/${index} --type=template &> /dev/null
- done
测试脚本
- # 0.配置环境变量
- [root@db04 ~]# vim /etc/profile.d/elasticdump.sh
- export PATH=/root/node-v10.13.0-linux-x64/lib/node_modules/elasticdump/bin:$PATH
- [root@db04 ~]# source /etc/profile
-
-
- # 1.创建备份目录
- [root@db04 ~]# mkdir /data
-
- # 2.执行备份脚本
- [root@db04 ~]# sh output_Es.sh
- 要备份的机器是:10.0.0.54
- start input index student
-
- # 3.查看备份目录
- [root@db04 ~]# ll /data/
- total 16
- -rw-r--r-- 1 root root 5 Aug 12 16:59 student_alias.json
- -rw-r--r-- 1 root root 101 Aug 12 16:59 student_analyzer.json
- -rw-r--r-- 1 root root 1284 Aug 12 16:59 student_data.json
- -rw-r--r-- 1 root root 5 Aug 12 16:59 student_template.json
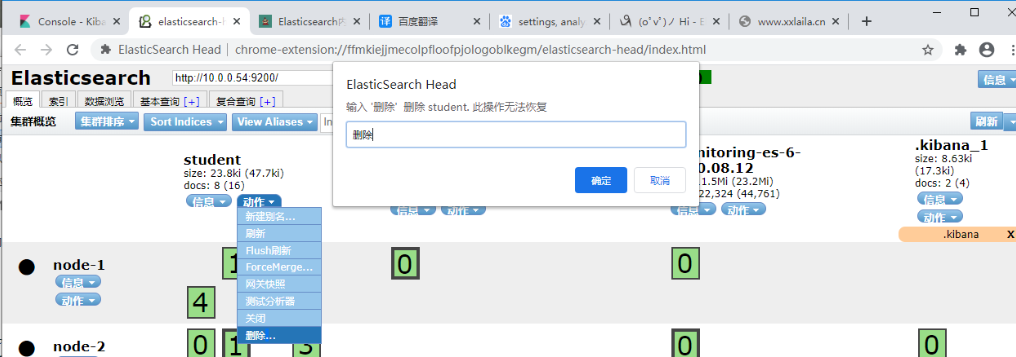
# 模拟误删除操作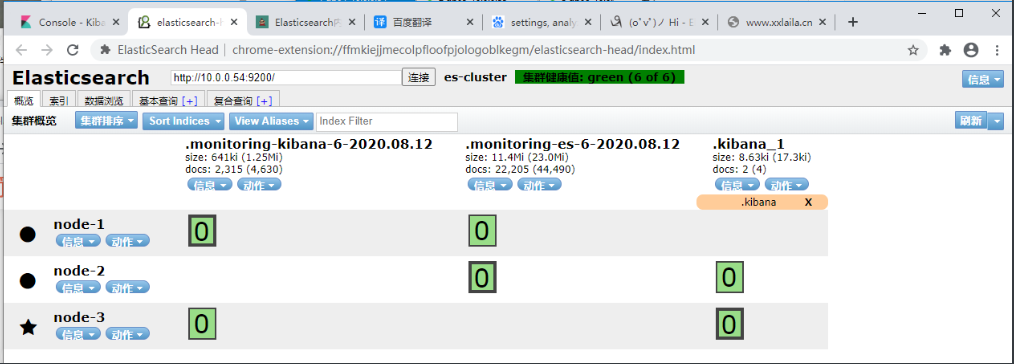
- # 执行恢复脚本
- [root@db04 ~]# sh input_Es.sh
- 要导入的机器是:10.0.0.54
- start input index student
-
-
- ## 数据恢复
声明:本文内容由网友自发贡献,不代表【wpsshop博客】立场,版权归原作者所有,本站不承担相应法律责任。如您发现有侵权的内容,请联系我们。转载请注明出处:https://www.wpsshop.cn/w/小惠珠哦/article/detail/961227?site
推荐阅读

相关标签

