
热门标签
热门文章
- 1pytorch之torch基础学习_torch 学习
- 225. 在QWidget窗口中嵌入QML界面_将qwidgets嵌入qml
- 3浅谈树形结构的特性和应用(上):多叉树,红黑树,堆,Trie树,B树,B+树......
- 4哈希表_ip地址搜索方案,哈希表
- 5大数据学习之hadoop伪分布式升级版的搭建_用finalshell软件伪分布式搭建
- 6计算机视觉领域热门研究方向state-of-art算法实时更新_计算机视觉中计数研究方向
- 7最小生成树入门(图解)
- 8NLP----句向量_nlp 句向量
- 9docker-compose mongodb 副本集
- 10mvn deploy时返回400解决方法.md_mvn deploy 400
当前位置: article > 正文
C# 调用支付宝API接口_c#支付宝支付api文档
作者:一键难忘520 | 2024-07-18 21:49:11
赞
踩
c#支付宝支付api文档
项目开始前(准备工作)
1、准备好支付宝账号,如果是上线的项目,要提前创建好项目


如果是客户端的话URL可以不写。
创建完成后,该项目会进入审核状态,要等待24小时。
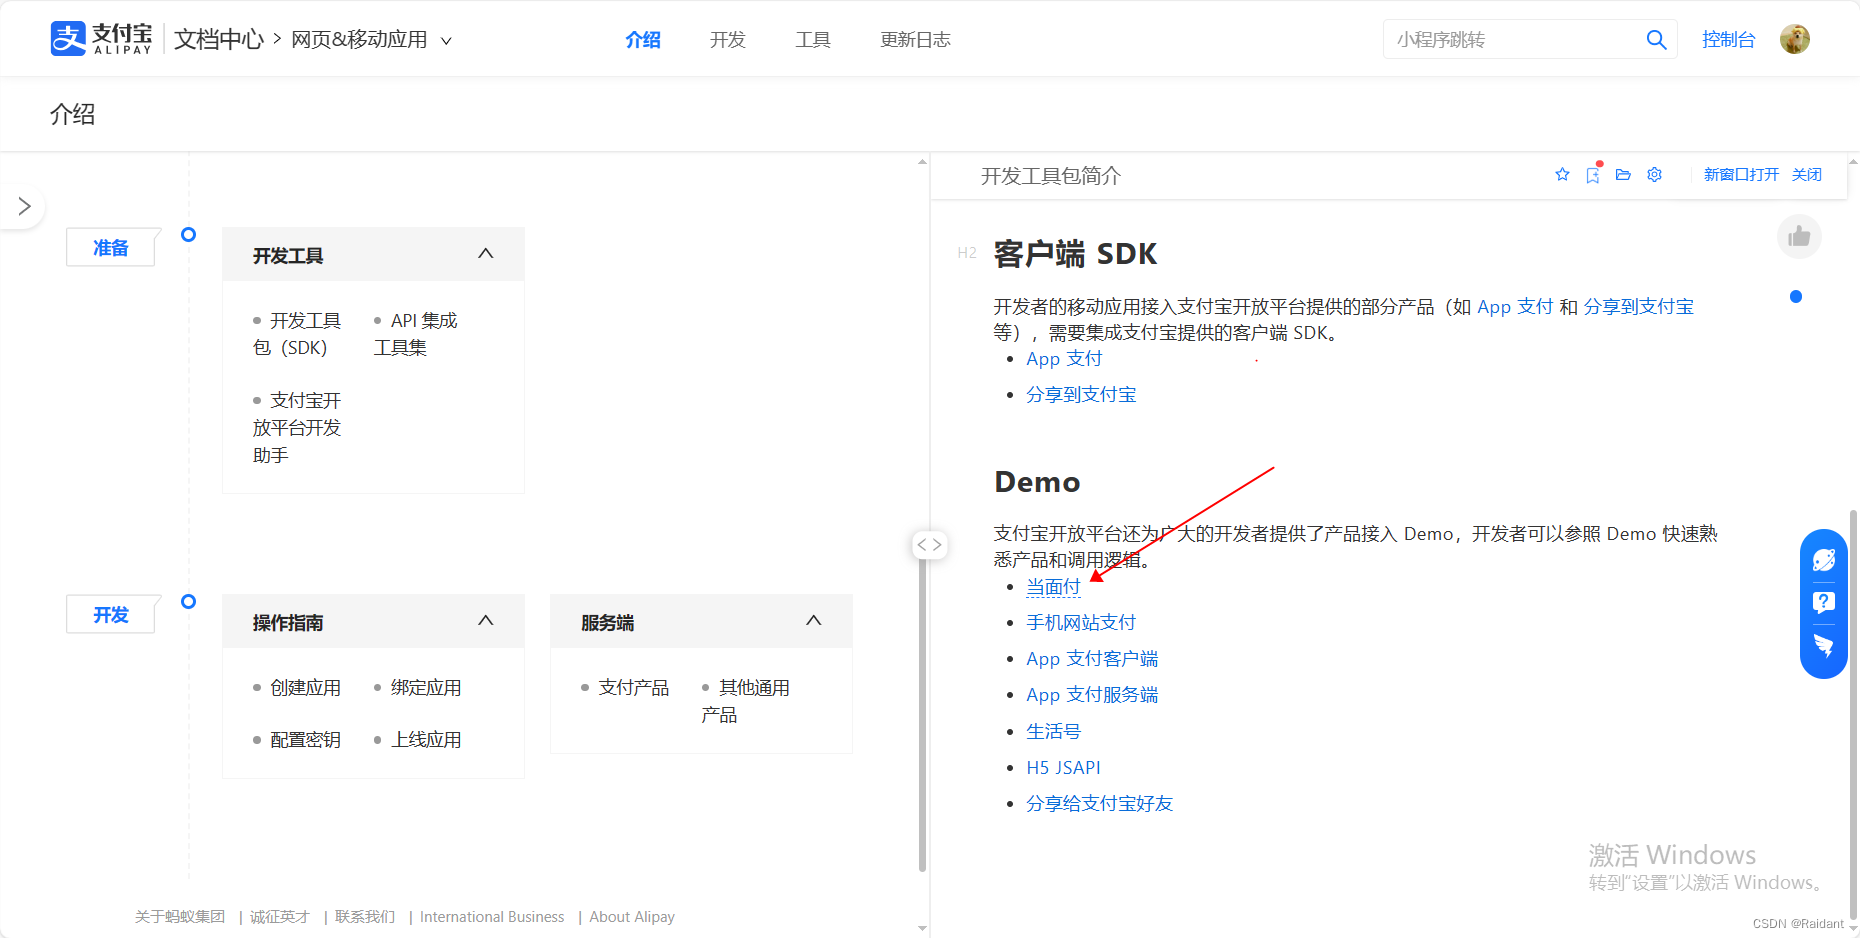
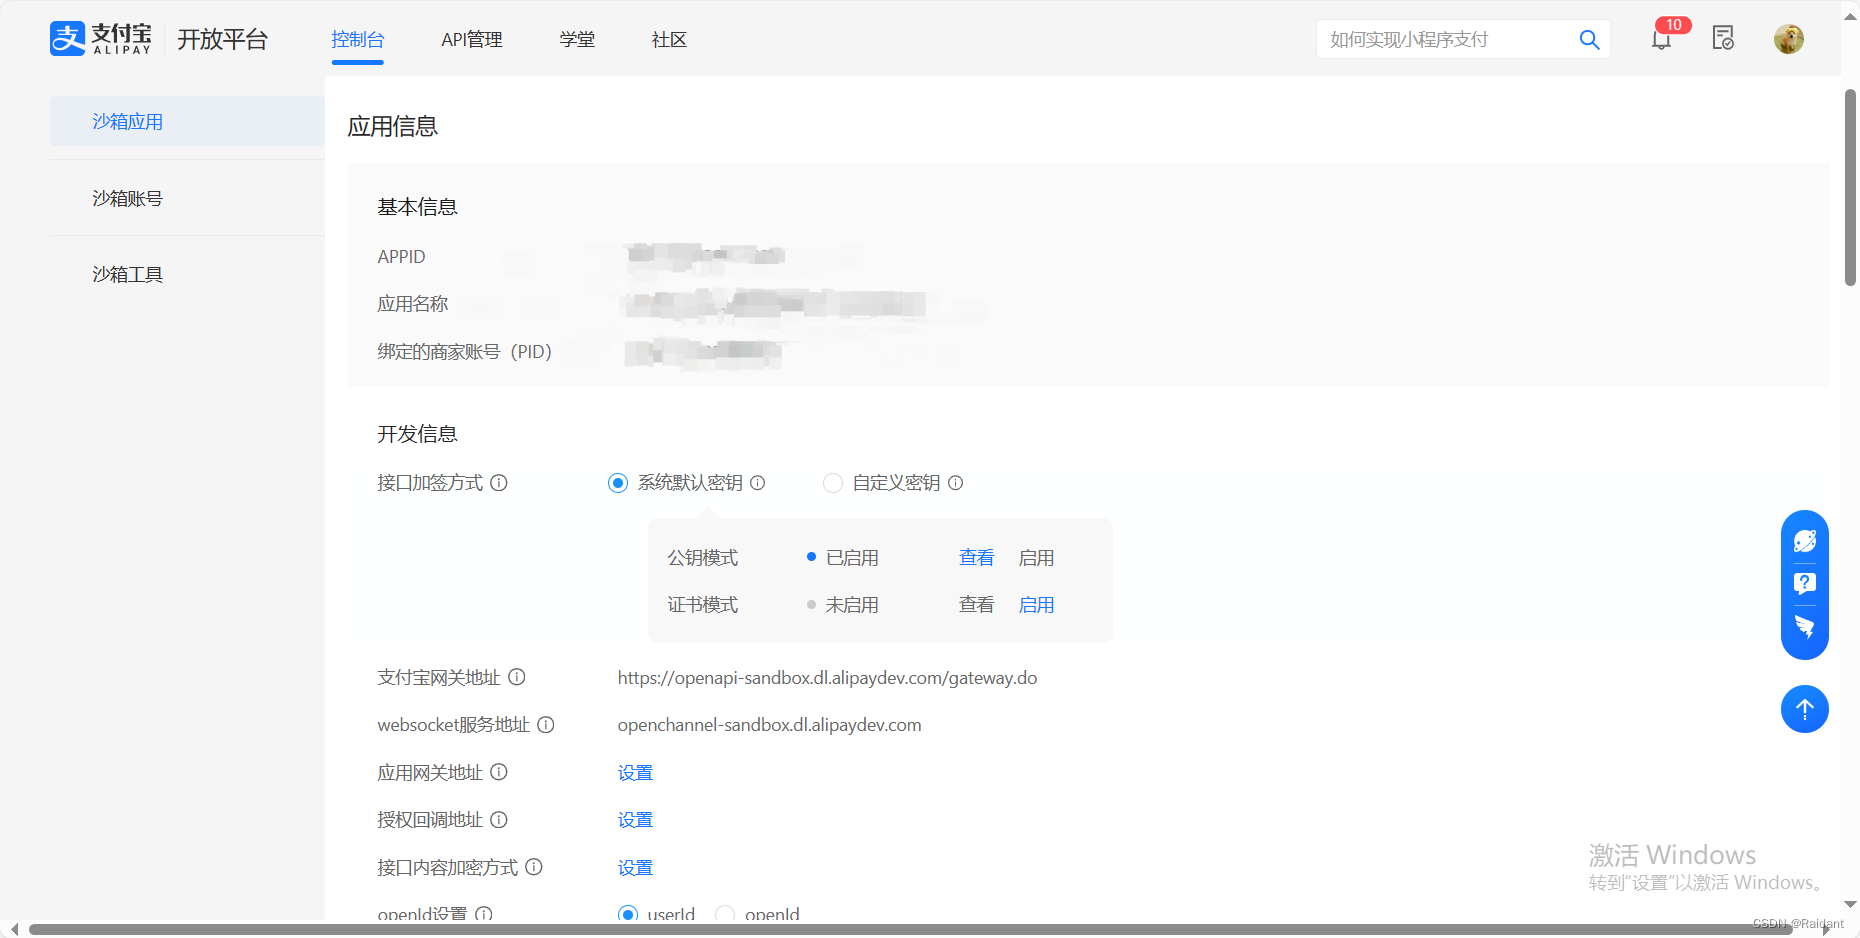
然后从图1,打开项目详情,


到这里,准备工作已经快完成了,我们要保留好 应用私钥 (无法在网站上查看,只有最开始生成的地方可以看到备份记录,因此要保存好)和 支付宝公钥。
最后,需要开通账号的当面付权限。


按要求完成上面的操作,即可开通接口,如果没权限,也可以先用沙盒测试,到此,准备工作已完成。
代码demo
下面展示一些 内联代码片。
            // 设置支付宝支付的相关配置
            //AlipayConfig config = new AlipayConfig
            //{
            //    AppId = "",
            //    MerchantPrivateKey = "",
            //    AlipayPublicKey = "",
            //    GatewayUrl = "https://openapi.alipay.com/gateway.do"
            //};
            //沙盒
            AlipayConfig  config = new AlipayConfig
            {
                AppId = "",
                MerchantPrivateKey = “”,//应用私钥
                AlipayPublicKey = "",//支付宝公钥
                GatewayUrl = "https://openapi-sandbox.dl.alipaydev.com/gateway.do"
            };

			 // 创建支付宝支付API客户端
            IAopClient client = new DefaultAopClient(config.GatewayUrl, config.AppId, config.MerchantPrivateKey, "json", "1.0", "RSA2", config.AlipayPublicKey, "UTF-8", false);
string testid = "1234";
            out_trade_no = DateTime.Now.ToString("yyyyMMddhhmmsshhmmss");
            AlipayTradePrecreateRequest request = new AlipayTradePrecreateRequest();
            request.BizContent = "{" +
    "\"out_trade_no\":\"" + out_trade_no + "\"," +//商户订单号,不能超过32位
    "\"total_amount\":" + 0.01 + "," +
    "\"buyer_id\":\"" + testid + "\"," +
    "\"subject\": \"测试 \"," +
    " \"timeout_express\":\"90m\"}";

           AlipayTradePrecreateResponse response = client.Execute(request);
			//此时已经生成了一个预付款信息,可以通过将response.QrCode转换成二维码的形式,或者开打网页的形式。这里展示二维码的方式;
			Bitmap bt;
            string enCodeString = response.QrCode;
            QRCodeEncoder qrCodeEncoder = new QRCodeEncoder();
            qrCodeEncoder.QRCodeEncodeMode = QRCodeEncoder.ENCODE_MODE.BYTE;
            qrCodeEncoder.QRCodeErrorCorrect = QRCodeEncoder.ERROR_CORRECTION.H;
            qrCodeEncoder.QRCodeScale = 3;
            qrCodeEncoder.QRCodeVersion = 10;
            bt = qrCodeEncoder.Encode(enCodeString, Encoding.UTF8);
            string path = @"C:\TestPay";
            if (!Directory.Exists(path))
            {
                Directory.CreateDirectory(path);
            }
            string testpath = System.IO.Path.Combine(path, "alipay.jpg");
            bt.Save(testpath);
			//到这里二维码已经生成成功了!只需要打开一个循环任务来判断是否付款成功即可!

- 1
- 2
- 3
- 4
- 5
- 6
- 7
- 8
- 9
- 10
- 11
- 12
- 13
- 14
- 15
- 16
- 17
- 18
- 19
- 20
- 21
- 22
- 23
- 24
- 25
- 26
- 27
- 28
- 29
- 30
- 31
- 32
- 33
- 34
- 35
- 36
- 37
- 38
- 39
- 40
- 41
- 42
- 43
- 44
- 45
- 46
- 47
    public class AlipayConfig
    {
        public string AppId { get; set; }
        public string MerchantPrivateKey { get; set; }
        public string AlipayPublicKey { get; set; }
        public string GatewayUrl { get; set; }
    }
- 1
- 2
- 3
- 4
- 5
- 6
- 7
		//这边需要拿到刚刚生成的out_trade_no ,Start()方法需要触发。可以是打开二维码付款页面时同时触发。
        public async Task ScheduleActionAsync(Action action)
        {
            await Task.Delay(TimeSpan.FromSeconds(20)); // 延迟20s
            action(); // 执行动作
        }

        public async void Start()
        {
            Action yourAction = () =>
            {
                // 这里放置你要执行的代码
                Notify(true);
                Console.WriteLine("执行任务,当前时间:" + DateTime.Now.ToString());
            };

            await ScheduleActionAsync(yourAction); // 安排任务在5分钟后执行
        }

        public void Notify()
        {
            try
            {
                bool isCont = false;
                // 创建支付宝支付API客户端
                IAopClient client = new DefaultAopClient(config.GatewayUrl, config.AppId, config.MerchantPrivateKey, "json", "1.0", "RSA2", config.AlipayPublicKey, "UTF-8", false);
                AlipayTradeQueryRequest request = new AlipayTradeQueryRequest();
                AlipayTradeQueryResponse response;
                request.BizContent = "{" +
                    "\"out_trade_no\":\"" + out_trade_no + "\"," +
                    "\"trade_no\": null}";
                    new Thread(() =>
                    {
                        while (true)
                        {
                            Thread.Sleep(1000); // 每隔一秒,查询一次 查看是否支付成功
                            response = client.Execute(request);
                            if (response.Code == "10000")
                            {
                                break;
                            }
                        }
                    }).Start();
            }
            catch (Exception)
            {

            }
        }
- 1
- 2
- 3
- 4
- 5
- 6
- 7
- 8
- 9
- 10
- 11
- 12
- 13
- 14
- 15
- 16
- 17
- 18
- 19
- 20
- 21
- 22
- 23
- 24
- 25
- 26
- 27
- 28
- 29
- 30
- 31
- 32
- 33
- 34
- 35
- 36
- 37
- 38
- 39
- 40
- 41
- 42
- 43
- 44
- 45
- 46
- 47
- 48
- 49
引入支付宝dll,可从官网下载。

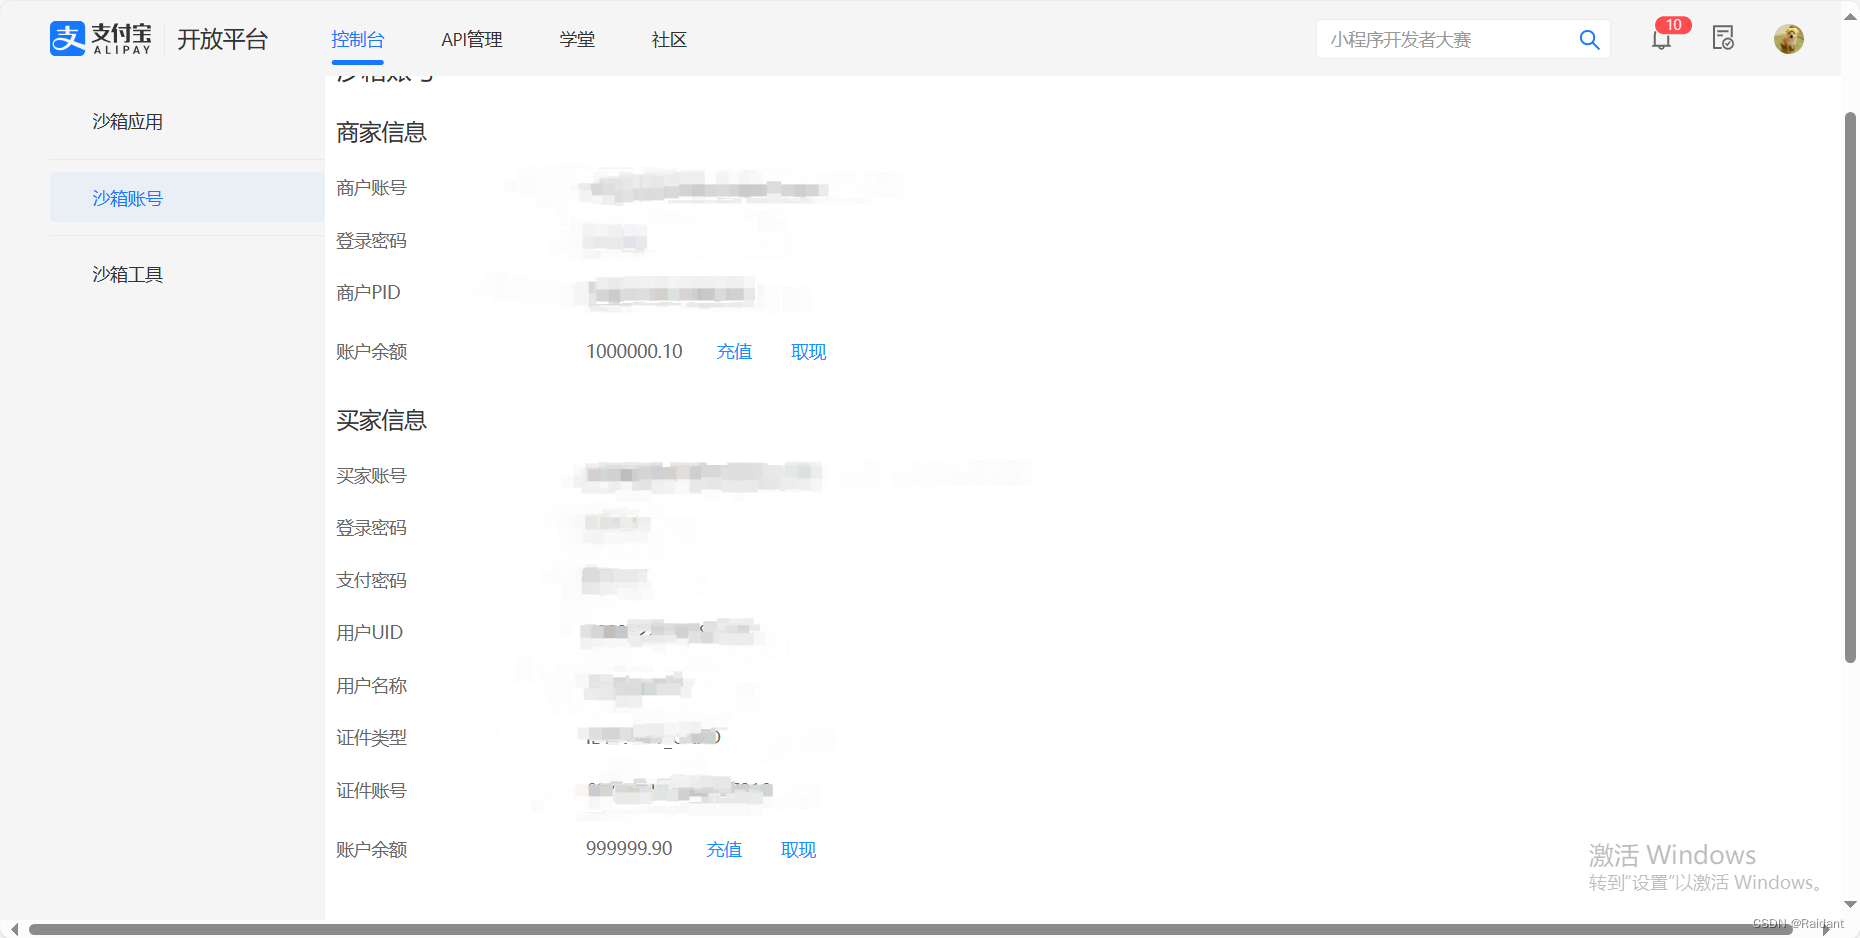
到这就算完成了。推荐使用沙箱来测试。(手机端目前仅支持安卓)
本文内容由网友自发贡献,转载请注明出处:【wpsshop博客】
推荐阅读

相关标签

