
热门标签
热门文章
- 1Win10必做的性能优化_windows10优化知乎
- 2Android 使用AspectJ实现权限申请和埋点上传_androdid中使用aspect实现权限结果
- 3多线程——volatile_多线程变量 v
- 4免费在Kaggle上部署stable diffusion,白嫖万元 32G 双GPU_stable diffusion云部署 google colab
- 5Windows系列(亲测有效):win10开启远程桌面,win10开启3389端口_win10防火墙放行3389
- 6Centos实时网络带宽占用查看工具iftop_公众号 4294967295
- 7uni-app开发微信小程序_uniapp开发微信小程序
- 8transformer学习记录_transformer迁移学习
- 9MATLAB中的符号计算是什么?如何使用它?
- 10Android中定时执行任务的3种实现方法_安卓定时运行程序
当前位置: article > 正文
个人博客系列-后端项目-RBAC角色管理(6)
作者:Monodyee | 2024-03-12 03:43:58
赞
踩
个人博客系列-后端项目-RBAC角色管理(6)
修改上一篇文章创建的用户表
## 用户表
from django.contrib.auth.hashers import make_password, check_password
from django.contrib.auth.models import AbstractBaseUser

class User(AbstractBaseUser):
	username = models.CharField(max_length=255, unique=True, verbose_name="手机号")
    password = models.CharField(max_length=255, unique=False, verbose_name="密码")
    is_vip = models.BooleanField(default=False,verbose_name="是否为vip")
    vip_expires_at = models.DateTimeField(auto_now_add=True,verbose_name="vip过期时间")
    is_active = models.BooleanField(default=True)
    USERNAME_FIELD = 'username'

    def set_password(self, raw_password):
        self.password = make_password(raw_password)

    def check_password(self, raw_password):
        return check_password(raw_password, self.password)

    class Meta:
        db_table = "blog_user"
        verbose_name = "用户表"
        verbose_name_plural = verbose_name

- 1
- 2
- 3
- 4
- 5
- 6
- 7
- 8
- 9
- 10
- 11
- 12
- 13
- 14
- 15
- 16
- 17
- 18
- 19
- 20
- 21
- 22
角色权限表
角色表
# 角色表
class Role(models.Model):
    role_name = models.CharField('角色名字', max_length=16)

    class Meta:
        db_table = "blog_role"
        verbose_name = "角色表"
        verbose_name_plural = verbose_name


# 权限表
class Access(models.Model):
    name = models.CharField('用户权限名称', max_length=256)
    path = models.CharField('用户权限路由', max_length=256)
    method = models.CharField('用户权限请求方式', max_length=16)
    types = models.CharField('权限类型', blank=True, null=True, max_length=10)  # 菜单权限和api权限

    class Meta:
        db_table = "blog_access"
        verbose_name = "权限表"
        verbose_name_plural = verbose_name


# 用户-角色  多对多
class UserRole(models.Model):
    user_id = models.IntegerField('用户ID', null=True, blank=True)
    role_id = models.IntegerField('角色ID', null=True, blank=True)

    class Meta:
        db_table = "blog_user_role"
        verbose_name = "用户角色表"
        verbose_name_plural = verbose_name


# 角色-权限 多对多
class RoleAccess(models.Model):
    role_id = models.IntegerField('角色ID', null=True, blank=True)
    acc_id = models.IntegerField('权限ID', null=True, blank=True)

    class Meta:
        db_table = "blog_role_access"
        verbose_name = "角色权限表"
        verbose_name_plural = verbose_name
- 1
- 2
- 3
- 4
- 5
- 6
- 7
- 8
- 9
- 10
- 11
- 12
- 13
- 14
- 15
- 16
- 17
- 18
- 19
- 20
- 21
- 22
- 23
- 24
- 25
- 26
- 27
- 28
- 29
- 30
- 31
- 32
- 33
- 34
- 35
- 36
- 37
- 38
- 39
- 40
- 41
- 42
- 43
- 44
- 45
在settings.py中配置自定义用户模型

数据库迁移
python manage.py makemigrations
python manage.py migrate
- 1
- 2
在app:userauth的视图中写一个获取用户信息的接口
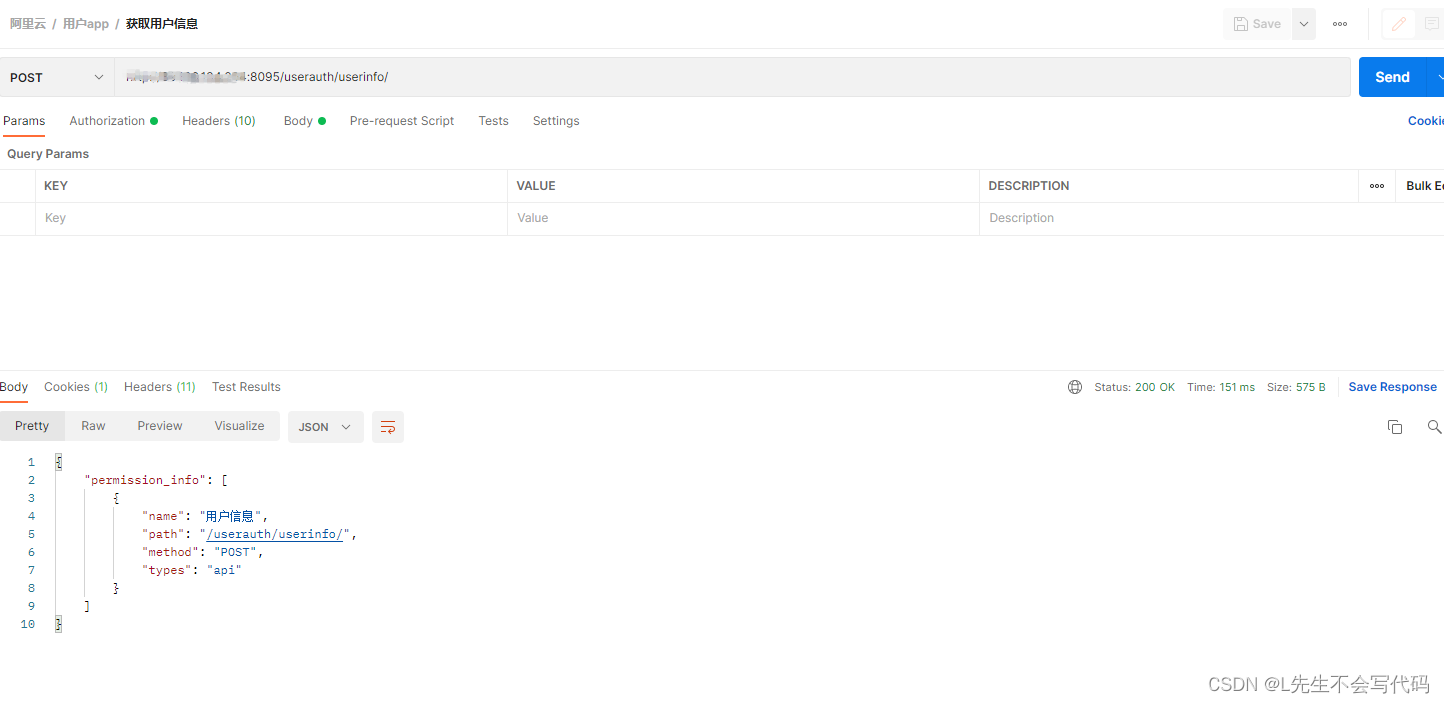
## views.py
from rest_framework.views import APIView
from rest_framework.response import Response
from userauth.models import User
from systemauth.models import Role, Access, UserRole, RoleAccess

class UserInfoView(APIView):
    def post(self, request,*args, **kwargs):
        print('获取用户信息',request.user.username)
        # 存入session中,并返回给前端一份
        # 后期存入redis, 有助于减少mysql数据库压力,增加响应速度
        user_info = User.objects.get(username=request.user.username)  # 用户信息
        role_info = UserRole.objects.filter(user_id=user_info.id)       # 用户角色信息,一个用户可以有多个角色
        role_id_lst = [role.id for role in role_info]
        role_access_info = RoleAccess.objects.filter(role_id__in=role_id_lst)
        access_id_lst = [access.acc_id for access in role_access_info]
        access_info = Access.objects.filter(id__in=access_id_lst)
        permission_info = list()
        for access in access_info:
            permission_info.append({
                'name': access.name,
                'path': access.path,
                'method': access.method,
                'types': access.types
            })
        request.session['permission_info'] = permission_info
        return Response({'permission_info': request.session.get('permission_info')})
- 1
- 2
- 3
- 4
- 5
- 6
- 7
- 8
- 9
- 10
- 11
- 12
- 13
- 14
- 15
- 16
- 17
- 18
- 19
- 20
- 21
- 22
- 23
- 24
- 25
- 26
- 27
在utils目录中编写权限中间件permission.py
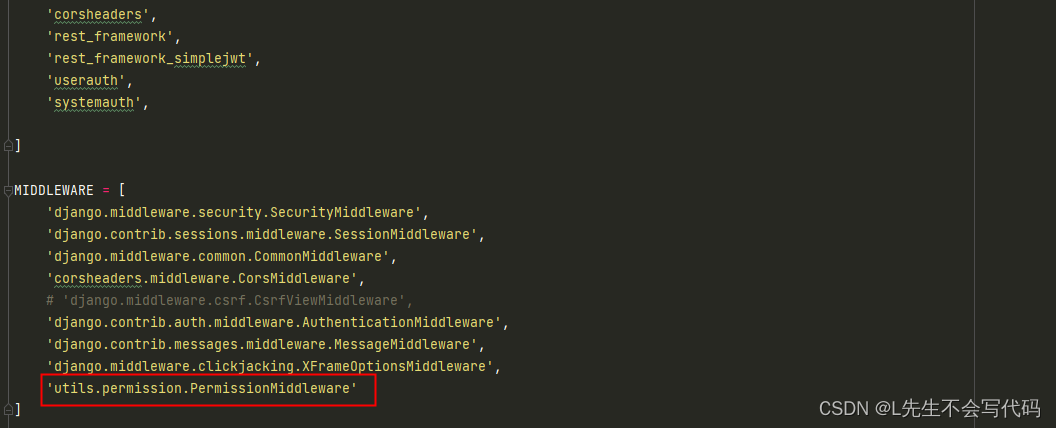
## permission.py
from django.utils.deprecation import MiddlewareMixin
from django.shortcuts import HttpResponse

# RBAC权限中间件
class PermissionMiddleware(MiddlewareMixin):
    def process_request(self, request):
        print('RABC权限中间件')
        request_path = request.path

        # 设置一些必要的路由白名单
        white_lst = ['/userauth/login/', "/userauth/userinfo/"]
        if request_path in white_lst:
            return None                          # 返回None表示通过验证
        # 请求的接口路由是否在权限范围内
        permission_info = request.session.get('permission_info',[])  # 从session中获取用户权限信息
        permission_api_lst = [info.get('path') for info in permission_info]
        if request_path in permission_api_lst:
            return None
        return HttpResponse("您没有访问权限")
- 1
- 2
- 3
- 4
- 5
- 6
- 7
- 8
- 9
- 10
- 11
- 12
- 13
- 14
- 15
- 16
- 17
- 18
- 19
- 20
在settings.py中配置自定义权限中间件
在表中配置一些测试数据,然后用postman进行测试。
声明:本文内容由网友自发贡献,不代表【wpsshop博客】立场,版权归原作者所有,本站不承担相应法律责任。如您发现有侵权的内容,请联系我们。转载请注明出处:https://www.wpsshop.cn/w/Monodyee/article/detail/221853?site=
推荐阅读
相关标签

