
热门标签
热门文章
- 1(52)只出现一次的数字III
- 2第四章 图像的频域增强_-dffftkfddx/m
- 3Linux:gdb调试器的解析+使用(超详细版)
- 4Eigen常用矩阵分解以及求解线性方程组方法 浅析_eigen 线性求解
- 5【计算机二级考试C语言】C内存管理
- 6Linux-manjaro搭建经验_manjaro apt
- 7web期末作业设计网页:动漫网站设计——哆啦A梦(10页) HTML+CSS+JavaScript 学生DW网页设计作业成品 动漫网页设计作业 web网页设计与开发 html实训大作业_多啦a梦网页设计方案模板
- 8Kafka Tool(Kafka 可视化工具)安装及使用教程_kafka tool工具
- 9C|C++中的静态全局变量,静态局部变量,全局变量,局部变量的区别(转载)_static 全局 局部变量 函数 以及类内函数与类外区别(this指针)
- 10react.js react.js - iframe src路径访问不到_react项目里面用iframe标签引入本地的html文件 上线后就找不到路径了
当前位置: article > 正文
关于springboot完整创建一个简单的前后端交互项目_springboot 快速开发一个前后台一体的项目
作者:二进制舞者2 | 2024-02-03 18:22:17
赞
踩
springboot 快速开发一个前后台一体的项目
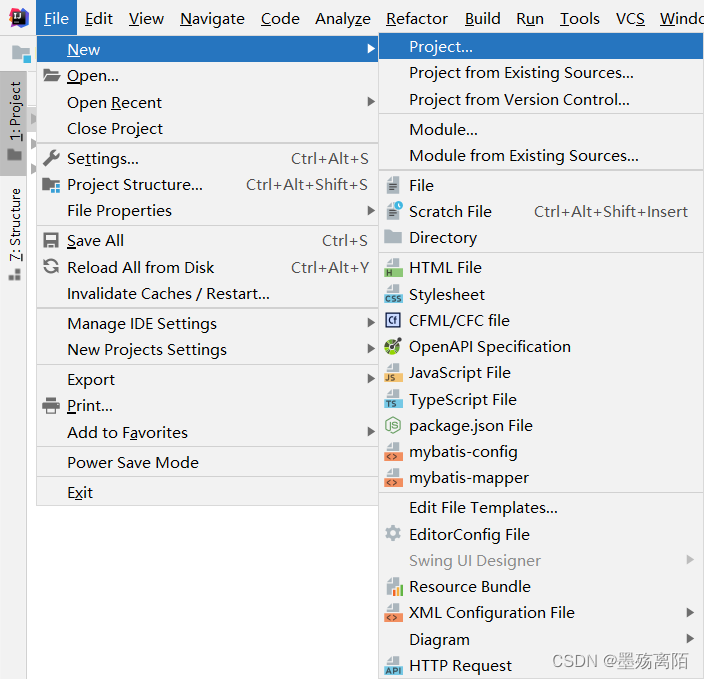
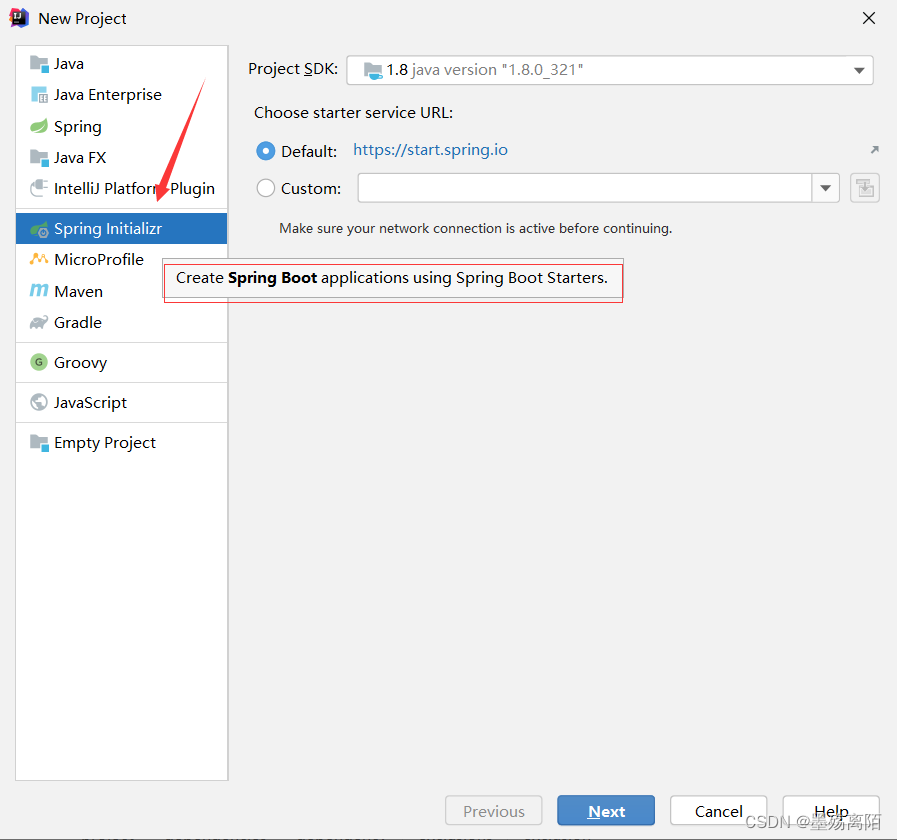
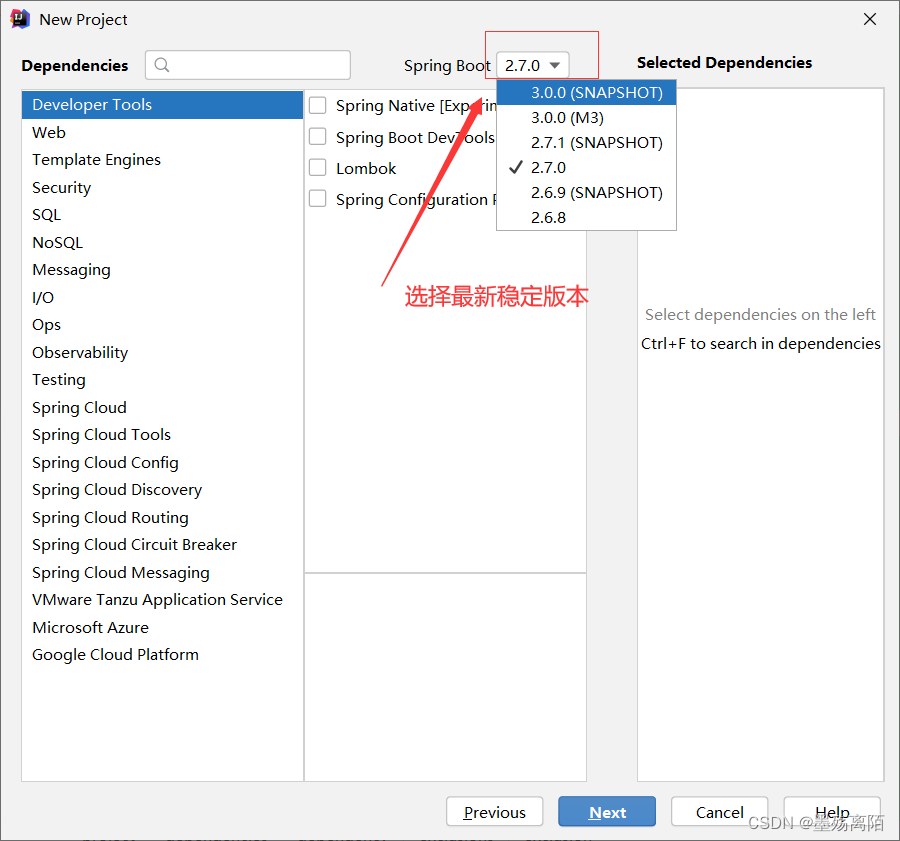
1、首先创建一个springboot项目

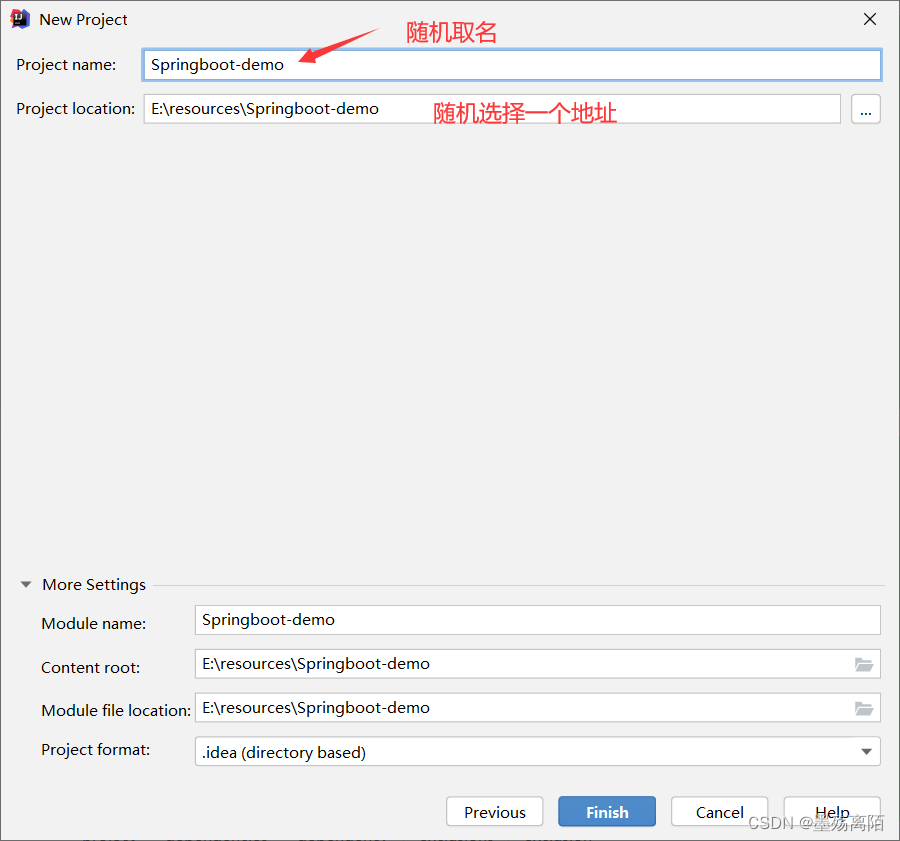
2、项目创建完成
1、项目初始目录

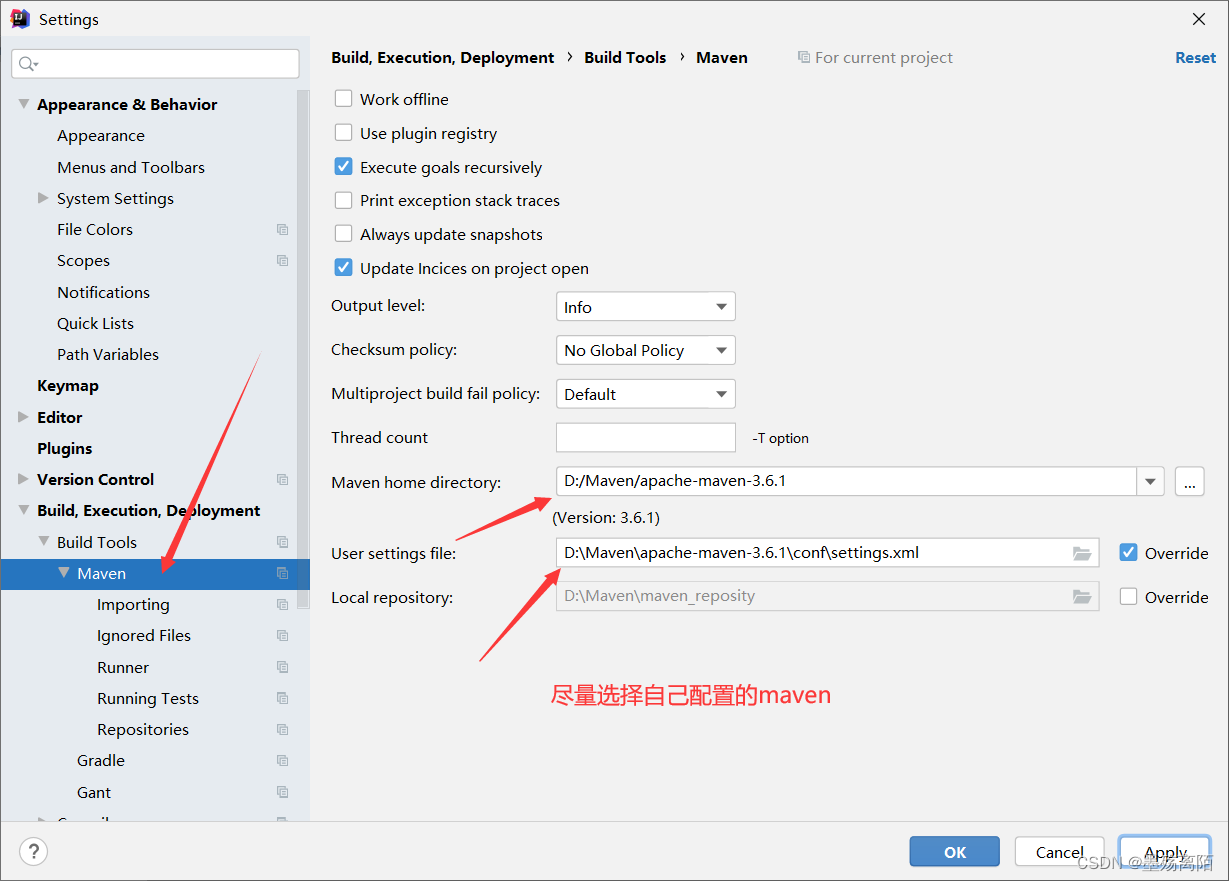
2、尽量设置为自己的maven配置
3、添加依赖
<dependency>
            <groupId>org.springframework.boot</groupId>
            <artifactId>spring-boot-starter-web</artifactId>
            <version>2.5.0</version>
        </dependency>
- 1
- 2
- 3
- 4
- 5
4、在项目中创建了这两个文件
static目录
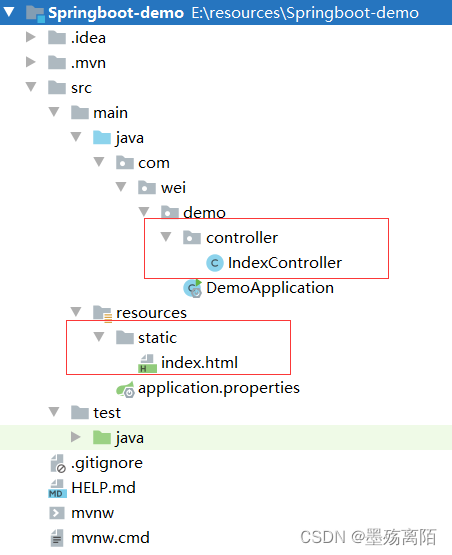
IndexController
package com.wei.demo.controller;

import org.springframework.stereotype.Controller;
import org.springframework.web.bind.annotation.GetMapping;
import org.springframework.web.bind.annotation.RequestMapping;

/**
 * @Author wei
 * @Date 2022/6/1 21:02
 * @Version 1.0
 */
@Controller
@RequestMapping("/")
public class IndexController {

    @GetMapping
    public String index(){

        return "index.html";
    }
}
- 1
- 2
- 3
- 4
- 5
- 6
- 7
- 8
- 9
- 10
- 11
- 12
- 13
- 14
- 15
- 16
- 17
- 18
- 19
- 20
- 21
- 22
index.html
<!DOCTYPE html>
<html lang="en">
<head>
    <meta charset="UTF-8">
    <title>Title</title>
</head>
<body>
    <h1>Hello,World!</h1>
</body>
</html>
- 1
- 2
- 3
- 4
- 5
- 6
- 7
- 8
- 9
- 10
3、启动项目
打开浏览器访问地址:
1、 http://localhost:8080/
2、http://localhost:8080/index.html 直接访问
上面两个地址都可以访问访问

templates目录(动态)
1、添加依赖
<dependency>
            <groupId>org.springframework.boot</groupId>
            <artifactId>spring-boot-starter-thymeleaf</artifactId>
            <version>2.6.4</version>
        </dependency>
- 1
- 2
- 3
- 4
- 5
2、在resources建立目录
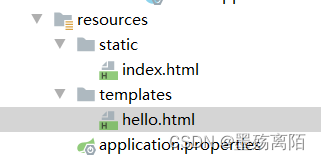
hello.html
<!DOCTYPE html>
<html lang="en" >
<head>
    <meta charset="UTF-8">
    <title>Title</title>
</head>
<body>
  <h1> hello,wei!</h1>
</body>
</html>
- 1
- 2
- 3
- 4
- 5
- 6
- 7
- 8
- 9
- 10
3、修改indexController文件
package com.wei.demo.controller;

import org.springframework.stereotype.Controller;
import org.springframework.web.bind.annotation.GetMapping;
import org.springframework.web.bind.annotation.RequestMapping;

/**
 * @Author wei
 * @Date 2022/6/1 21:02
 * @Version 1.0
 */
@Controller
@RequestMapping
public class IndexController {

    @GetMapping("/")
    public String index(){

        return "index.html";
    }

    @GetMapping("/hellodemo")
    public String hello(){
        return "hello";
    }
}
- 1
- 2
- 3
- 4
- 5
- 6
- 7
- 8
- 9
- 10
- 11
- 12
- 13
- 14
- 15
- 16
- 17
- 18
- 19
- 20
- 21
- 22
- 23
- 24
- 25
- 26
- 27
访问地位为:http://localhost:8080/hellodemo
动态页面不能直接访问
总结
静态页面的return默认是跳转到/static/目录下,当在pom.xml中引入了thymeleaf组件,动态跳转会覆盖默认的静态跳转,默认就会跳转到/templates/下,注意看两者return代码也有区别,动态没有html后缀。
声明:本文内容由网友自发贡献,不代表【wpsshop博客】立场,版权归原作者所有,本站不承担相应法律责任。如您发现有侵权的内容,请联系我们。转载请注明出处:https://www.wpsshop.cn/article/detail/57546
推荐阅读


相关标签

