
热门标签
当前位置: article > 正文
迁移学习实现图片分类任务
作者:思考机器3 | 2024-02-01 10:29:58
赞
踩
迁移学习实现图片分类任务
导入工具包
- import time
- import os
-
- import numpy as np
- from tqdm import tqdm
-
- import torch
- import torchvision
- import torch.nn as nn
- import torch.nn.functional as F
-
- import matplotlib.pyplot as plt
- %matplotlib inline
-
- # 忽略烦人的红色提示
- import warnings
- warnings.filterwarnings("ignore")

获取计算硬件
- # 有 GPU 就用 GPU,没有就用 CPU
- device = torch.device('cuda:0' if torch.cuda.is_available() else 'cpu')
- print('device', device)
图片预处理
- from torchvision import transforms
-
- # 训练集图像预处理:缩放裁剪、图像增强、转 Tensor、归一化
- train_transform = transforms.Compose([transforms.RandomResizedCrop(224),
- transforms.RandomHorizontalFlip(),
- transforms.ToTensor(),
- transforms.Normalize([0.485, 0.456, 0.406], [0.229, 0.224, 0.225])
- ])
-
- # 测试集图像预处理-RCTN:缩放、裁剪、转 Tensor、归一化
- test_transform = transforms.Compose([transforms.Resize(256),
- transforms.CenterCrop(224),
- transforms.ToTensor(),
- transforms.Normalize(
- mean=[0.485, 0.456, 0.406],
- std=[0.229, 0.224, 0.225])
- ])
这里对train训练集和text集的处理不同,几个transforms的操作通过compose进行整合。
载入图片分类数据集
- # 数据集文件夹路径
- dataset_dir = 'fruit30_split'
-
- train_path = os.path.join(dataset_dir, 'train')
- test_path = os.path.join(dataset_dir, 'val')
- print('训练集路径', train_path)
- print('测试集路径', test_path)
-
- from torchvision import datasets
-
- # 载入训练集
- train_dataset = datasets.ImageFolder(train_path, train_transform)
-
- # 载入测试集
- test_dataset = datasets.ImageFolder(test_path, test_transform)
-
-
- print('训练集图像数量', len(train_dataset))
- print('类别个数', len(train_dataset.classes))
- print('各类别名称', train_dataset.classes)
-
- print('测试集图像数量', len(test_dataset))
- print('类别个数', len(test_dataset.classes))
- print('各类别名称', test_dataset.classes)
-
datasets下的ImageFolder,可以直接构建数据集。
类别与索引号一一对应
- class_names = train_dataset.classes
- n_class = len(class_names)
-
-
- # 映射关系:类别 到 索引号
- train_dataset.class_to_idx
-
定义数据加载器Dataloader,dataloader用于给模型喂数据。
- from torch.utils.data import DataLoader
-
- BATCH_SIZE = 32
-
- # 训练集的数据加载器
- train_loader = DataLoader(train_dataset,
- batch_size=BATCH_SIZE,
- shuffle=True,
- num_workers=4
- )
-
- # 测试集的数据加载器
- test_loader = DataLoader(test_dataset,
- batch_size=BATCH_SIZE,
- shuffle=False,
- num_workers=4
- )
查看一个batch的图像与标注
- # DataLoader 是 python生成器,每次调用返回一个 batch 的数据
- images, labels = next(iter(train_loader))
-
- images. Shape
- #torch.Size([32, 3, 224, 224])
- labels
- #tensor([11, 19, 3, 25, 29, 13, 21, 18, 11, 1, 13, 15, 13, 0, 15, 25, 0, 7,11, 10, 9, 6, 26, 2, 11, 10, 29, 29, 15, 8, 19, 8])
-
迁移学习范式
导入训练所用的工具包
- from torchvision import models
- import torch.optim as optim
- model = models.resnet18(pretrained=True) # 载入预训练模型
- # 修改全连接层,使得全连接层的输出与当前数据集类别数对应
- # 新建的层默认 requires_grad=True
- model.fc = nn.Linear(model.fc.in_features, n_class)
- model.fc
- Linear(in_features=512, out_features=30, bias=True)
- # 只微调训练最后一层全连接层的参数,其它层冻结
- optimizer = optim.Adam(model.fc.parameters())
采用第一种迁移学习的方式,优化器采用的是Adam的优化器。
训练配置
- model = model.to(device)
-
- # 交叉熵损失函数
- criterion = nn.CrossEntropyLoss()
-
- # 训练轮次 Epoch
- EPOCHS = 20
-
模拟一个batch的训练
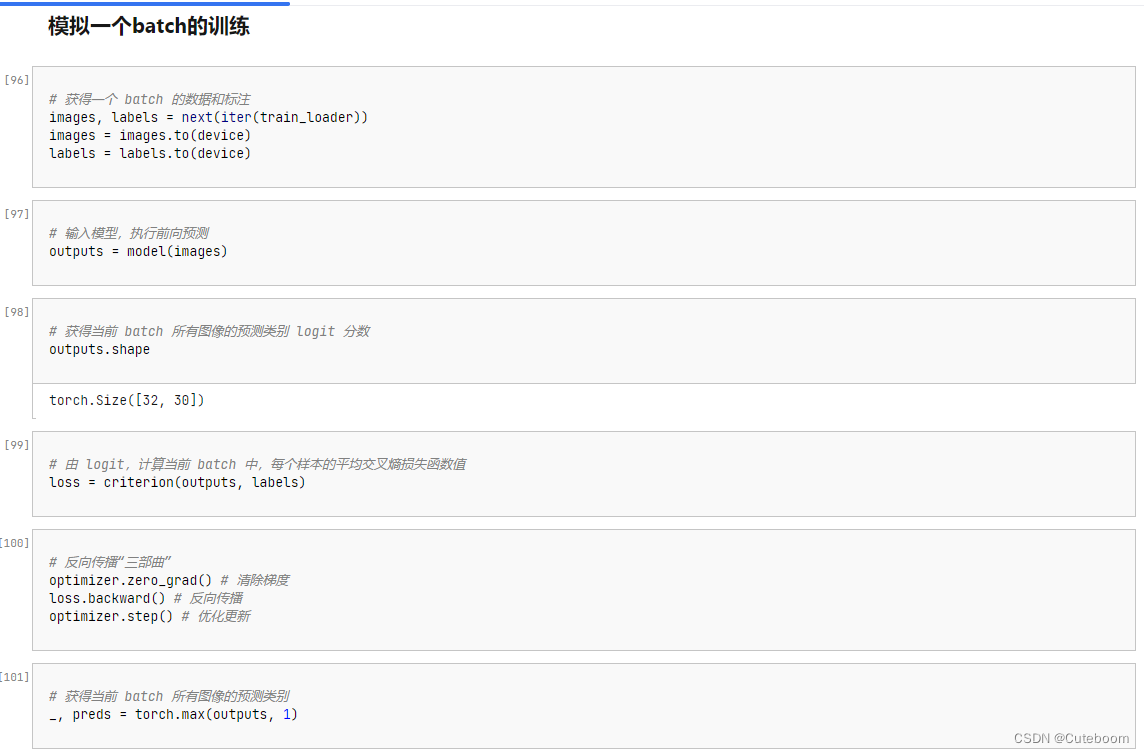

这里着重注意反向传播三部曲
- # 反向传播“三部曲”
- optimizer.zero_grad() # 清除梯度
- loss.backward() # 反向传播
- optimizer.step() # 优化更新
运行完整训练
- # 遍历每个 EPOCH
- for epoch in tqdm(range(EPOCHS)):
-
- model. Train() #每次开始前将模型设置为训练模式
-
- for images, labels in train_loader: # 获取训练集的一个 batch,包含数据和标注
- images = images.to(device)
- labels = labels.to(device)
-
- outputs = model(images) # 前向预测,获得当前 batch 的预测结果
- loss = criterion(outputs, labels) # 比较预测结果和标注,计算当前 batch 的交叉熵损失函数
-
- optimizer.zero_grad()
- loss.backward() # 损失函数对神经网络权重反向传播求梯度
- optimizer.step() # 优化更新神经网络权重
在测试集上进行初步测试
- model.eval() #模型设置为测试模式
- with torch.no_grad(): #不再回传梯度
- correct = 0
- total = 0
- for images, labels in tqdm(test_loader): # 获取测试集的一个 batch,包含数据和标注
- images = images.to(device)
- labels = labels.to(device)
- outputs = model(images) # 前向预测,获得当前 batch 的预测置信度
- _, preds = torch.max(outputs, 1) # 获得最大置信度对应的类别,作为预测结果
- total += labels.size(0)
- correct += (preds == labels).sum() # 预测正确样本个数,如果预测类别等于标注类别
-
- print('测试集上的准确率为 {:.3f} %'.format(100 * correct / total))
保存模型
torch.save(model, 'checkpoint/fruit30_pytorch_C1.pth')声明:本文内容由网友自发贡献,不代表【wpsshop博客】立场,版权归原作者所有,本站不承担相应法律责任。如您发现有侵权的内容,请联系我们。转载请注明出处:https://www.wpsshop.cn/article/detail/53254
推荐阅读
相关标签

