
热门标签
热门文章
- 1ChatGLM2-6B! 我跑通啦!本地部署+微调(windows系统)_我跑通了 chatglm windows
- 22019第十届蓝桥杯国赛C组C/C++第I题 胖子走迷宫_蓝桥杯 大胖子走迷宫
- 3【音视频原理】音频编解码原理 ① ( 声音特性 | 声音本质 | 声音频率 | 声音频率和响度本质分析 | 数字音频 |脉冲编码调制 PCM - 采样振幅值 | 奈奎斯特 Nyguist 采样定理 )
- 4机器学习系列(7):目标检测YOLO算法及Python实现以自动驾驶为例_yolo人脸检测python
- 5Dubbo 集群容错_dubbo集群容错
- 6跟着pink老师前端入门教程-day12
- 7iso安装器_封装一个windows10系统 ③常用软件安装,系统优化,系统封装
- 8Unity核心9——3D动画_unity动画
- 9The Coding Bootcamp Primer-一个免费的Web开发课程,可让您准备参加任何Bootcamp
- 10# [NOI2019] 斗主地 洛谷黑题题解
当前位置: article > 正文
Spring Boot: 定时任务注解@Scheduled以及动态任务SchedulingConfigurer 实践_@scheduled 动态
作者:数据科学创新者 | 2024-01-31 22:07:42
赞
踩
@scheduled 动态
简介
使用SpringBoot创建定时任务非常简单,目前主要有以下三种创建方式:
- 一、基于注解(@Scheduled)
- 二、基于接口(SchedulingConfigurer)
前者相信大家都很熟悉,但是实际使用中我们往往想从数据库中读取指定时间来动态执行定时任务,这时候基于接口的定时任务就派上用场了。 - 三、基于注解设定多线程定时任务
一、基于注解(@Scheduled)
使用SpringBoot基于注解来创建定时任务非常简单,只需几行代码便可完成。
@Component
@Configuration //主要用于标记配置类,兼备component的效果
@EnableScheduling  //开启定时任务
public class StaticScheduleTask {
    @Resource
    RealTimeMonitorServiceImpl realTimeMonitorService;

    //添加定时任务 4小时/4小时/4小时/
    @Scheduled(cron = "0 0 0/4 * * ?")
    private void configureTasks() {
        log.info("执行静态定时任务时间: " + LocalDateTime.now());

    }

}
- 1
- 2
- 3
- 4
- 5
- 6
- 7
- 8
- 9
- 10
- 11
- 12
- 13
- 14
- 15
cronExpression定义时间规则,Cron表达式由6或7个空格分隔的时间字段组成:秒 分钟 小时 日期 月份 星期 年(可选)
| 字段 | 允许值 | 允许的特殊字符 |
|---|---|---|
| 秒 | 0-59 | , - * / |
| 分 | 0-59 | , - * / |
| 小时 | 0-23 | , - * / |
| 日期 | 1-31 | , - * ? / L W C |
| 月份 | 1-12 | , - * / |
| 星期 | 1-7 | , - * ? / L C # |
| 年 | 1970-2099 | , - * / |
二、基于接口(SchedulingConfigurer)
1.Pom配置
<parent>
        <groupId>org.springframework.boot</groupId>
        <artifactId>spring-boot-starter</artifactId>
        <version>2.0.4.RELEASE</version>
    </parent>

    <dependencies>
        <dependency><!--添加Web依赖 -->
            <groupId>org.springframework.boot</groupId>
            <artifactId>spring-boot-starter-web</artifactId>
        </dependency>
        <dependency><!--添加MySql依赖 -->
             <groupId>mysql</groupId>
            <artifactId>mysql-connector-java</artifactId>
        </dependency>
        <dependency><!--添加Mybatis依赖 配置mybatis的一些初始化的东西-->
            <groupId>org.mybatis.spring.boot</groupId>
            <artifactId>mybatis-spring-boot-starter</artifactId>
            <version>1.3.1</version>
        </dependency>
        <dependency><!-- 添加mybatis依赖 -->
            <groupId>org.mybatis</groupId>
            <artifactId>mybatis</artifactId>
            <version>3.4.5</version>
            <scope>compile</scope>
        </dependency>
    </dependencies>

- 1
- 2
- 3
- 4
- 5
- 6
- 7
- 8
- 9
- 10
- 11
- 12
- 13
- 14
- 15
- 16
- 17
- 18
- 19
- 20
- 21
- 22
- 23
- 24
- 25
- 26
- 27
2.添加数据库记录, 开启本地数据库mysql,随便打开查询窗口,然后执行脚本内容,如下
DROP DATABASE IF EXISTS `socks`;
CREATE DATABASE `socks`;
USE `SOCKS`;
DROP TABLE IF EXISTS `cron`;
CREATE TABLE `cron`  (
  `cron_id` varchar(30) NOT NULL PRIMARY KEY,
  `cron` varchar(30) NOT NULL
);
INSERT INTO `cron` VALUES ('1', '0/5 * * * * ?');
- 1
- 2
- 3
- 4
- 5
- 6
- 7
- 8
- 9
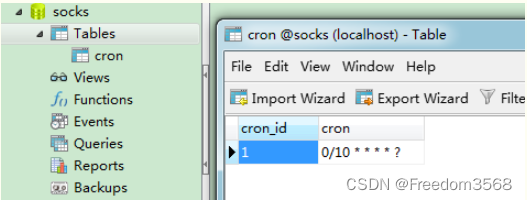
数据库截图:
3.Application.yml 配置
spring:
  datasource:
    url: jdbc:mysql://localhost:3306/socks
    username: root
    password: 123456
- 1
- 2
- 3
- 4
- 5
4.创建定时器
数据库准备好数据之后,我们编写定时任务,注意这里添加的是TriggerTask,目的是循环读取我们在数据库设置好的执行周期,以及执行相关定时任务的内容。
@Component
@Configuration      //1.主要用于标记配置类,兼备Component的效果。
@EnableScheduling   // 2.开启定时任务
public class DynamicScheduleTask implements SchedulingConfigurer {

    @Mapper
    public interface CronMapper {
        @Select("select cron from cron limit 1")
        public String getCron();
    }

    @Autowired      //注入mapper
    @SuppressWarnings("all")
    CronMapper cronMapper;

    /**
     * 执行定时任务.
     */
    @Override
    public void configureTasks(ScheduledTaskRegistrar taskRegistrar) {

        taskRegistrar.addTriggerTask(
                //1.添加任务内容(Runnable)
                () -> System.out.println("执行动态定时任务: " + LocalDateTime.now().toLocalTime()),
                //2.设置执行周期(Trigger)
                triggerContext -> {
                    //2.1 从数据库获取执行周期
                    String cron = cronMapper.getCron();
                    //2.2 合法性校验.
                    if (StringUtils.isEmpty(cron)) {
                        // Omitted Code ..
                    }
                    //2.3 返回执行周期(Date)
                    return new CronTrigger(cron).nextExecutionTime(triggerContext);
                }
        );
    }

}
- 1
- 2
- 3
- 4
- 5
- 6
- 7
- 8
- 9
- 10
- 11
- 12
- 13
- 14
- 15
- 16
- 17
- 18
- 19
- 20
- 21
- 22
- 23
- 24
- 25
- 26
- 27
- 28
- 29
- 30
- 31
- 32
- 33
- 34
- 35
- 36
- 37
- 38
- 39
5.测试
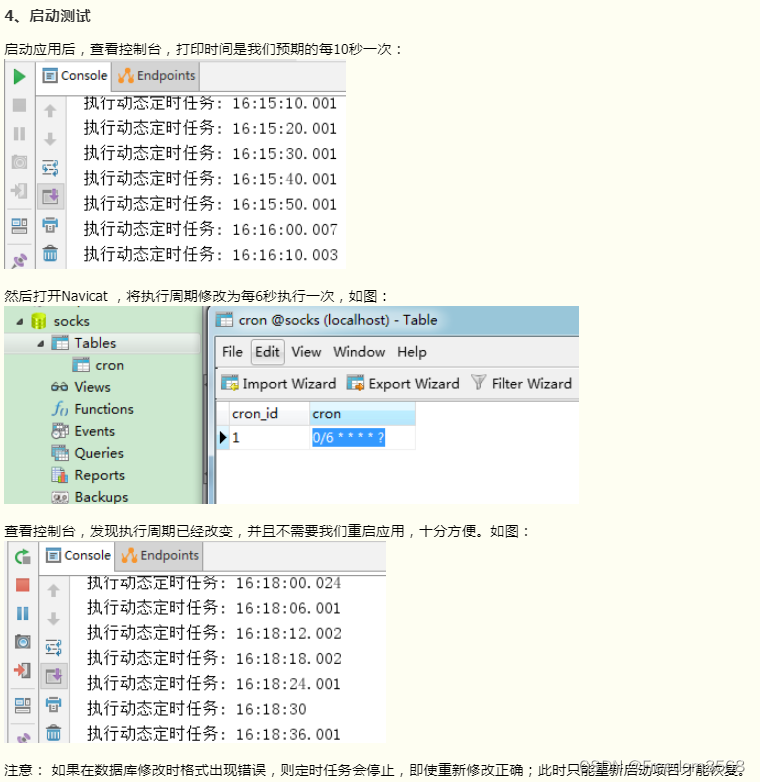
多线程定时任务
基于注解设定多线程定时任务
//@Component注解用于对那些比较中立的类进行注释;
//相对与在持久层、业务层和控制层分别采用 @Repository、@Service 和 @Controller 对分层中的类进行注释
@Component
@EnableScheduling   // 1.开启定时任务
@EnableAsync        // 2.开启多线程
public class MultithreadScheduleTask {

        @Async
        @Scheduled(fixedDelay = 1000)  //间隔1秒
        public void first() throws InterruptedException {
            System.out.println("第一个定时任务开始 : " + LocalDateTime.now().toLocalTime() + "\r\n线程 : " + Thread.currentThread().getName());
            System.out.println();
            Thread.sleep(1000 * 10);
        }

        @Async
        @Scheduled(fixedDelay = 2000)
        public void second() {
            System.out.println("第二个定时任务开始 : " + LocalDateTime.now().toLocalTime() + "\r\n线程 : " + Thread.currentThread().getName());
            System.out.println();
        }
    }
- 1
- 2
- 3
- 4
- 5
- 6
- 7
- 8
- 9
- 10
- 11
- 12
- 13
- 14
- 15
- 16
- 17
- 18
- 19
- 20
- 21
- 22

总结
其他: https://github.com/mmzsblog/springboot-schedule
声明:本文内容由网友自发贡献,不代表【wpsshop博客】立场,版权归原作者所有,本站不承担相应法律责任。如您发现有侵权的内容,请联系我们。转载请注明出处:https://www.wpsshop.cn/article/detail/52294
推荐阅读
相关标签

