
热门标签
热门文章
- 1Educational Codeforces Round 161 (Rated for Div. 2)补题
- 2SpringBoot - @InitBinder注解详解
- 3我的wsl不见了_wsl突然找不到了
- 4MYSQL之错误代码----mysql错误代码与JAVA实现
- 5Ubuntu 20.04 ROS Noetic及Realsense-ROS的安装和多机通信_noetic realsense
- 6JAVA开发(AOP之ProceedingJoinPoint)_proceedingjoinpoint 获取参数
- 7【硬核】源码 + 案例分享 JDK8 新特性中的四大函数式接口_jdk8四大函数
- 8美团BERT的探索和实践 | CSDN原力计划
- 9力扣 707. 设计链表_力扣 设计链表
- 10opencv学习 特征提取
当前位置: article > 正文
(十六)完整的模型验证套路_模型resize操作
作者:思考机器 | 2024-01-31 20:03:30
赞
踩
模型resize操作
【声明】来源b站视频小土堆PyTorch深度学习快速入门教程(绝对通俗易懂!)【小土堆】_哔哩哔哩_bilibili
测试/demo
套路:利用及已经训练好的模型,给它提供输入
模型是在谷歌的gpu上训练好的,精度为60多,这边直接加载

test.py
- import torch
- from PIL import Image
- import torchvision
- import torch.nn as nn
-
- img_path = "./data/cat.png" #图片路径
- image = Image.open(img_path) #读取图片,把图片转换为PIL类型
- #png格式是4通道,RGB+透明通道
- image = image.convert('RGB') #保留颜色通道,如果图片本来就是三个通道,经过此操作,不变,加上这一步,可以适应png,jpg各种格式的图片
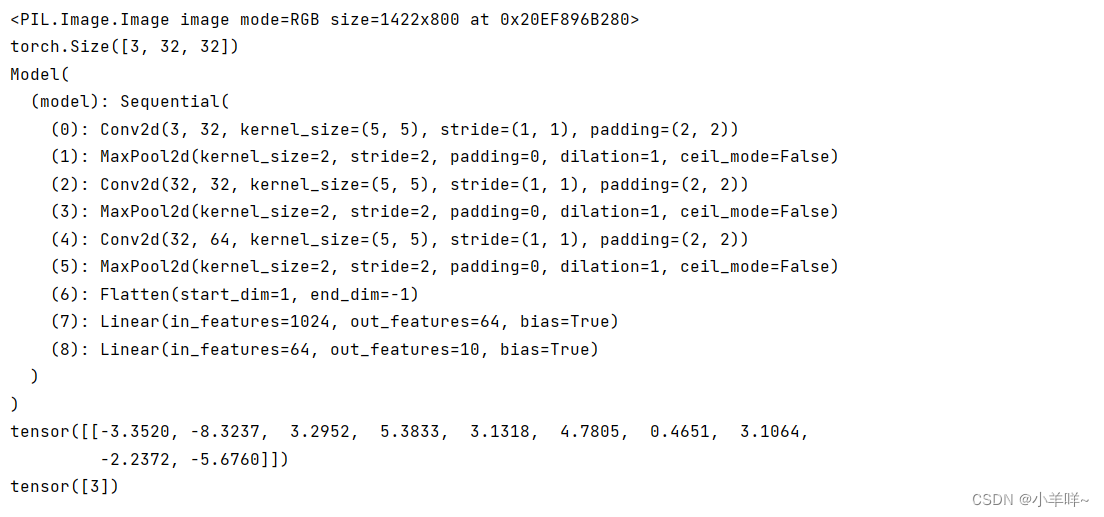
- print(image)
-
- transform = torchvision.transforms.Compose([
- torchvision.transforms.Resize((32,32)), #把图片进行resize
- torchvision.transforms.ToTensor() #转换为Tensor
- ])
- image = transform(image)
- print(image.shape)
-
- # 搭建神经网络
- class Model(nn.Module):
- def __init__(self) -> None:
- super().__init__()
- self.model = nn.Sequential(
- nn.Conv2d(3, 32, 5, 1, 2),
- nn.MaxPool2d(2),
- nn.Conv2d(32, 32, 5, 1, 2),
- nn.MaxPool2d(2),
- nn.Conv2d(32, 64, 5, 1, 2),
- nn.MaxPool2d(2),
- nn.Flatten(),
- nn.Linear(64*4*4, 64),
- nn.Linear(64, 10)
- )
- def forward(self, input):
- input = self.model(input)
- return input
-
- model = torch.load("./data/mymodel_train_goole29.pth",map_location=torch.device('cpu'))
- print(model)
- image = torch.reshape(image,(1,3,32,32))
- model.eval() #把模型转换为测试类型
- with torch.no_grad(): #没有梯度
- output =model(image)
- print(output) # tensor([[-1.4594, 0.5749, 0.6508, 0.7668, 0.8262, 0.8882, 1.1195, 0.5799,
- # -1.7798, -0.3695]])
- print(output.argmax(1)) #预测类别 tensor([6])

结果
声明:本文内容由网友自发贡献,不代表【wpsshop博客】立场,版权归原作者所有,本站不承担相应法律责任。如您发现有侵权的内容,请联系我们。转载请注明出处:https://www.wpsshop.cn/article/detail/51931
推荐阅读
相关标签

