
热门标签
热门文章
- 1【“云计算”的初识,从无到有的第一步积累】_公有云是指外部客户提供服务的云
- 2C/C++字符串查找函数_c 字符串 查找
- 3传统文化网站设计_中国传统文化主题网页设计
- 4CVPR2020论文列表(中英对照)_perception consistency ultrasound image super-reso
- 5c语言指针的赋值求职和取值,c语言与指针——(二)指针变量的定义与赋值
- 6使用python对电力故障录波数据进行滤波再分析_./work/csv/fft_test.csv
- 7VScode 运行编译 + 调试 C/C++,详细教程!!_vscode 编译器了,怎么改
- 8Java面试题(全)
- 9网络工程师就是网管?网工版「10万个为什么」,快拿来吧你!_网络工程难度排名
- 10java list获取最后一个元素的值,Java获取集合的最后一个元素
当前位置: article > 正文
zabbix自定义监控_userparameter=check_lvs[*],python /etc/zabbix/scri
作者:思考机器5 | 2024-01-30 20:26:46
赞
踩
userparameter=check_lvs[*],python /etc/zabbix/script/check_lvs.py $1
自定义监控进程
- 写脚本,脚本放在统一位置
- 修改被监控机zabbix_agentd.conf配置文件
UnxsafeParameters=1
UnserParameter=<key>,<command> - 重启zabbix_agent
- 在web界面配置监控项和触发器
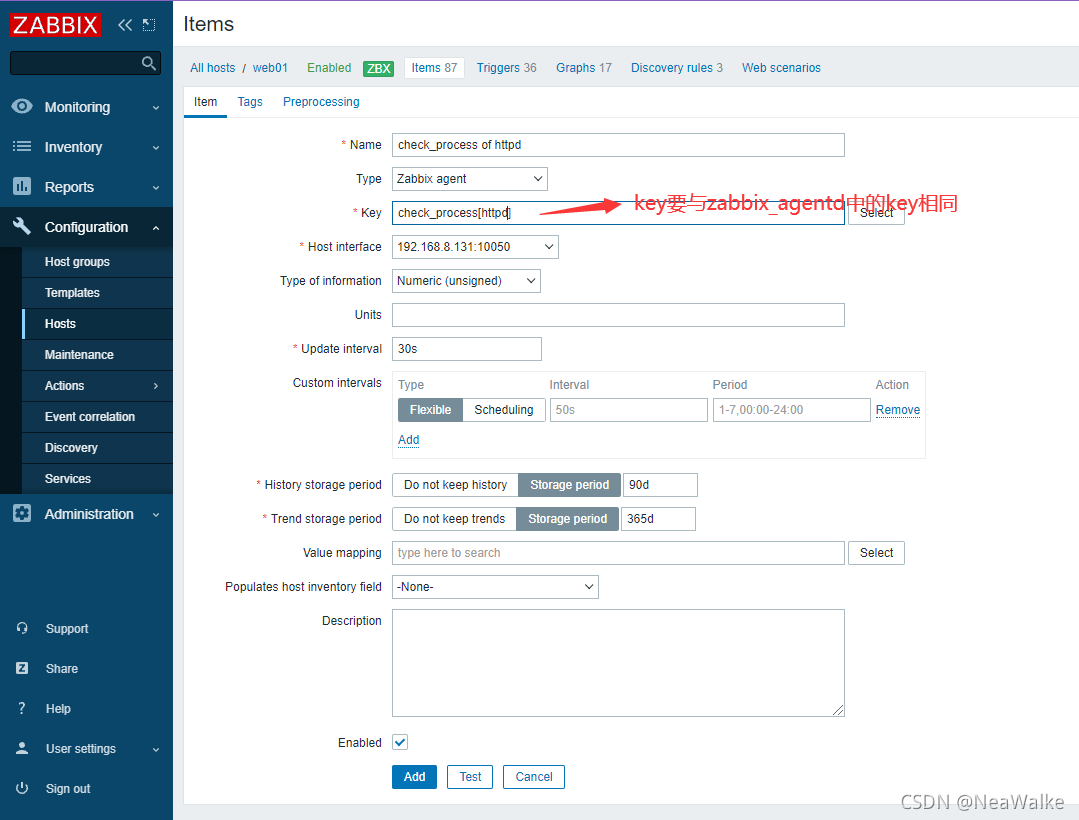
修改客户端zabbix_agentd文件zabbix_agentd.conf
[root@localhost etc]# vim zabbix_agentd.conf
UnsafeUserParameters=1 #默认为0。修改为1,打开自定义监控功能
······
UserParameter=check_process[*],/script/check_process.sh $1

#重启zabbix
[root@localhost etc]# pkill zabbix
[root@localhost etc]# zabbix_agentd

#写自定义监控脚本
[root@localhost scripts]# cat check_process.sh
#!/bin/bash

count=$(ps -ef | grep -Ev "grep|$0" | grep -c "$1")
if [ $count -eq 0 ];then
    echo '1'
else
    echo '0'
fi

#在服务端查看配置文件是否存在问题
[root@server ~]# zabbix_get -s 192.168.8.131 -k check_process[httpd]

- 1
- 2
- 3
- 4
- 5
- 6
- 7
- 8
- 9
- 10
- 11
- 12
- 13
- 14
- 15
- 16
- 17
- 18
- 19
- 20
- 21
- 22
配置监控项
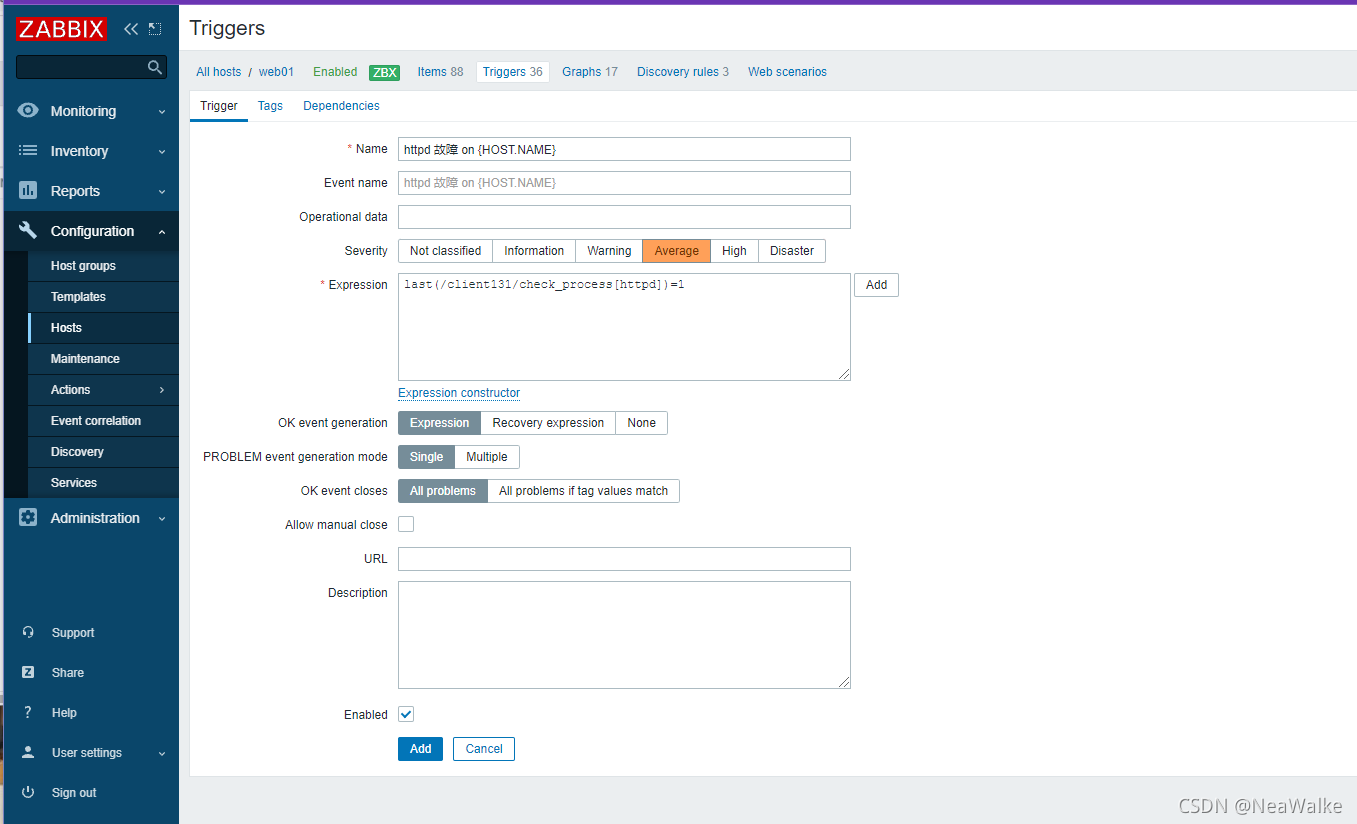
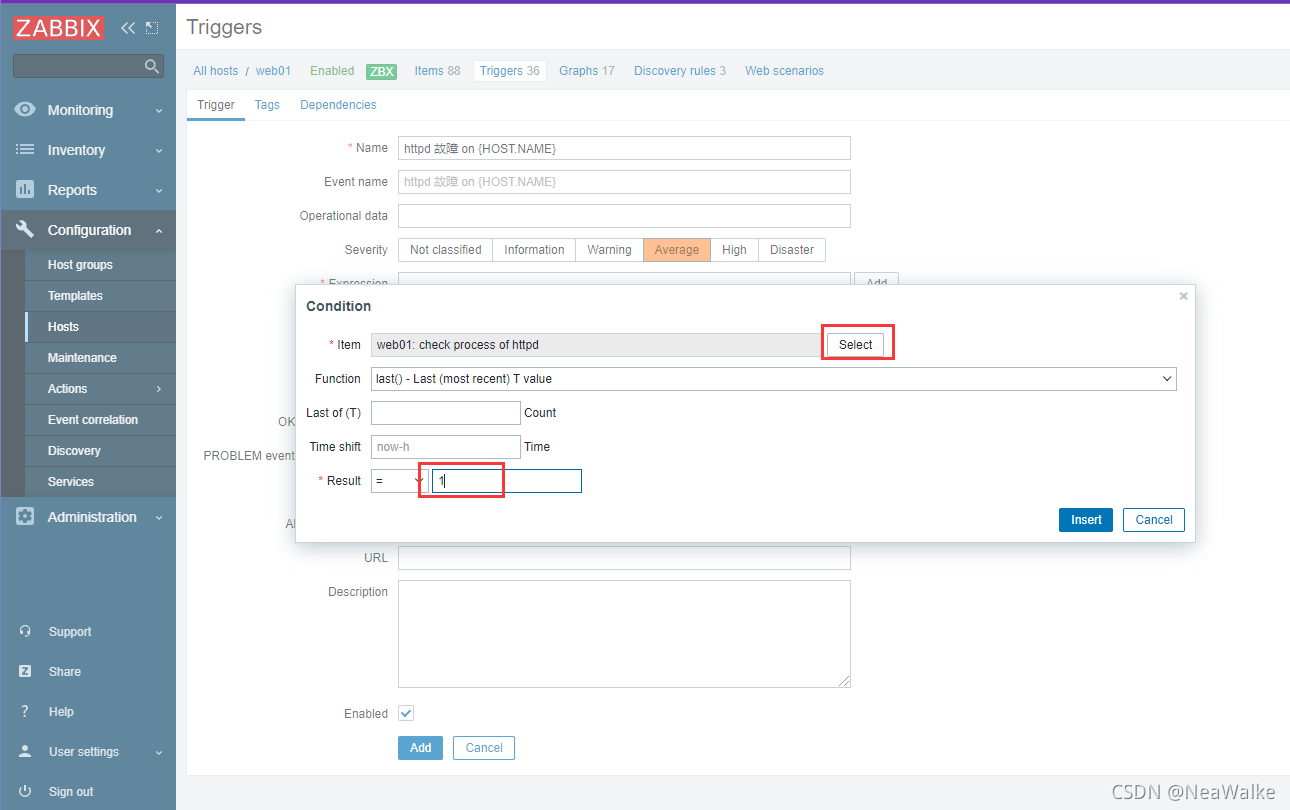
添加触发器
自定义监控日志
- 写脚本,脚本放在统一位置
- 修改被监控机zabbix_agentd.conf配置文件
UnxsafeParameters=1
UnserParameter=<key>,<command> - 重启zabbix_agent
- 在web界面配置监控项和触发器
#日志脚本
#!/usr/bin/env python3
import sys
import re

def prePos(seekfile):
    global curpos
    try:
        cf = open(seekfile)
    except IOError:
        curpos = 0
        return curpos
    except FileNotFoundError:
        curpos = 0
        return curpos
    else:
        try:
            curpos = int(cf.readline().strip())
        except ValueError:
            curpos = 0
            cf.close()
            return curpos
        cf.close()
    return curpos

def lastPos(filename):
    with open(filename) as lfile:
        if lfile.readline():
            lfile.seek(0,2)
        else:
            return 0
        lastPos = lfile.tell()
    return lastPos

def getSeekFile():
    try:
        seekfile = sys.argv[2]
    except IndexError:
        seekfile = '/tmp/logseek'
    return seekfile

def getKey():
    try:
        tagKey = str(sys.argv[3])
    except IndexError:
        tagKey = 'Error'
    return tagKey

def getResult(filename,seekfile,tagkey):
    destPos = prePos(seekfile)
    curPos = lastPos(filename)

    if curPos < destPos:
        curpos = 0

    try:
        f = open(filename)
    except IOError:
        print('Could not open file: %s' % filename)
    except FileNotFoundError:
        print('Could not open file: %s' % filename)
    else:
        f.seek(destPos)

        while curPos != 0 and f.tell() < curPos:
            rresult = f.readline().strip()
            global result
            if re.search(tagkey, rresult):
                result = 1
                break
            else:
                result = 0

        with open(seekfile,'w') as sf:
            sf.write(str(curPos))
    finally:
        f.close()
    return result

if __name__ == "__main__":
    result = 0
    curpos = 0
    tagkey = getKey()
    seekfile = getSeekFile()
    result = getResult(sys.argv[1],seekfile,tagkey)
    print(result)
- 1
- 2
- 3
- 4
- 5
- 6
- 7
- 8
- 9
- 10
- 11
- 12
- 13
- 14
- 15
- 16
- 17
- 18
- 19
- 20
- 21
- 22
- 23
- 24
- 25
- 26
- 27
- 28
- 29
- 30
- 31
- 32
- 33
- 34
- 35
- 36
- 37
- 38
- 39
- 40
- 41
- 42
- 43
- 44
- 45
- 46
- 47
- 48
- 49
- 50
- 51
- 52
- 53
- 54
- 55
- 56
- 57
- 58
- 59
- 60
- 61
- 62
- 63
- 64
- 65
- 66
- 67
- 68
- 69
- 70
- 71
- 72
- 73
- 74
- 75
- 76
- 77
- 78
- 79
- 80
- 81
- 82
- 83
- 84
- 85
- 86
- 87
log.py作用:检查日志文件中是否有指定的关键字
第一个参数为日志文件名(必须有,相对路径、绝对路径均可)
第二个参数为seek position文件的路径(可选项,若不设置则默认为/tmp/logseek文件,相对路径、绝对路径均可)
第三个参数为搜索关键字,默认为Error
#执行脚本需安装python
[root@localhost scripts]# yum -y install python3

#修改文件
[root@localhost etc]# vim zabbix_agentd.conf
UserParameter=check_log[*],/scripts/log.py $1 $2 $3

[root@localhost etc]# pkill zabbix
[root@localhost etc]# zabbix_agentd

#修改文件权限
[root@localhost ~]# chmod 755 /var/log/httpd/
- 1
- 2
- 3
- 4
- 5
- 6
- 7
- 8
- 9
- 10
- 11
- 12
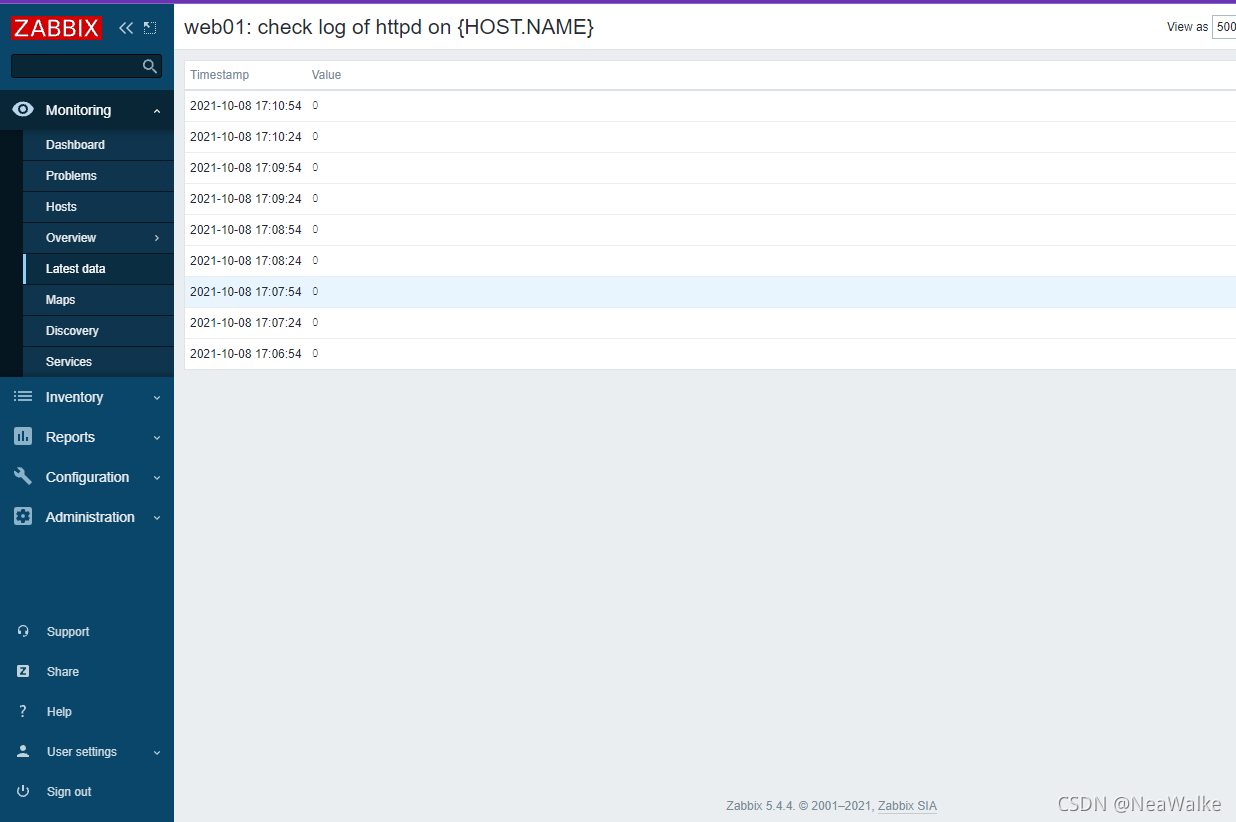
配置监控项
添加触发器
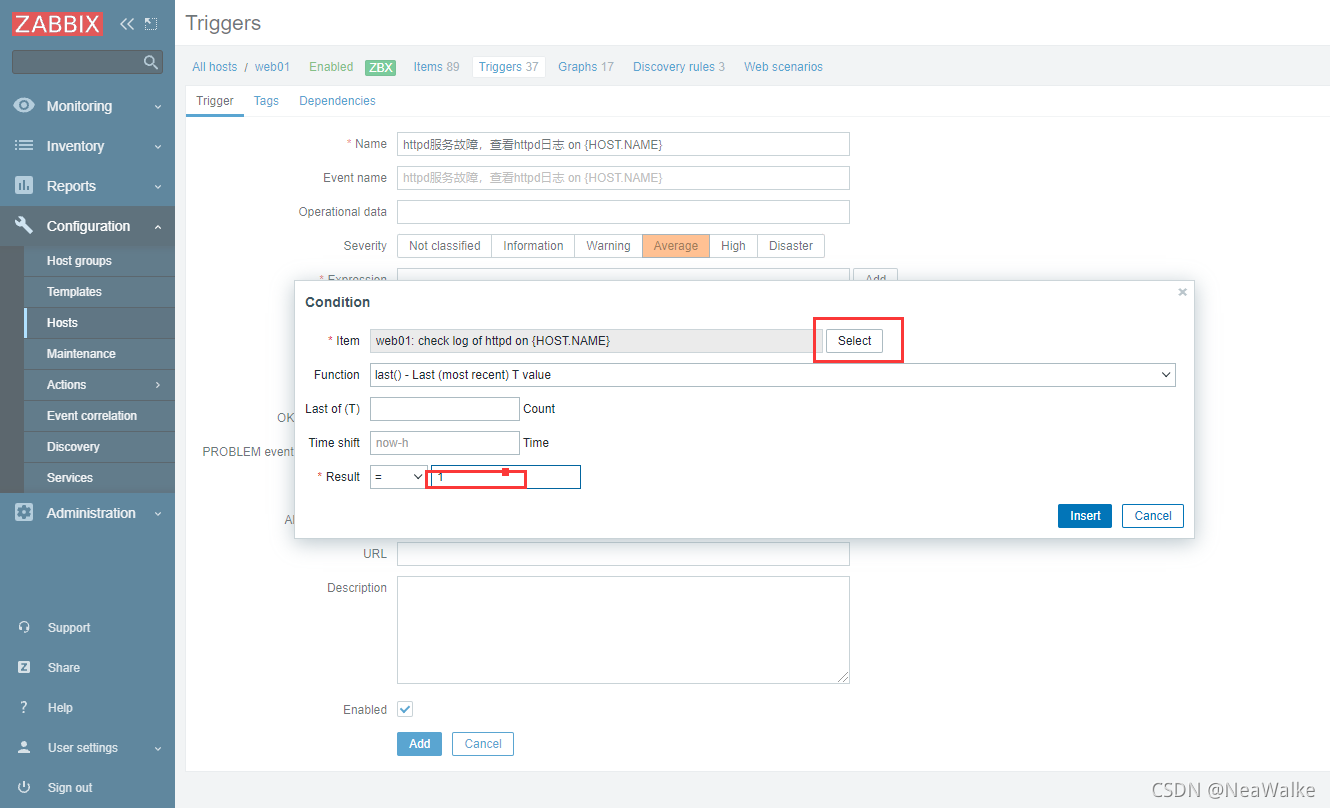
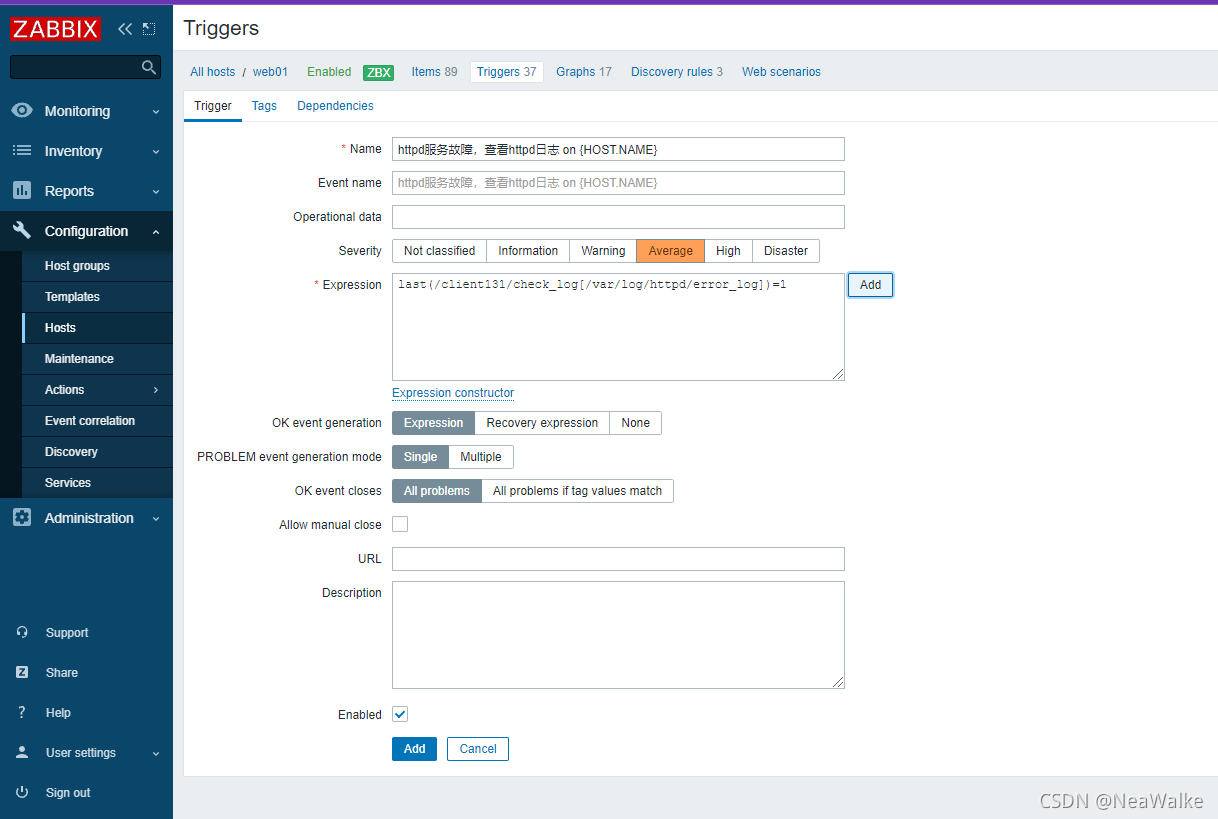
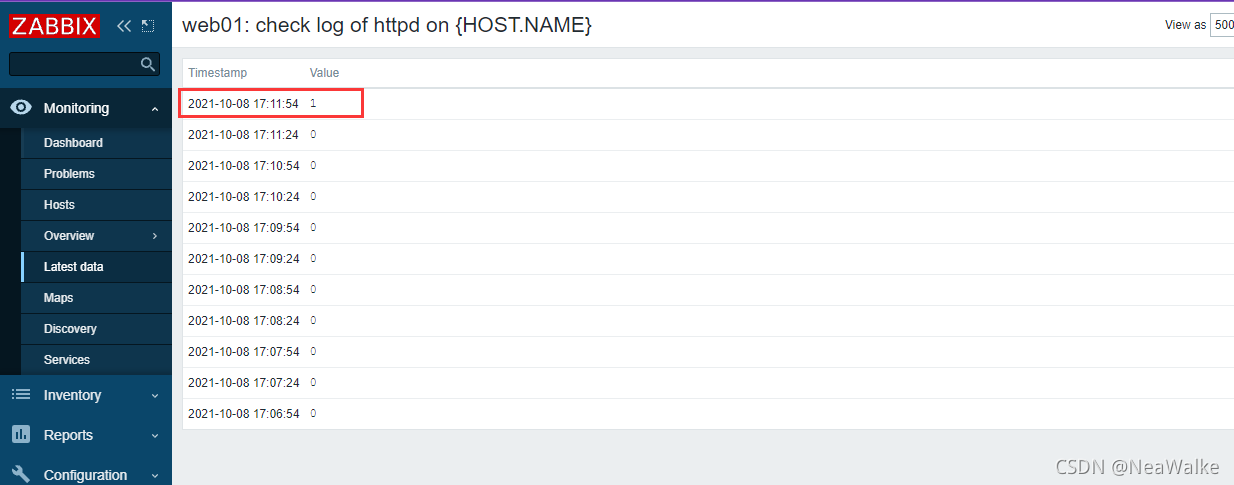
#写入错误
[root@localhost ~]# echo "Error" >> /var/log/httpd/error_log
- 1
- 2
自定义监控mysql主从
- 写脚本,脚本放在统一位置
- 修改被监控机zabbix_agentd.conf配置文件
UnxsafeParameters=1
UnserParameter=<key>,<command> - 重启zabbix_agent
- 在web界面配置监控项和触发器
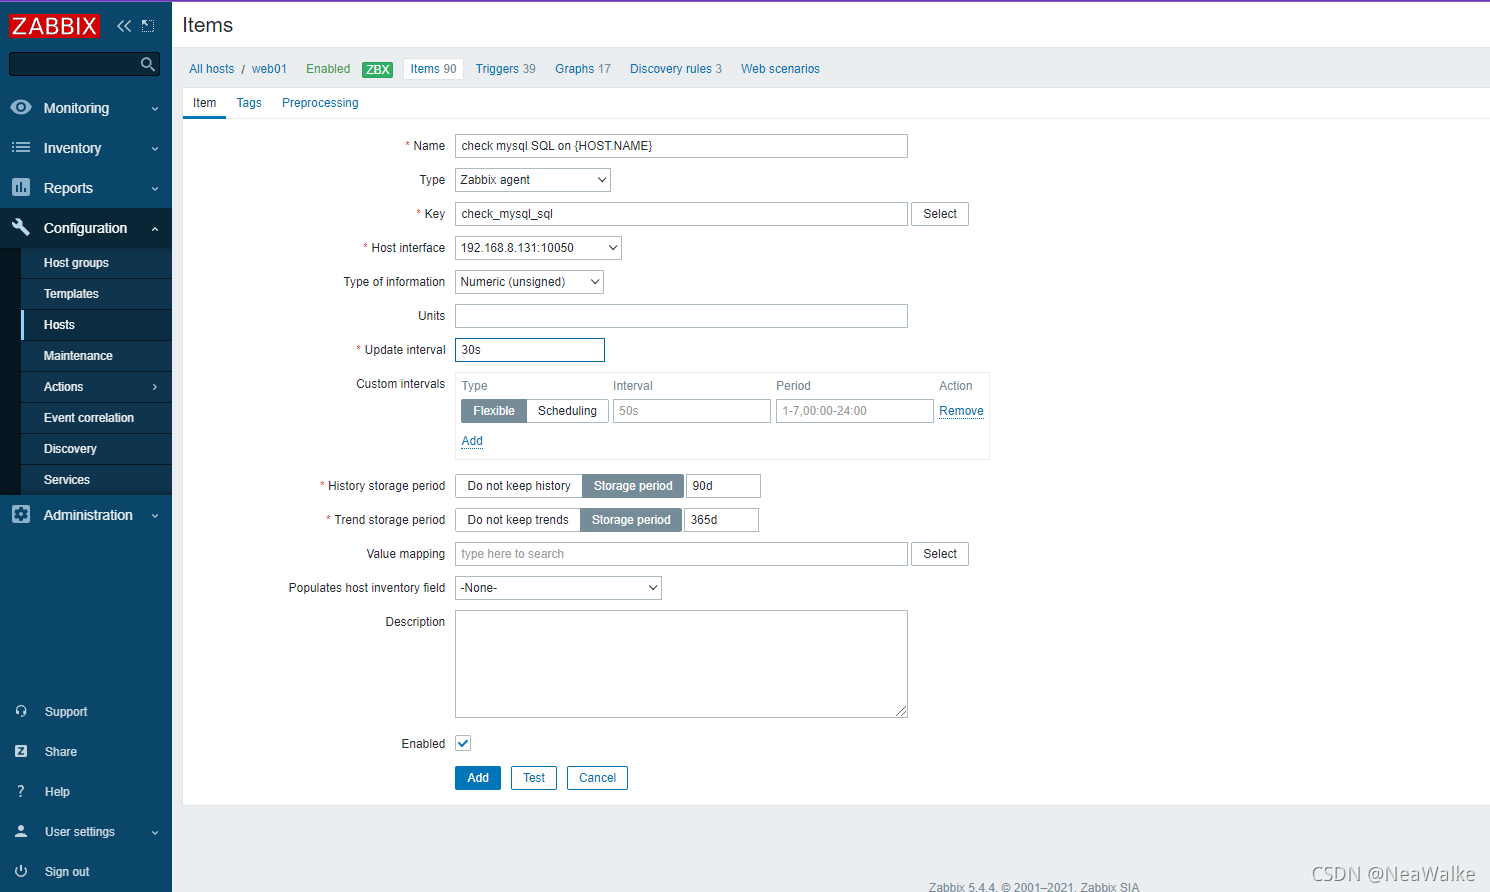
#在家目录下写存放数据库密码文件
[root@localhost ] vim /scripts/.password
[client]
user=root
password=123

#编写脚本
[root@localhost scripts]# vim mysql_io.sh
#!/bin/bash

IO=$(mysql --defaults-file=/scripts/.password  -e"show slave status\G;"  | grep Slave_IO_Running: | awk   '{print $2}')
if [ $IO == "Yes" ];then
    echo "0"
else
    echo "1"
fi

[root@localhost scripts]# cat mysql_sql.sh
#!/bin/bash

SQL=$(mysql --defaults-file=/scripts/.password  -e"show slave status\G;"  | grep Slave_SQL_Running: | awk   '{print $2}')
if [ $SQL == 'Yes' ];then
    echo "0"
else
    echo "1"
fi

# 修改zabbix_agentd文件
[root@localhost scripts]# vim /usr/local/etc/zabbix_agentd.conf
UserParameter=check_mysql_io,/scripts/mysql_io.sh
UserParameter=check_mysql_sql,/scripts/mysql_sql.sh

#重启服务
[root@localhost etc]# pkill zabbix
[root@localhost etc]# zabbix_agentd

#在服务端上查看
[root@server ~]# zabbix_get -s 192.168.8.131 -k check_mysql_io
0
[root@server ~]# zabbix_get -s 192.168.8.131 -k check_mysql_sql
0
- 1
- 2
- 3
- 4
- 5
- 6
- 7
- 8
- 9
- 10
- 11
- 12
- 13
- 14
- 15
- 16
- 17
- 18
- 19
- 20
- 21
- 22
- 23
- 24
- 25
- 26
- 27
- 28
- 29
- 30
- 31
- 32
- 33
- 34
- 35
- 36
- 37
- 38
- 39
- 40
- 41
- 42
- 43
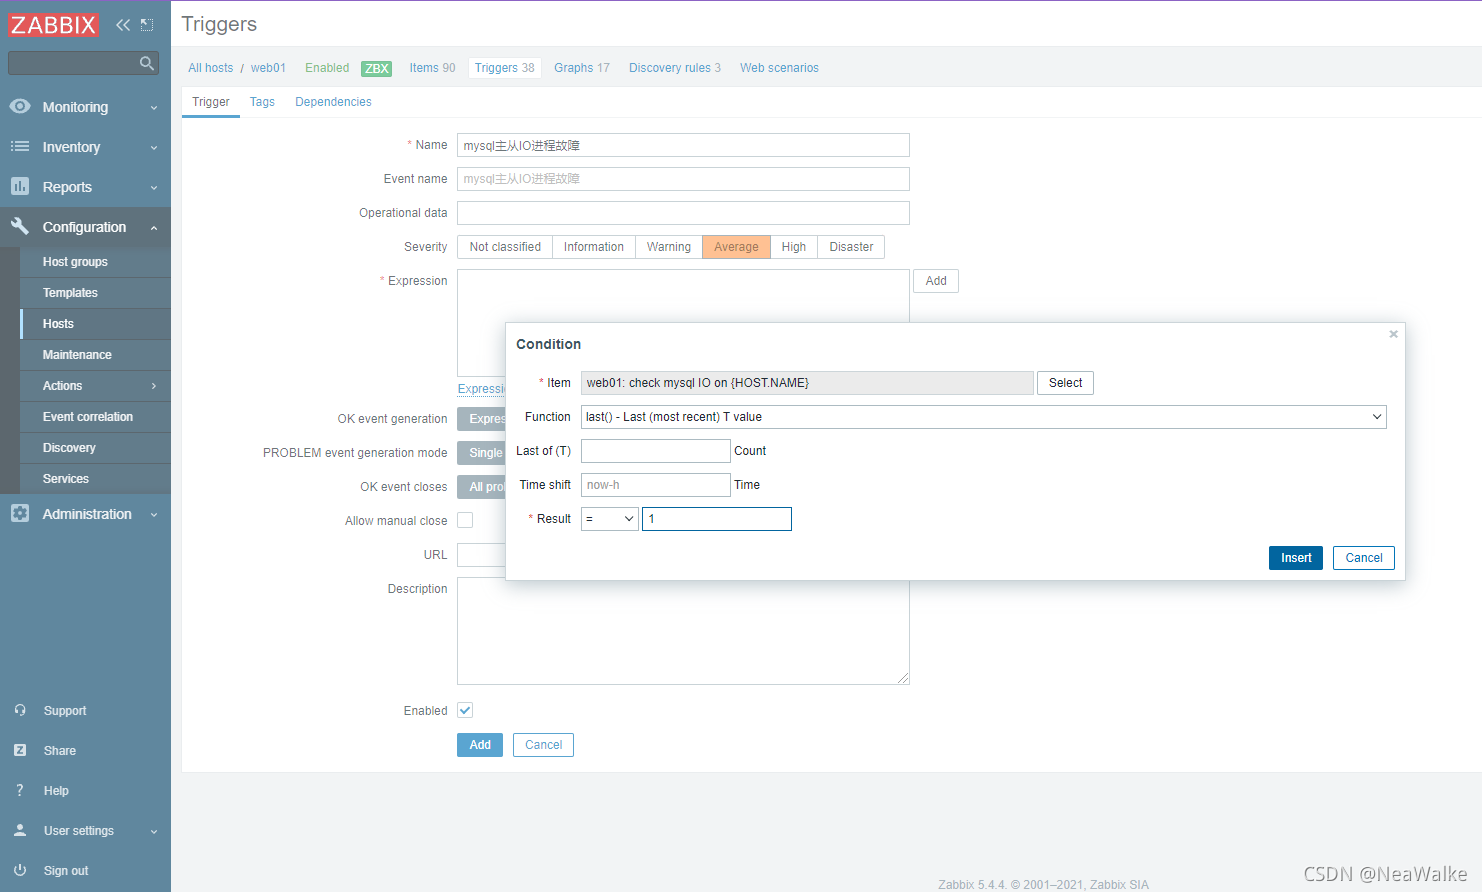
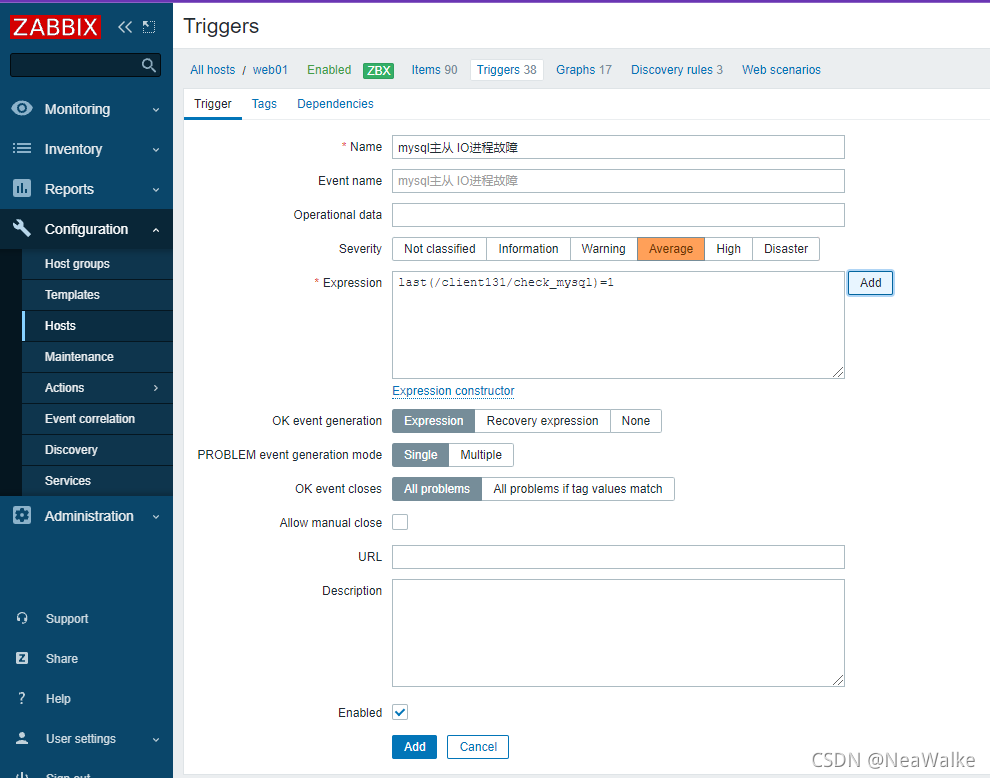
监控IO进程
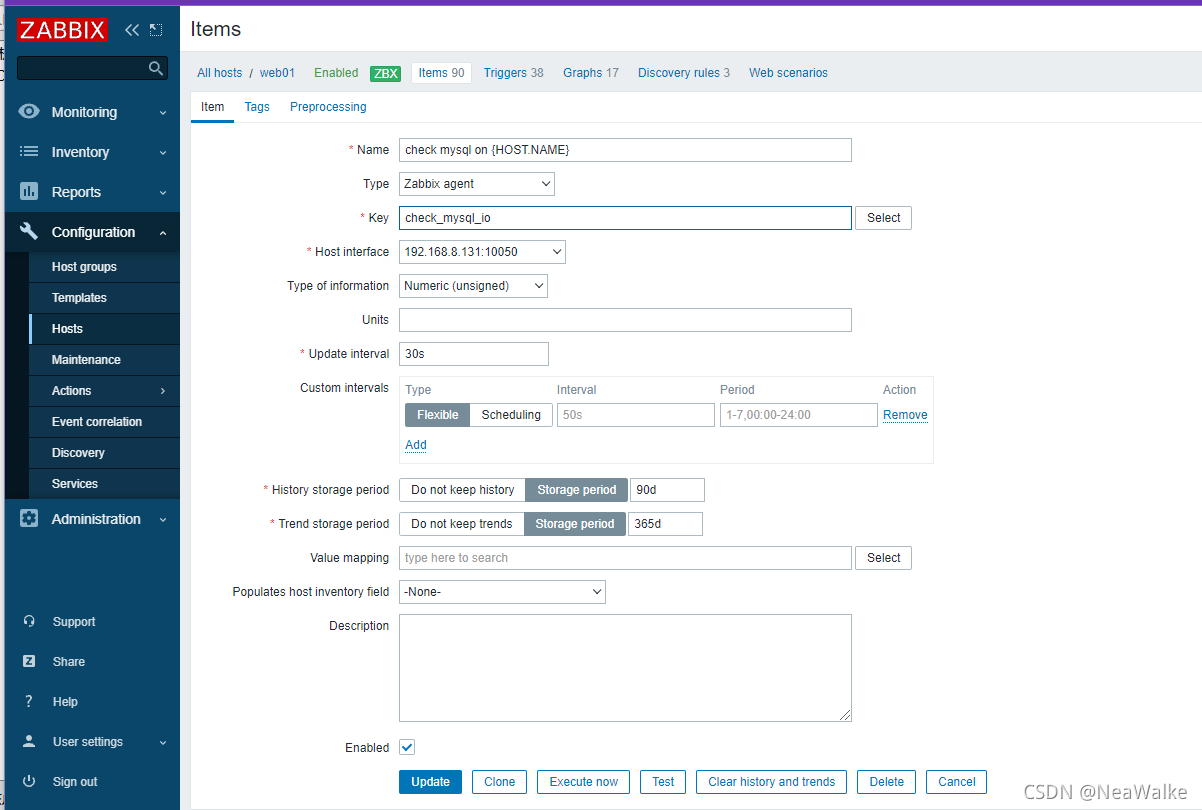

监控SQL进程


#关闭主从同步
[root@localhost scripts]# mysql -uroot -p12
mysql> stop slave
    -> ;
Query OK, 0 rows affected (0.00 sec)

mysql> reset slave;
Query OK, 0 rows affected (0.01 sec)

mysql> show slave status\G;
*************************** 1. row ***************************
               Slave_IO_State:
                  Master_Host: 192.168.8.129
                  Master_User: repl
                  Master_Port: 3306
                Connect_Retry: 60
              Master_Log_File:
          Read_Master_Log_Pos: 4
               Relay_Log_File: mysql_relay-bin.000001
                Relay_Log_Pos: 4
        Relay_Master_Log_File:
             Slave_IO_Running: No
            Slave_SQL_Running: No
- 1
- 2
- 3
- 4
- 5
- 6
- 7
- 8
- 9
- 10
- 11
- 12
- 13
- 14
- 15
- 16
- 17
- 18
- 19
- 20
- 21
- 22
- 23
- 24
mysql主从延迟
- 写脚本,脚本放在统一位置
- 修改被监控机zabbix_agentd.conf配置文件
UnxsafeParameters=1
UnserParameter=<key>,<command> - 重启zabbix_agent
- 在web界面配置监控项和触发器
#脚本
[root@localhost scripts]# cat mysql_behind.sh
#!/bin/bash

delay=$(mysql --defaults-file=/scripts/.password  -e"show slave status\G;"  | grep Behind | awk   '{print $2}')
if [ $delay -eq 0 ];then
    echo '0'
else
    echo '1'
fi

#
- 1
- 2
- 3
- 4
- 5
- 6
- 7
- 8
- 9
- 10
- 11
- 12
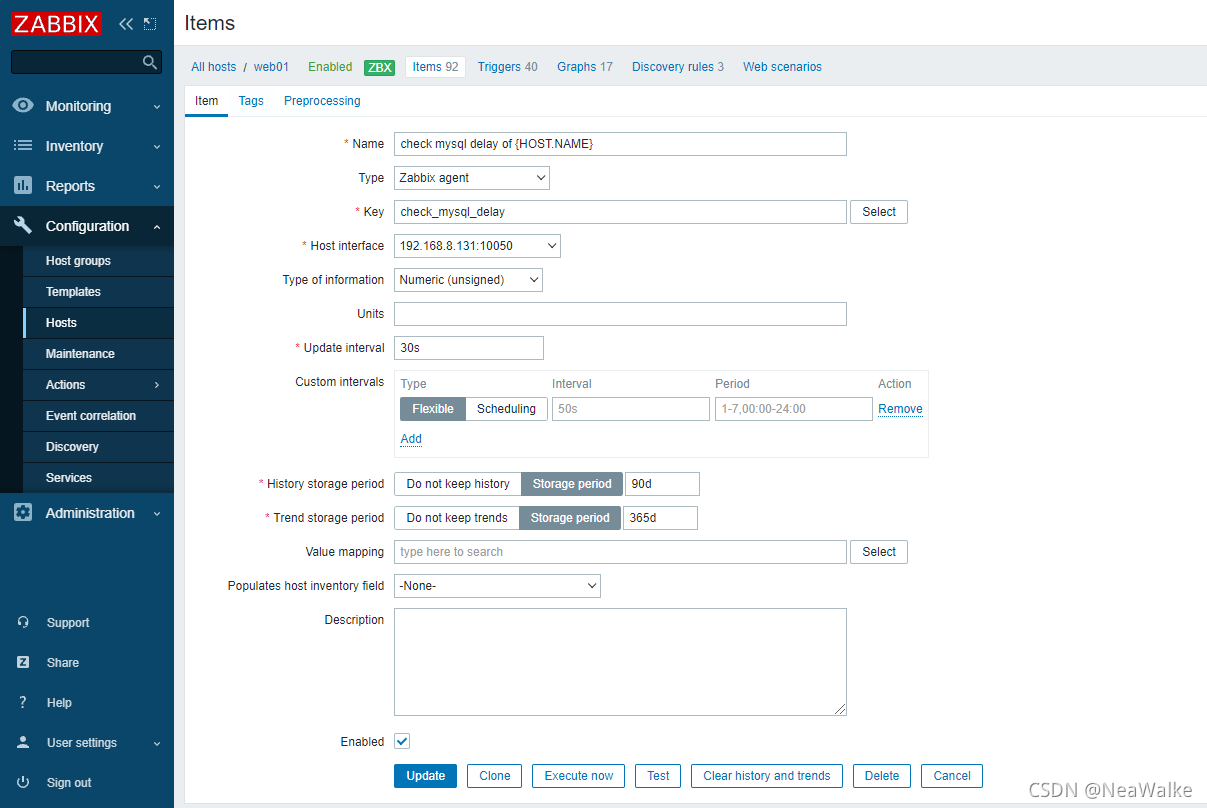
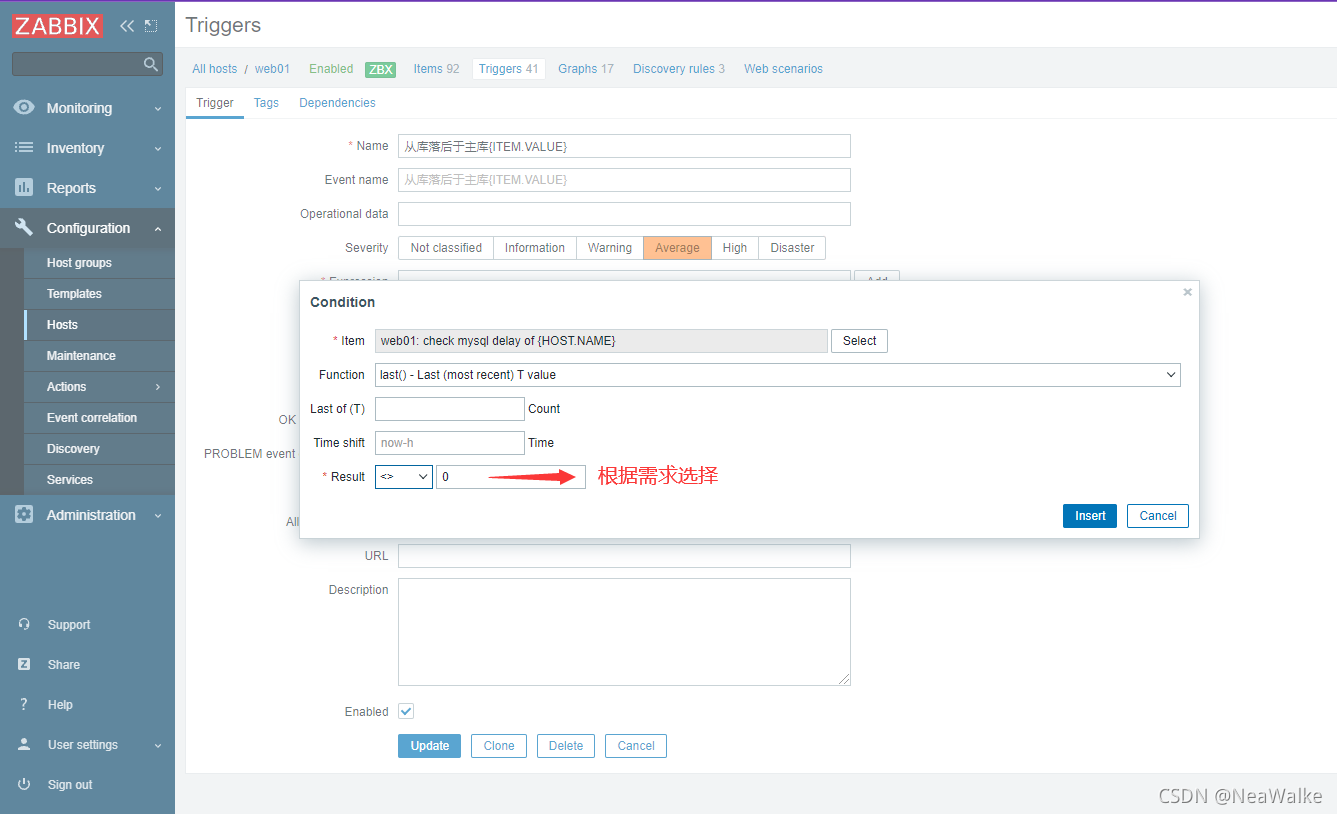
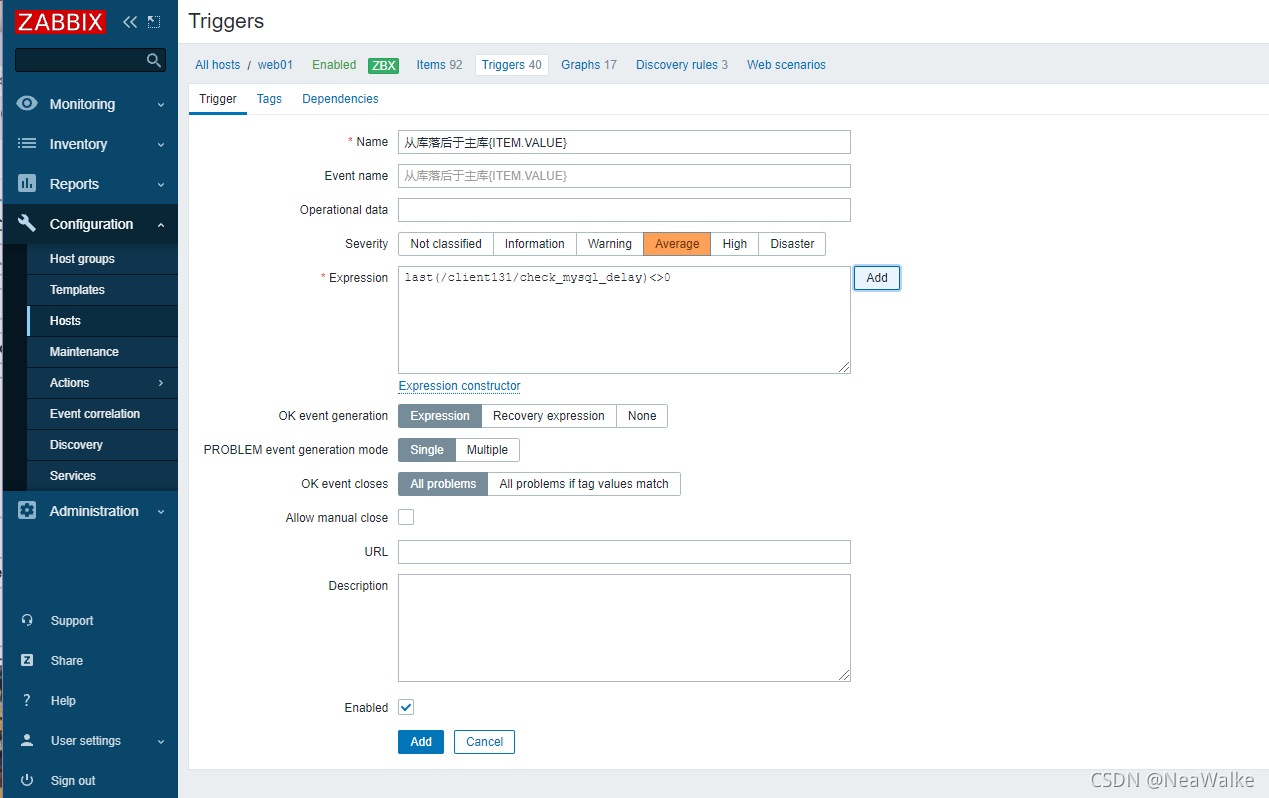
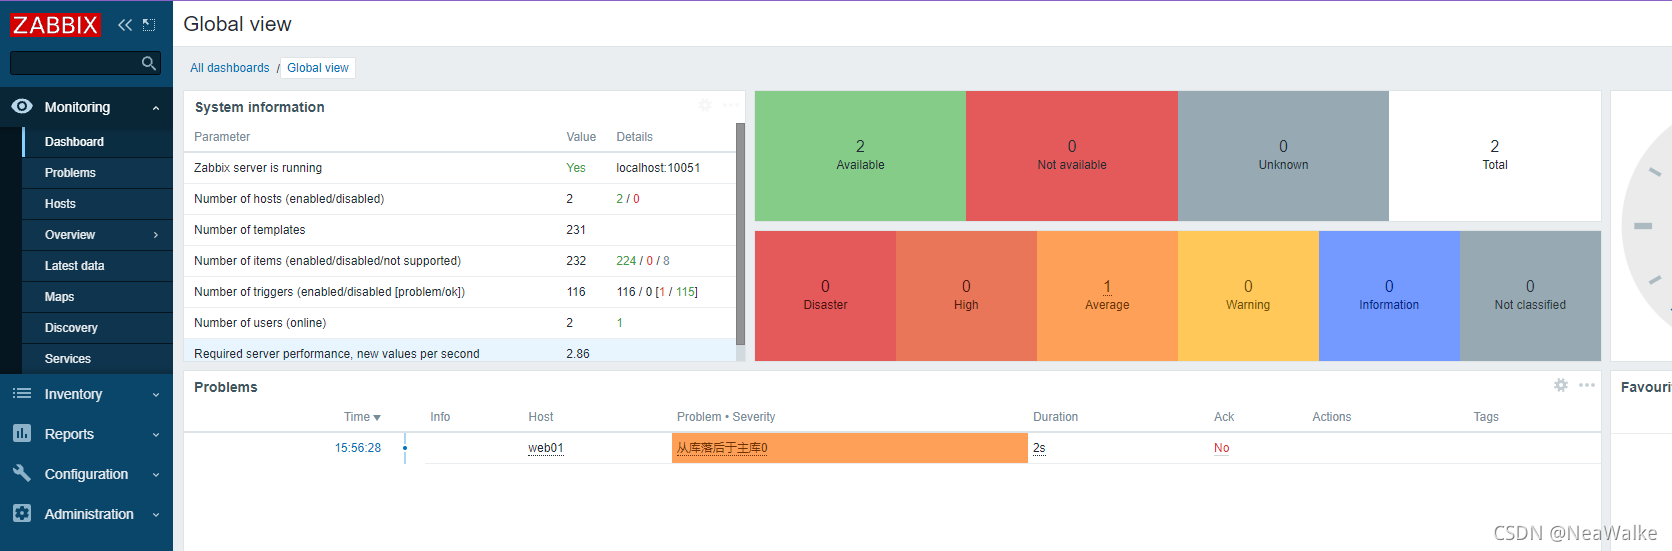
添加监控项
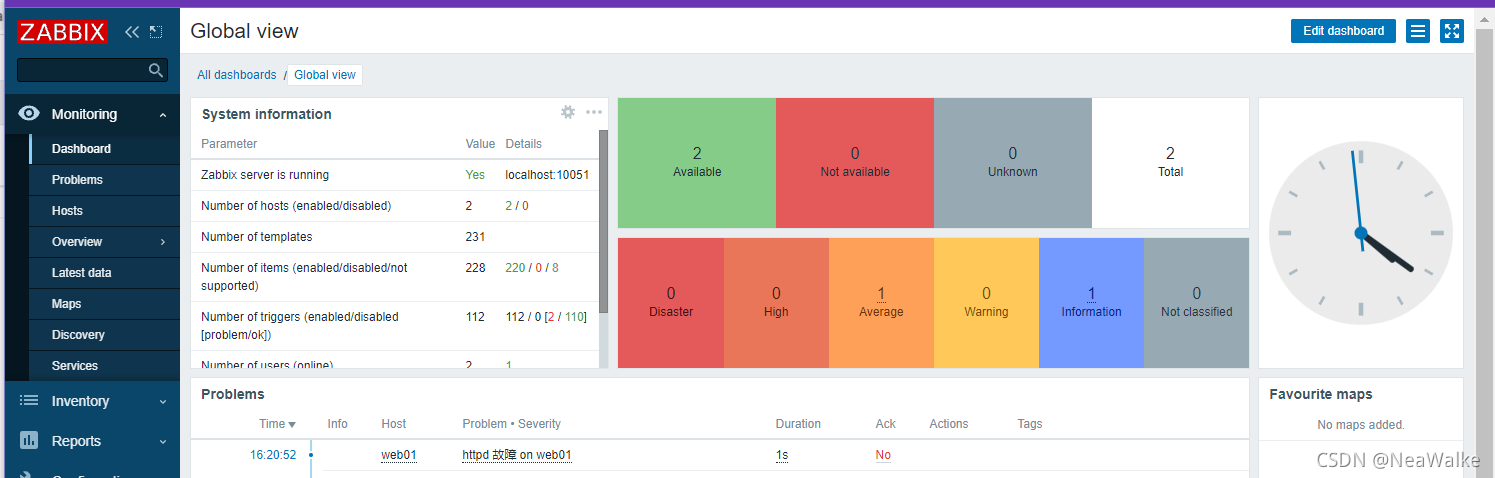
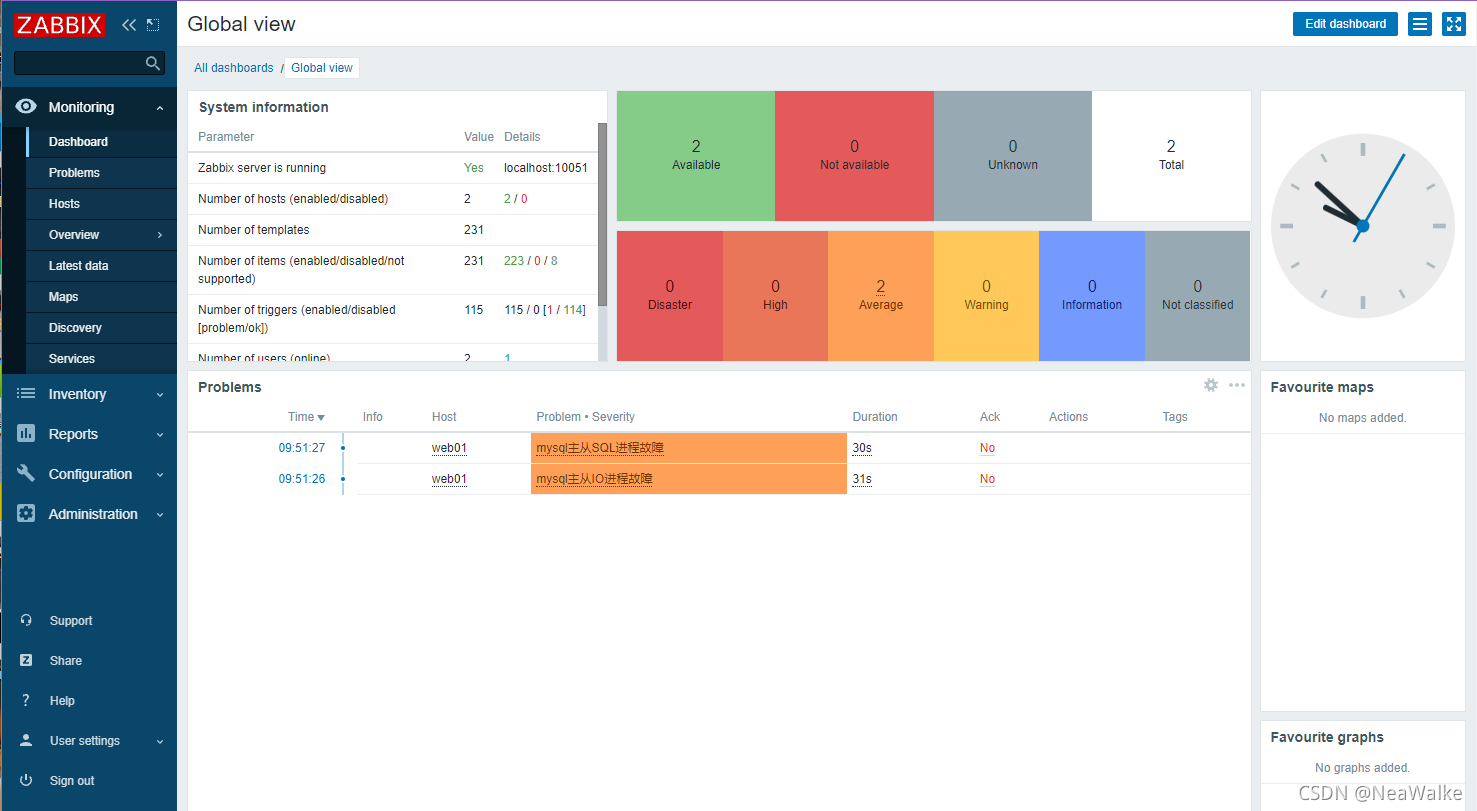
测试=0时,报警效果
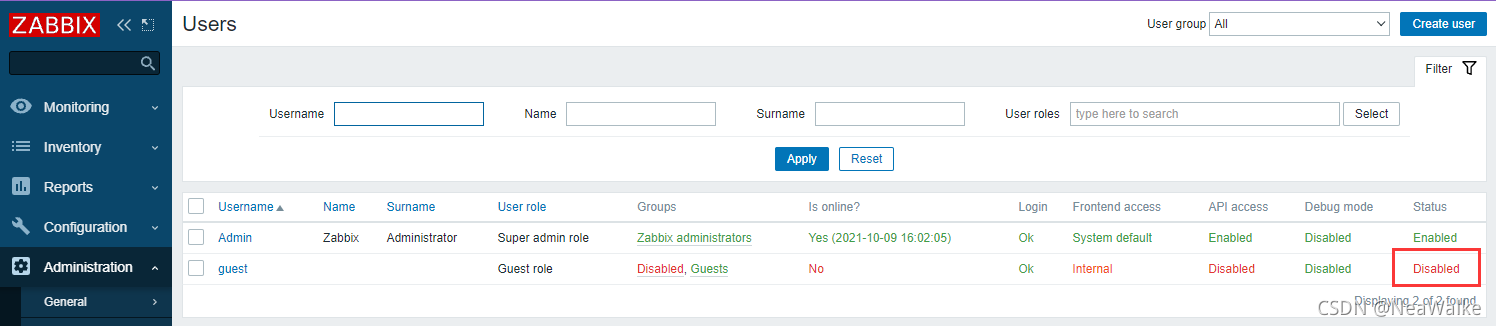
用户和组权限设置
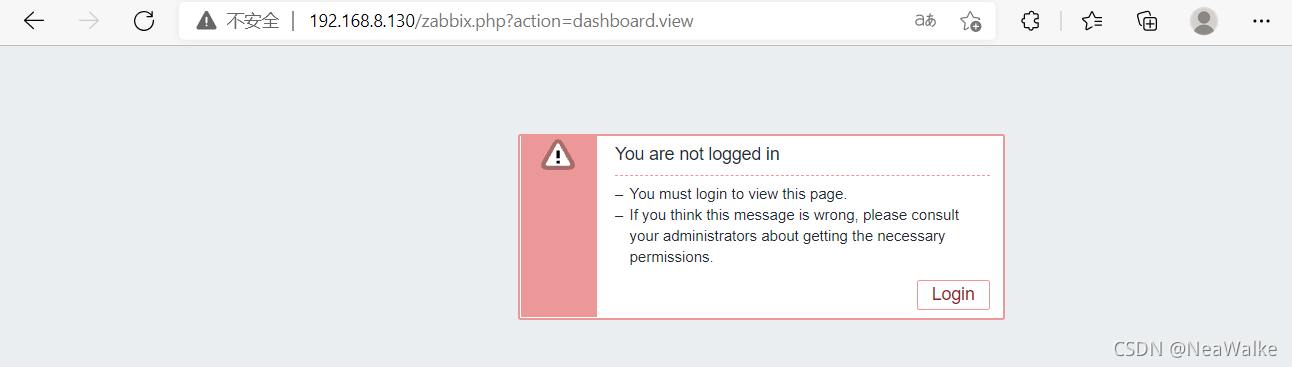
guest用户此时为禁用
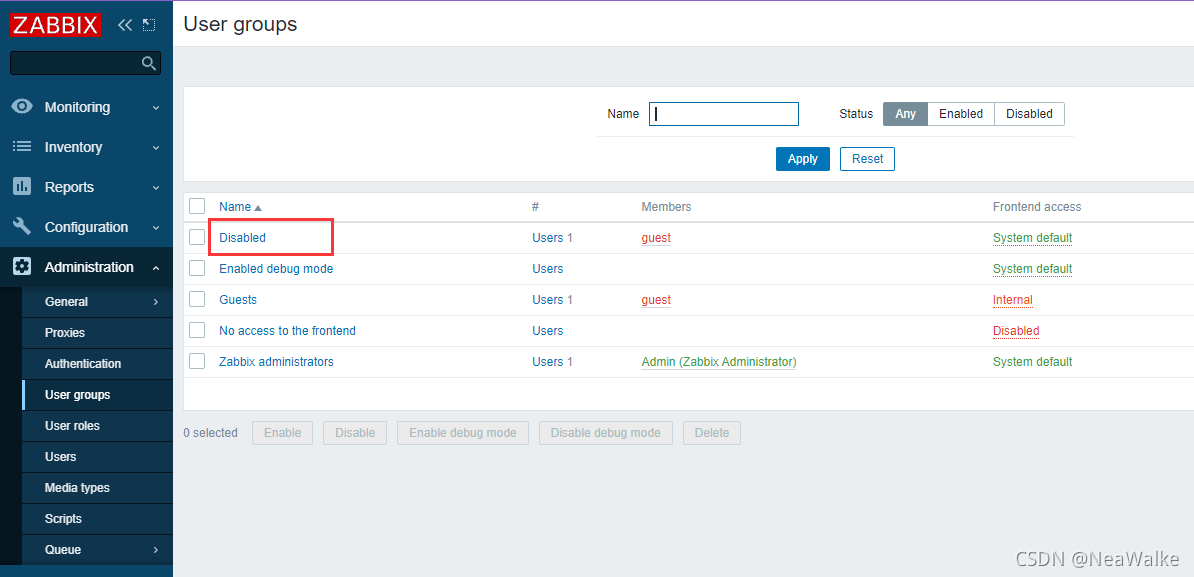
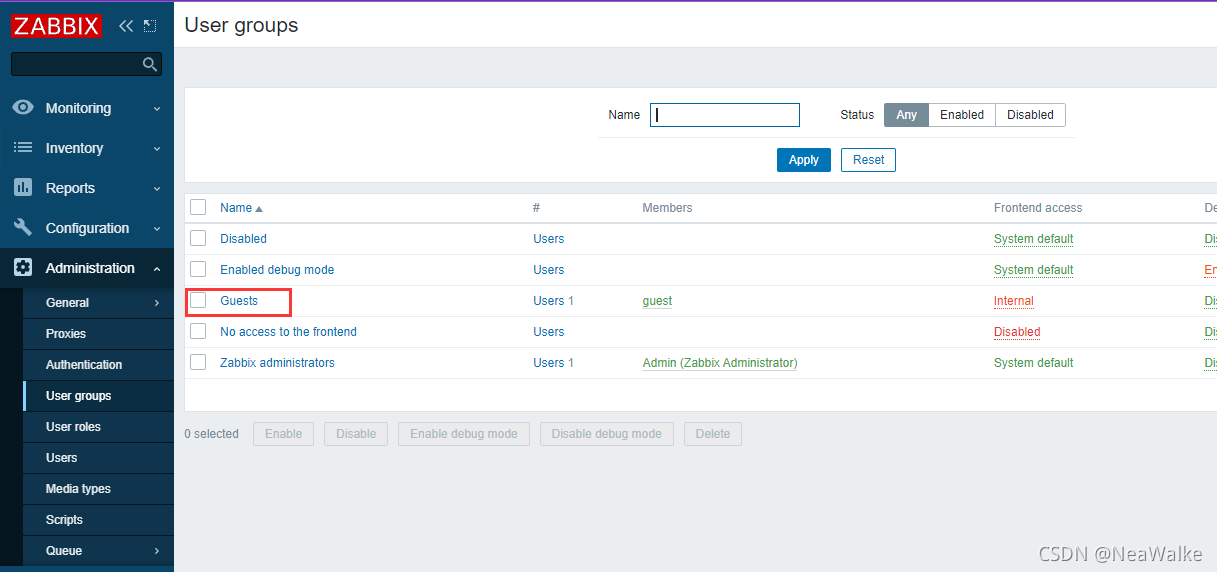
在用户组里将guest用户踢出
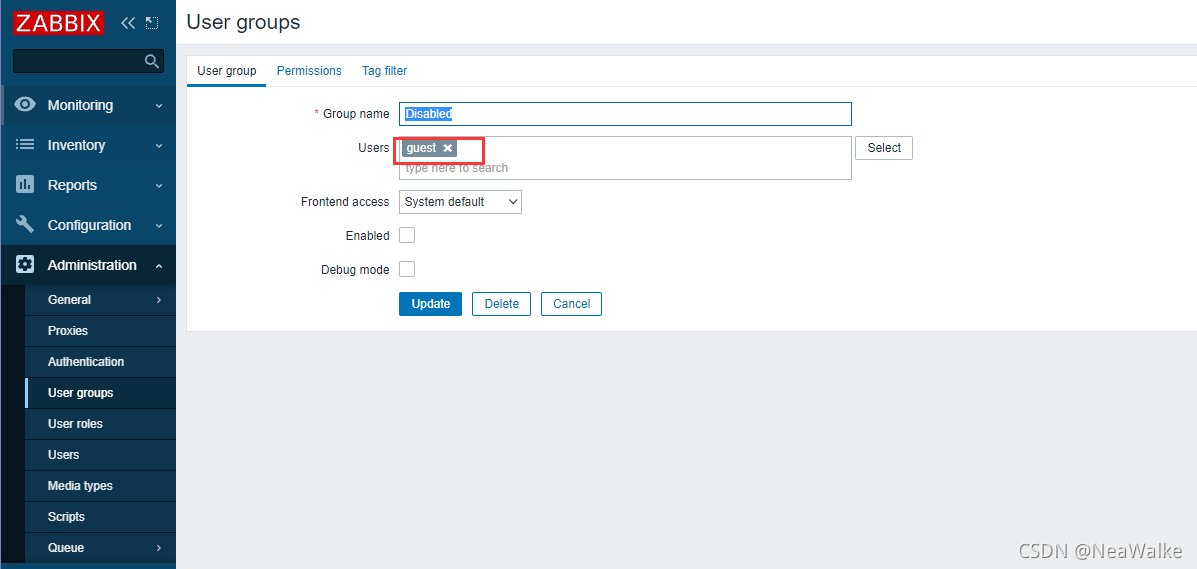

此时guest用户启用
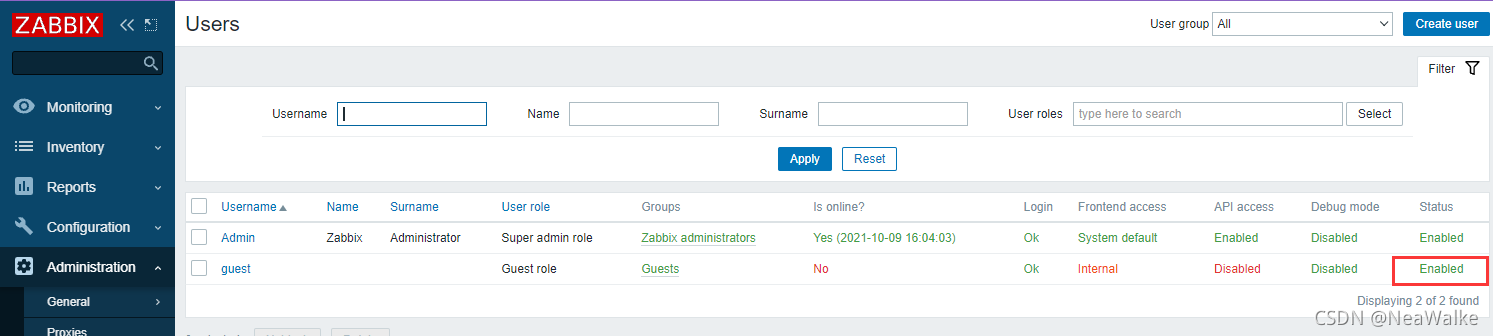
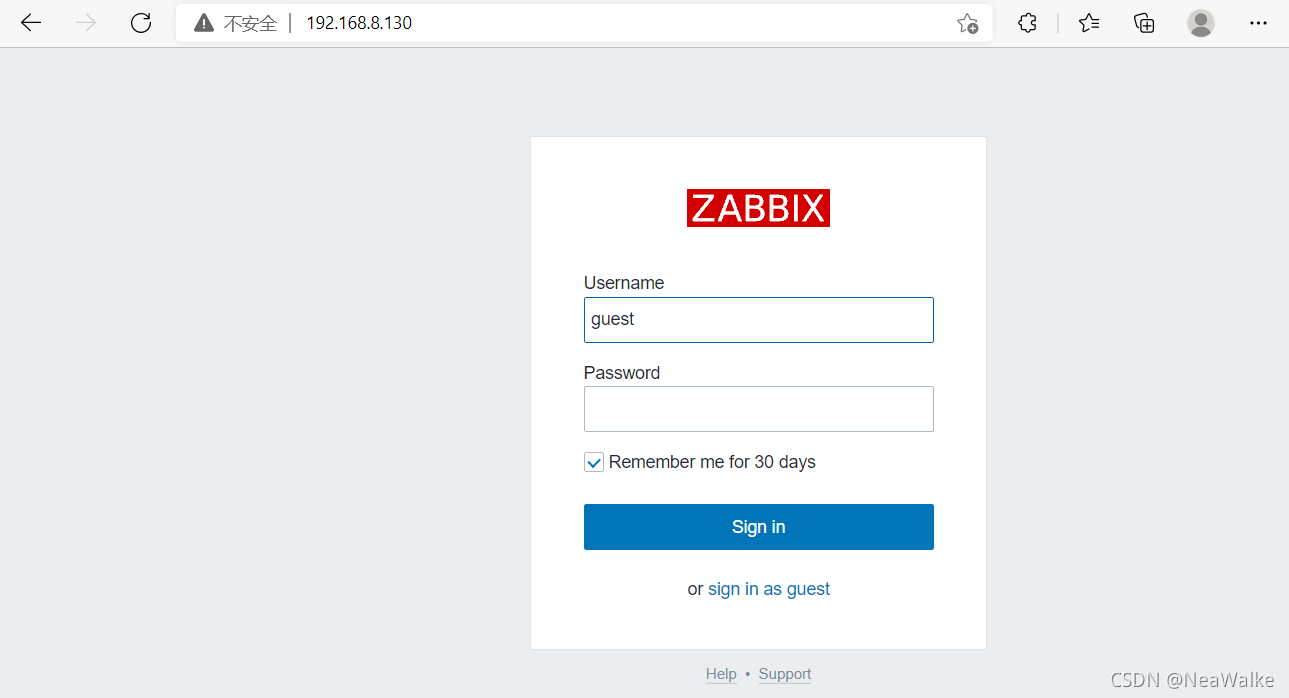
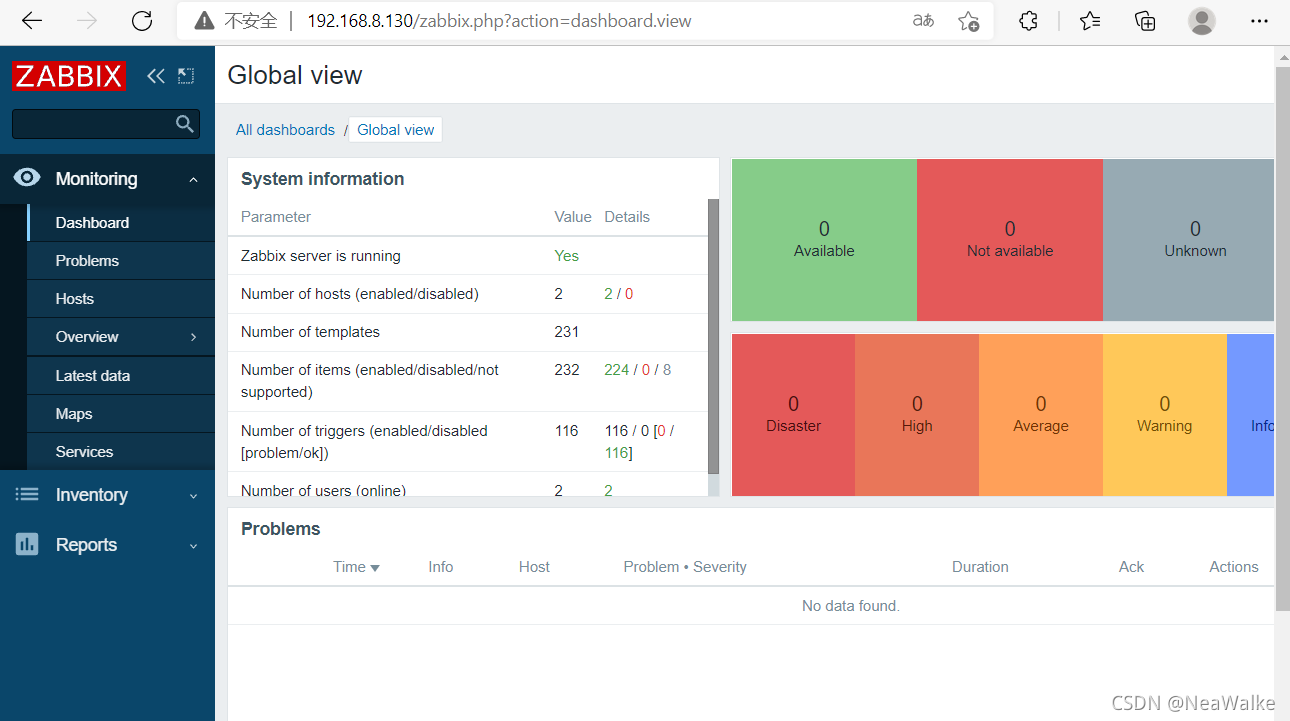
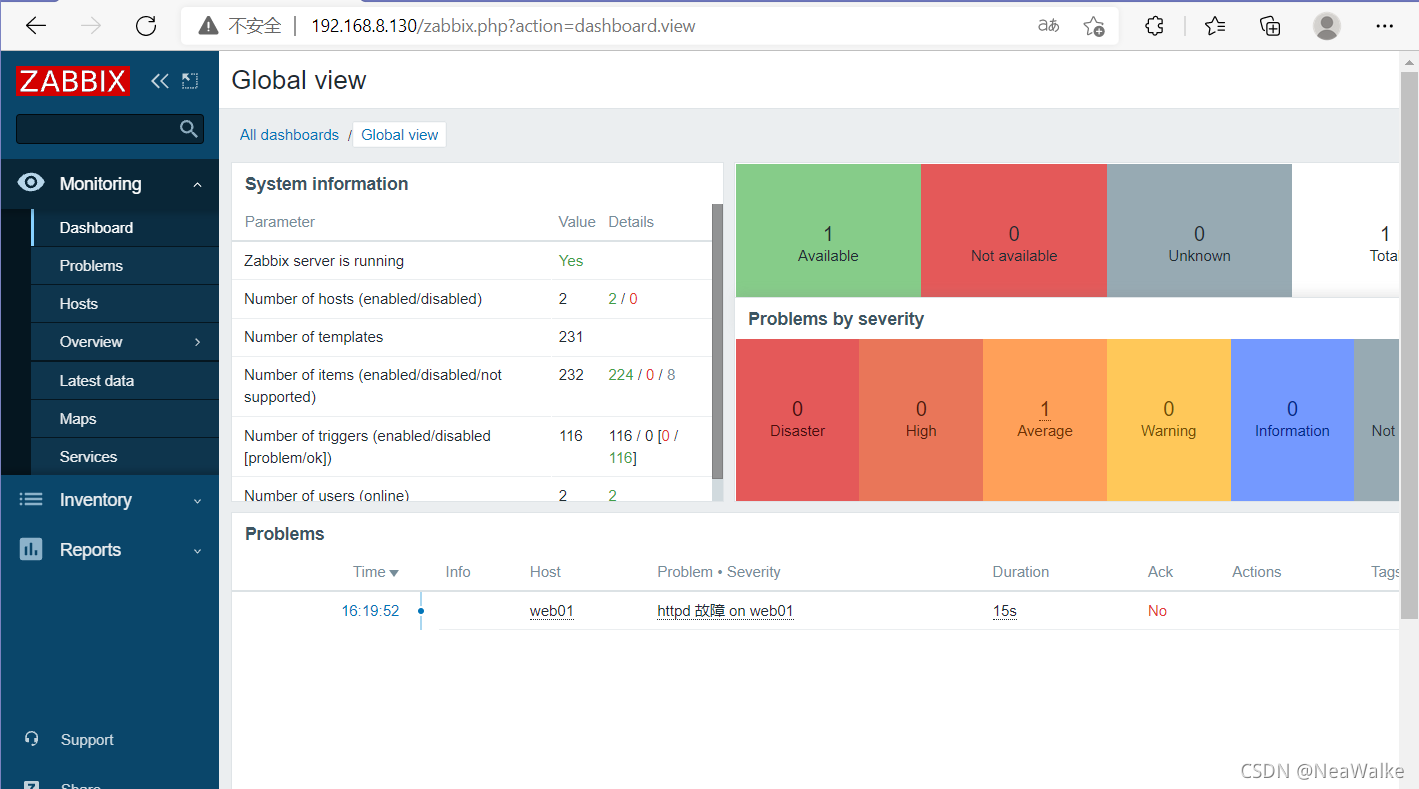
guest用户即可访问
设置guest用户不能访问
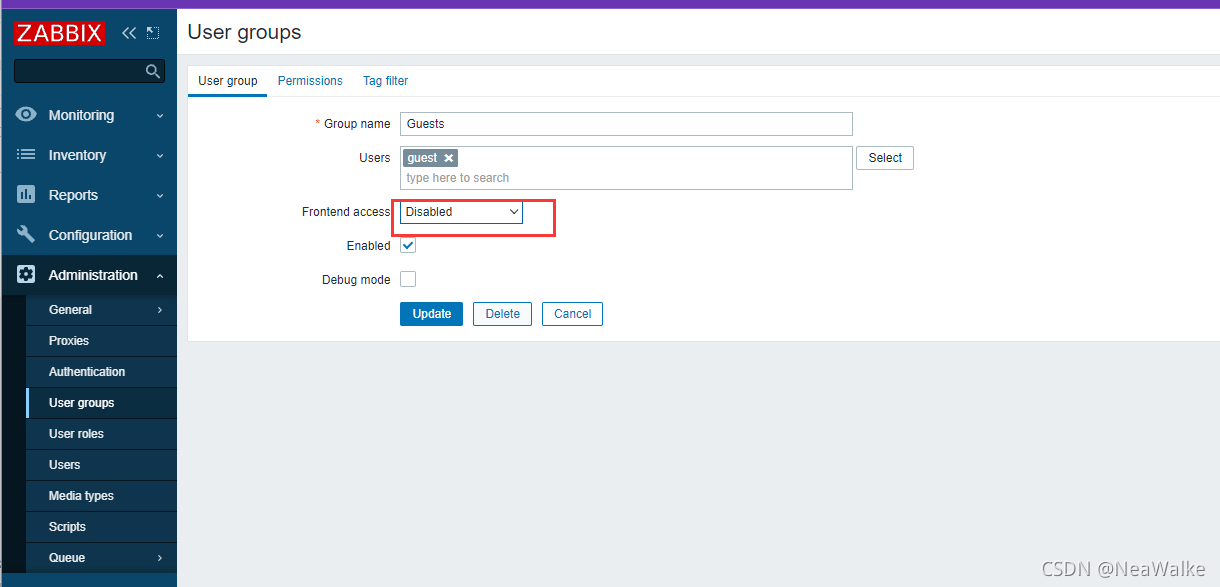
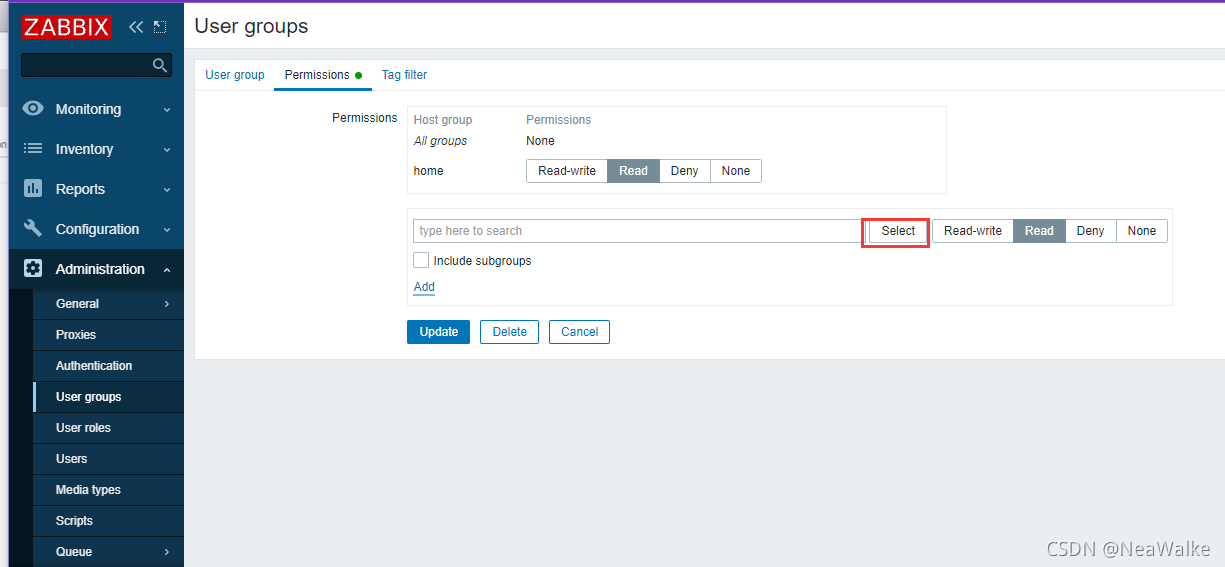
给guest用户读权限
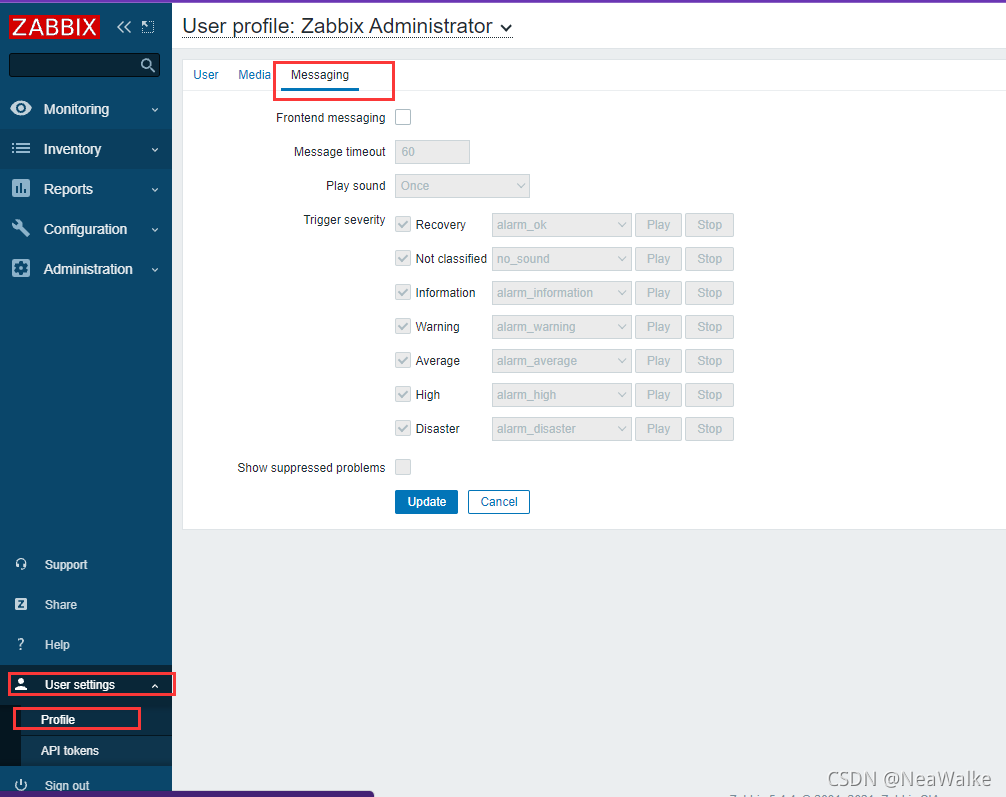
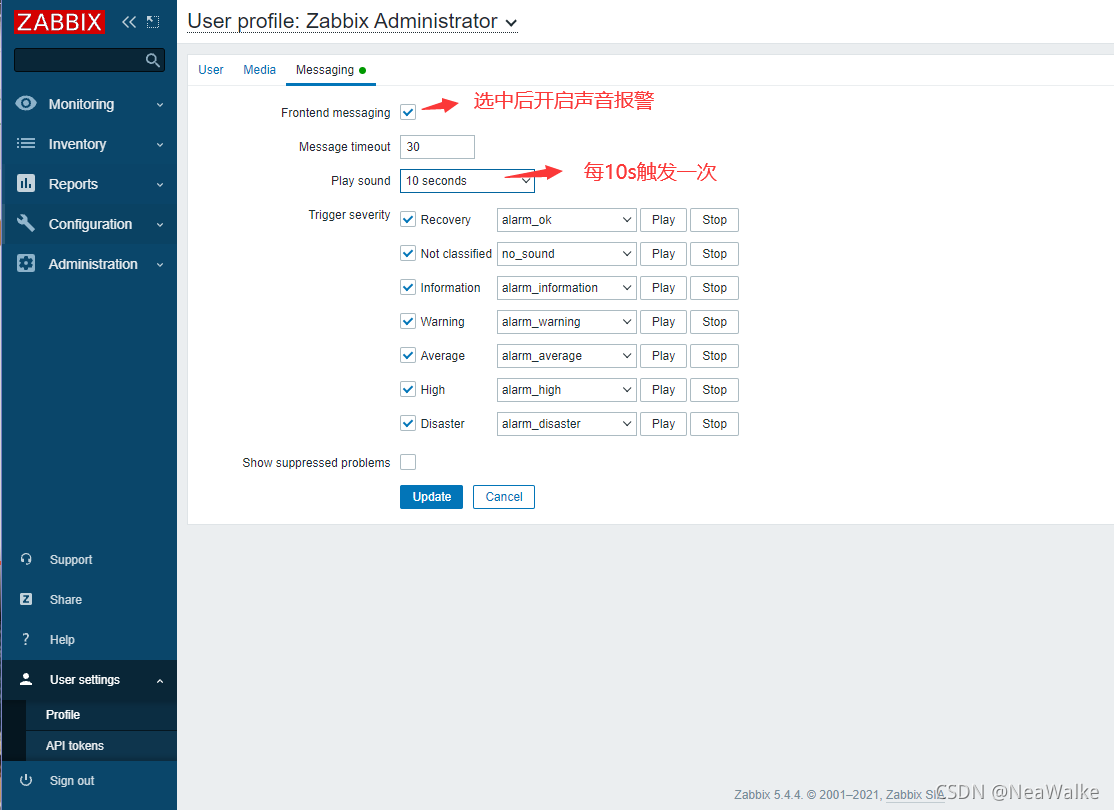
声音报警
声明:本文内容由网友自发贡献,不代表【wpsshop博客】立场,版权归原作者所有,本站不承担相应法律责任。如您发现有侵权的内容,请联系我们。转载请注明出处:https://www.wpsshop.cn/article/detail/49194
推荐阅读


相关标签

