
- 1kafka集群搭建与使用_启动kafka时会使用linux主机名关联的ip地址,所以需要把主机名和linux的ip映射配置
- 2Vuepress码云部署及自动跳转404 的问题_vuepress 部署后 切换路由404
- 3vue事件对象$event
- 4ElasticSearch RestHighLevelClient 教程(一)通用操作_resthighlevelclient插入数据
- 5几种统计一段字符串中所有字符出现次数的方法_写方法得到段字符串在长字符串中出现的次数
- 6python模拟windows启动,在Windows启动时自动运行Python脚本?
- 7使用vscode编译器,&运行c++程序_vscode怎么运行c++
- 8sqli-labs-master靶场训练笔记(54-65|决战紫禁之巓)
- 9IAAS平台运维_设置控制节点主机名controller;计算节点主机名:compute。执行命令以及执行结果截
- 10python 节气计算_python 生成 1900-2100 的二十四节气文件
安装zabbix 5.0_configure: error: not found mariadb library
赞
踩
一 实验环境
| ip | 部署组件 | 备注 |
| 192.168.144.251 | nginx+php+mysql+zabbix_server | php版本必须是7.2.0以上 |
二 实验步骤
#先将所有安装包上传到/opt下:

#解压
tar zxf nginx-1.14.0.tar.gz -C /usr/local/src/
tar zxf zlib-1.2.11.tar.gz -C /usr/local/src/
tar zxf openssl-1.0.2k.tar.gz -C /usr/local/src/
tar zxf ngx_devel_kit-0.3.1rc1.tar.gz -C /usr/local/src/
tar zxf lua-nginx-module-0.10.13.tar.gz -C /usr/local/src/
2.1 安装nginx
2.1.1 安装依赖包
yum -y install gcc gcc-c++ pcre pcre-devel zlib zlib-devel openssl openssl-devel lua-devel
2.1.2 创建nginx用户
chattr -ia /etc/passwd
chattr -ia /etc/group
chattr -ia /etc/shadow
chattr -ia /etc/gshadow
useradd nginx -s /sbin/nologin
2.1.3 解压安装包
2.1.4 编译安装
cd /usr/local/src/
cd nginx-1.14.0 && { ./configure --prefix=/opt/nginx --user=nginx --group=nginx --with-http_stub_status_module --without-http_memcached_module --with-http_ssl_module --with-http_gzip_static_module --with-openssl=/usr/local/src/openssl-1.0.2k --with-zlib=/usr/local/src/zlib-1.2.11 --with-pcre --add-module=/usr/local/src/ngx_devel_kit-0.3.1rc1 --add-module=/usr/local/src/lua-nginx-module-0.10.13 && make && make install; }
#判断是否安装成功
echo $?
输出0表示安装成功
2.1.5 配置nginx文件
cd /opt/nginx/conf/
mv nginx.conf nginx.conf_bak
vi nginx.conf
添加如下内容:
-
- #user nobody;
- user nginx nginx;
- worker_processes 32;
-
- #error_log logs/error.log;
- #error_log logs/error.log notice;
- #error_log logs/error.log info;
-
- #pid logs/nginx.pid;
-
-
- events {
- use epoll;
- worker_connections 10240;
- }
-
-
- http {
- include mime.types;
- default_type application/octet-stream;
-
- #log_format main '$remote_addr - $remote_user [$time_local] "$request" '
- # '$status $body_bytes_sent "$http_referer" '
- # '"$http_user_agent" "$http_x_forwarded_for"';
-
- #access_log logs/access.log main;
-
- sendfile on;
- #tcp_nopush on;
-
- #keepalive_timeout 0;
- keepalive_timeout 65;
-
- #gzip on;
-
- server {
- listen 8080;
- server_name localhost;
-
- #charset koi8-r;
-
- #access_log logs/host.access.log main;
-
- location / {
- root html;
- index index.html index.htm index.php;
- }
-
- #error_page 404 /404.html;
-
- # redirect server error pages to the static page /50x.html
- #
- error_page 500 502 503 504 /50x.html;
- location = /50x.html {
- root html;
- }
-
- # proxy the PHP scripts to Apache listening on 127.0.0.1:80
- #
- #location ~ \.php$ {
- # proxy_pass http://127.0.0.1;
- #}
-
- # pass the PHP scripts to FastCGI server listening on 127.0.0.1:9000
- #
- location ~ \.php$ {
- root html;
- fastcgi_pass 127.0.0.1:9000;
- fastcgi_index index.php;
- fastcgi_param SCRIPT_FILENAME $document_root$fastcgi_script_name;
- include fastcgi_params;
- }
-
- # deny access to .htaccess files, if Apache's document root
- # concurs with nginx's one
- #
- #location ~ /\.ht {
- # deny all;
- #}
- }
-
-
- # another virtual host using mix of IP-, name-, and port-based configuration
- #
- #server {
- # listen 8000;
- # listen somename:8080;
- # server_name somename alias another.alias;
-
- # location / {
- # root html;
- # index index.html index.htm;
- # }
- #}
-
-
- # HTTPS server
- #
- #server {
- # listen 443 ssl;
- # server_name localhost;
-
- # ssl_certificate cert.pem;
- # ssl_certificate_key cert.key;
-
- # ssl_session_cache shared:SSL:1m;
- # ssl_session_timeout 5m;
-
- # ssl_ciphers HIGH:!aNULL:!MD5;
- # ssl_prefer_server_ciphers on;
-
- # location / {
- # root html;
- # index index.html index.htm;
- # }
- #}
-
- }

#验证配置文件
/opt/nginx/sbin/nginx -t
正常情况下会输出:
nginx: the configuration file /opt/nginx/conf/nginx.conf syntax is ok
nginx: configuration file /opt/nginx/conf/nginx.conf test is successful
2.1.6 启动nginx
/opt/nginx/sbin/nginx
#验证
[root@Centos7-Mode-V8 ~]# netstat -nltp |grep 8080
tcp 0 0 0.0.0.0:8080 0.0.0.0:* LISTEN 5726/nginx: master
能看到8080端口,说明启动成功。
#设置nginx开机自启
vi /etc/rc.d/rc.local
添加
/opt/nginx/sbin/nginx
#给该文件赋予执行权限
chmod +x /etc/rc.d/rc.local
2.1.7 测试能否正常访问nginx
访问nginx地址:
192.168.144.251:8080
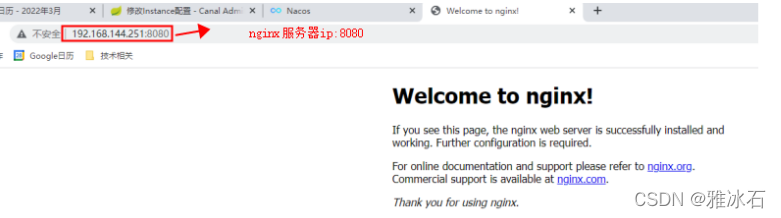
2.2 安装php
2.2.1 安装依赖包
yum install -y gcc gcc-c++ make zlib zlib-devel pcre pcre-devel \
libjpeg libjpeg-devel libpng libpng-devel \
freetype freetype-devel libxml2 libxml2-devel \
glibc glibc-devel glib2 glib2-devel bzip2 bzip2-devel \
ncurses ncurses-devel curl curl-devel e2fsprogs e2fsprogs-devel \
openssl openssl-devel sqlite-devel libxslt-devel \
openldap openldap-devel
2.2.2 安装php
cd /opt/
tar zxvf php-7.2.26.tar.gz
cd php-7.2.26
- ./configure --prefix=/opt/php \
-
- --with-config-file-path=/opt/php/etc \
-
- --with-mysqli=mysqlnd --with-pdo-mysql=mysqlnd \
-
- --with-fpm-user=nginx --with-fpm-group=nginx \
-
- --with-gd --with-jpeg-dir --with-png-dir --with-freetype-dir \
-
- --with-iconv-dir \
-
- --with-libxml-dir \
-
- --with-zlib-dir \
-
- --with-curl \
-
- --with-gettext \
-
- --with-openssl \
-
- --with-mhash \
-
- --with-xmlrpc \
-
- --with-xsl \
-
- --without-pear \
-
- --with-xpm-dir=no \
-
- --enable-libxml \
-
- --enable-xml \
-
- --enable-bcmath \
-
- --enable-mbstring \
-
- --enable-mbregex \
-
- --enable-sockets \
-
- --enable-ctype \
-
- --enable-session \
-
- --enable-shmop \
-
- --enable-sysvsem \
-
- --enable-inline-optimization \
-
- --enable-fpm \
-
- --enable-pcntl \
-
- --enable-soap \
-
- --enable-short-tags \
-
- --enable-static \
-
- --enable-ftp \
-
- --disable-ipv6 \
-
- --enable-exif \
-
- --enable-opcache \
-
- --enable-zip && make && make install
#判断是否安装成功
echo $?
输出0表示安装成功
2.2.3 配置php
# 启动脚本
cp sapi/fpm/init.d.php-fpm /etc/init.d/php-fpm && chmod +x /etc/init.d/php-fpm
# 配置文件
cp /opt/php/etc/php-fpm.conf.default /opt/php/etc/php-fpm.conf && {
sed -e 's#;pid = run/php-fpm.pid#pid = run/php-fpm.pid#g' -i /opt/php/etc/php-fpm.conf
}
cp /opt/php/etc/php-fpm.d/www.conf.default /opt/php/etc/php-fpm.d/www.conf && {
sed -e 's/pm.max_children = 5/pm.max_children = 50/g' \
-e 's/pm.start_servers = 2/pm.start_servers = 20/g' \
-e 's/pm.min_spare_servers = 1/pm.min_spare_servers = 5/g' \
-e 's/pm.max_spare_servers = 3/pm.max_spare_servers = 35/g' \
-i /opt/php/etc/php-fpm.d/www.conf
}
cp php.ini-production /opt/php/etc/php.ini && {
sed -r -e 's/^(short_open_tag =).*/\1 On/g' \
-e 's/^(disable_functions =).*/\1 passthru,exec,system,chroot,chgrp,chown,shell_exec,proc_open,proc_get_status,ini_alter,ini_alter,ini_restore,dl,openlog,syslog,readlink,symlink,popepassthru,stream_socket_server,escapeshellcmd,dll,popen,disk_free_space,checkdnsrr,checkdnsrr,getservbyname,getservbyport,disk_total_space,posix_ctermid,posix_get_last_error,posix_getcwd, posix_getegid,posix_geteuid,posix_getgid, posix_getgrgid,posix_getgrnam,posix_getgroups,posix_getlogin,posix_getpgid,posix_getpgrp,posix_getpid, posix_getppid,posix_getpwnam,posix_getpwuid, posix_getrlimit, posix_getsid,posix_getuid,posix_isatty, posix_kill,posix_mkfifo,posix_setegid,posix_seteuid,posix_setgid, posix_setpgid,posix_setsid,posix_setuid,posix_strerror,posix_times,posix_ttyname,posix_uname/g' \
-e 's/^(expose_php =).*/\1 Off/g' \
-e 's/^(max_execution_time =).*/\1 600/g' \
-e 's/^(max_input_time =).*/\1 600/g' \
-e 's/^(memory_limit =).*/\1 1024M/g' \
-e 's/^(post_max_size =).*/\1 32M/g' \
-e 's/^;(always_populate_raw_post_data =).*/\1 -1/' \
-e 's/^(upload_max_filesize =).*/\1 2M/g' \
-e 's/^(default_socket_timeout =).*/\1 120/g' \
-e 's/^;(date.timezone =).*/\1 Asia\/Shanghai/' \
-e 's/^(mysql.connect_timeout =).*/\1 120/g' \
-e 's/^;(opcache.enable=).*/\11/' \
-e 's/^;(opcache.enable_cli=).*/\10/' \
-e '/;curl.cainfo =/azend_extension=opcache.so' \
-e 's/^(memory_limit =).*/\1 1024M/g' \
-i /opt/php/etc/php.ini
}
# 添加systemctl脚本启动文件
cat > /usr/lib/systemd/system/php-rpm.service << EOF
[Unit]
Description=php-fpm
After=network.target
[Service]
Type=forking
ExecStart=/opt/php/sbin/php-fpm
[Install]
WantedBy=multi-user.target
EOF
2.2.4 启动php
systemctl daemon-reload
systemctl enable php-fpm
systemctl start php-fpm
2.2.5 测试能否正常访问php
2.2.5.1 建测试文件
cat << EOF >/opt/nginx/html/phptest.php
<?php
phpinfo();
?>
EOF
2.2.5.2 访问php
http://192.168.144.251:8080/phptest.php

2.3 安装mysql
2.3.1 安装mysql
安装步骤略
2.3.2 配置mysql
cd /opt/
tar -zxf zabbix-5.0.17.tar.gz
#初始化数据
create database vdms character set utf8 collate utf8_bin;
grant all privileges on vdms.* to servername@'%' identified by 'serverpassword';
use vdms;
source /opt/zabbix-5.0.17/database/mysql/schema.sql;
source /opt/zabbix-5.0.17/database/mysql/data.sql;
source /opt/zabbix-5.0.17/database/mysql/images.sql;
2.4 安装zabbix server
2.4.1 安装依赖包
yum install -y OpenIPMI-devel libssh2-devel net-snmp-devel unixODBC-devel mysql-devel libxml2-devel libcurl-devel libevent-devel
2.4.2 安装zabbix
将zabbix安装包上传至/usr/local/src下
useradd zabbix -s /sbin/nologin
cd /opt/
cd zabbix-5.0.17
./configure --prefix=/opt/zabbix --enable-server --enable-agent --with-mysql --enable-ipv6 --with-net-snmp --with-libcurl --with-libxml2 --enable-java --with-openipmi --with-unixodbc
/*
假如报错:configure: error: Not found mariadb library
则:
yum -y remove MariaDB*
rpm -qa |grep Maria
mv /etc/yum.repos.d/7-mariadb.repo /etc/yum.repos.d/7-mariadb.repo.bak
yum clean all
yum makecache
yum -y install mariadb-devel
yum -y install net-snmp-devel
然后重新执行上面的configure命令。
*/
make && make install
echo $?
输出0表示安装成功
2.4.3 配置zabbix
cp misc/init.d/fedora/core5/zabbix_server /etc/init.d/ && {
sed -ri 's#ZABBIX_BIN=(.*)$#ZABBIX_BIN="/opt/zabbix/sbin/zabbix_server"#' /etc/init.d/zabbix_server
}
cp misc/init.d/fedora/core5/zabbix_agentd /etc/init.d/ && {
sed -ri 's#ZABBIX_BIN=(.*)$#ZABBIX_BIN="/opt/zabbix/sbin/zabbix_agentd"#' /etc/init.d/zabbix_agentd
}
[[ ! -d /opt/zabbix/etc/zabbix_server.conf ]] && {
sed -i '/# DBHost=/aDBHost=192.168.144.251' /opt/zabbix/etc/zabbix_server.conf
sed -i 's/^DBName=zabbix/DBName=vdms/' /opt/zabbix/etc/zabbix_server.conf #库名
sed -i 's/^DBUser=zabbix/DBUser=servername/' /opt/zabbix/etc/zabbix_server.conf #用户名
sed -i '/# DBPassword=/aDBPassword=serverpassword' /opt/zabbix/etc/zabbix_server.conf #密码
sed -i '/# DBPort=/aDBPort=3307' /opt/zabbix/etc/zabbix_server.conf #数据库端口
sed -i '/# PidFile=/aPidFile=/tmp/zabbix_server.pid' /opt/zabbix/etc/zabbix_server.conf
grep -Ev "^$|#" /opt/zabbix/etc/zabbix_server.conf
}
[[ ! -d /opt/zabbix/etc/zabbix_agentd.conf ]] && {
sed -ri "s/^Server=(.*)$/Server=\1,`ifconfig |grep 192.168.144 |awk '{print $2}'`/" /opt/zabbix/etc/zabbix_agentd.conf
sed -ri "s/^ServerActive=(.*)$/ServerActive=`ifconfig |grep 192.168.144 |awk '{print $2}'`/" /opt/zabbix/etc/zabbix_agentd.conf
sed -ri "s/^Hostname=(.*)$/Hostname=`ifconfig |grep 192.168.144 |awk '{print $2}'`/" /opt/zabbix/etc/zabbix_agentd.conf
sed -ri "263aInclude=/opt/zabbix/etc/zabbix_agentd.conf.d/*.conf" /opt/zabbix/etc/zabbix_agentd.conf
grep -Ev "#|^$" /opt/zabbix/etc/zabbix_agentd.conf
}
ln -s /opt/zabbix/bin/* /usr/local/bin/
chkconfig zabbix_server on
chkconfig zabbix_agentd on
service zabbix_server start
service zabbix_agentd start
cd /opt/zabbix-5.0.17/ui/
cp -axv ./ /opt/nginx/html/zabbix
chown -R nginx.nginx /opt/nginx/html/zabbix
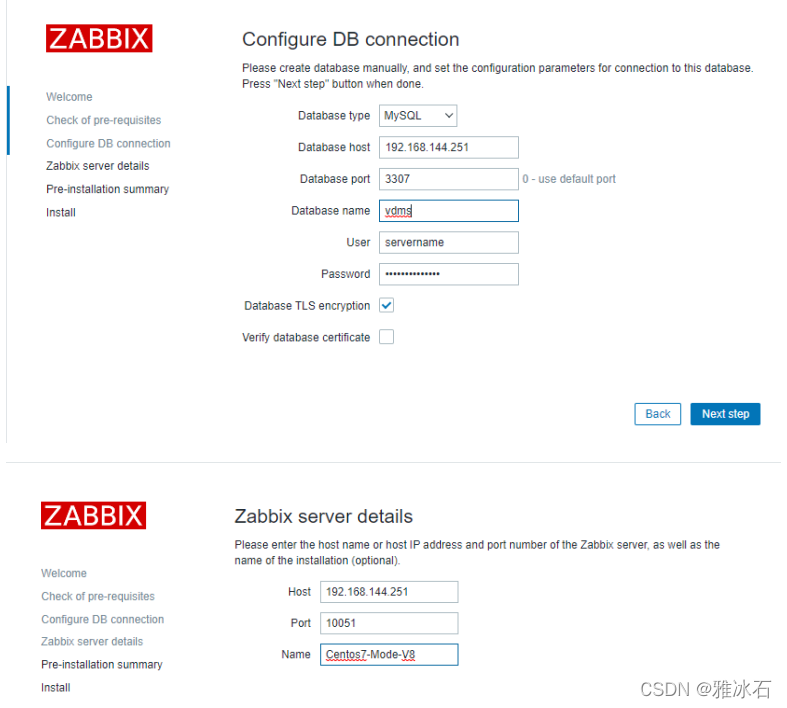
#访问setup.php页面,设置zabbix
http://192.168.144.251:8080/zabbix/setup.php
数据库servername的密码是serverpassword
登录zabbix默认账号:Admin,密码:zabbix,这是一个超级管理员。
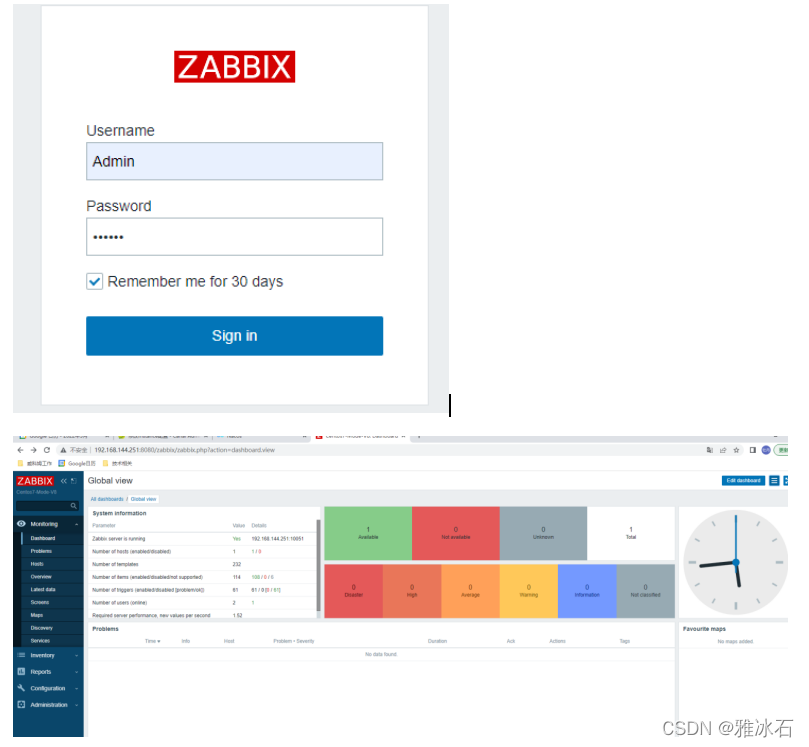
2.4.4 登录zabbix
以后登录zabbix,访问如下网址:
http://192.168.144.252:8080/zabbix/index.php
#设置语言为中文
点击左下角的User settings,在Language处选择Chinese


