
热门标签
热门文章
- 1云原生之使用Docker部署Dashy个人导航页_docker 导航页
- 2xcode iOS 17.2 not install, Simulator 手动安装_ios17.2 simulator
- 3nvidia driver、cuda、cudnn、nvidia-docker 安装、配置和部署(Ubuntu 18.04 LTS)_nvidia docker 版本
- 4Unity零基础入门 - 见缝插针_开发gamemanager去生成针
- 5企业、工厂如何运用智能物联网技术, 降低能耗、实现节能减排?_对于和物联网控制系统节能合作需要了解什么内容
- 62-4《学生食堂信息管理系统》饭卡管理模块_录入时间列(register_date)默认值为当前录入时间
- 7kubernetes--pod的生命周期管理(PostStart,PreStop)
- 8neo4j教程-安装部署_neo4j安装
- 9【TCP】流量控制和拥塞控制
- 10论文排版神器VSCode+LaTeX最新保姆级图文配置教程_vscode latex
当前位置: article > 正文
idea 创建 spring boot
作者:程序代码艺术家 | 2024-01-30 14:06:03
赞
踩
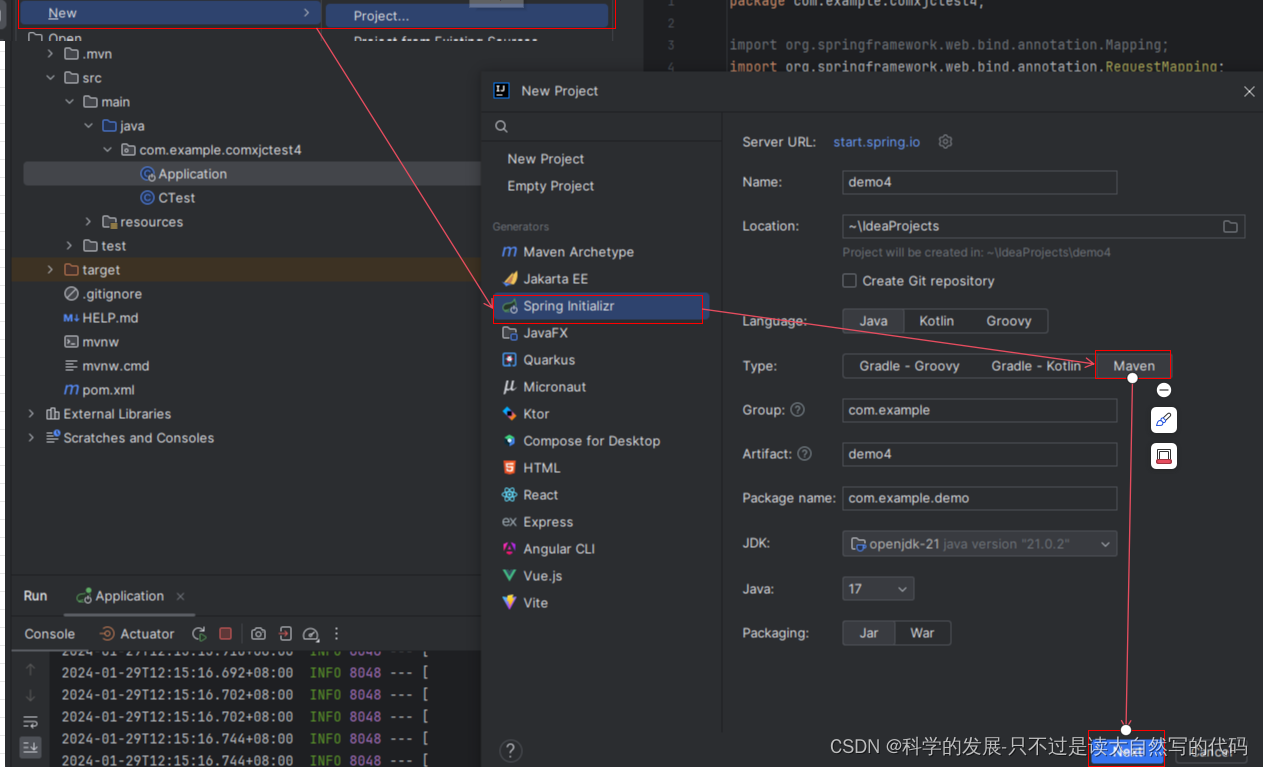
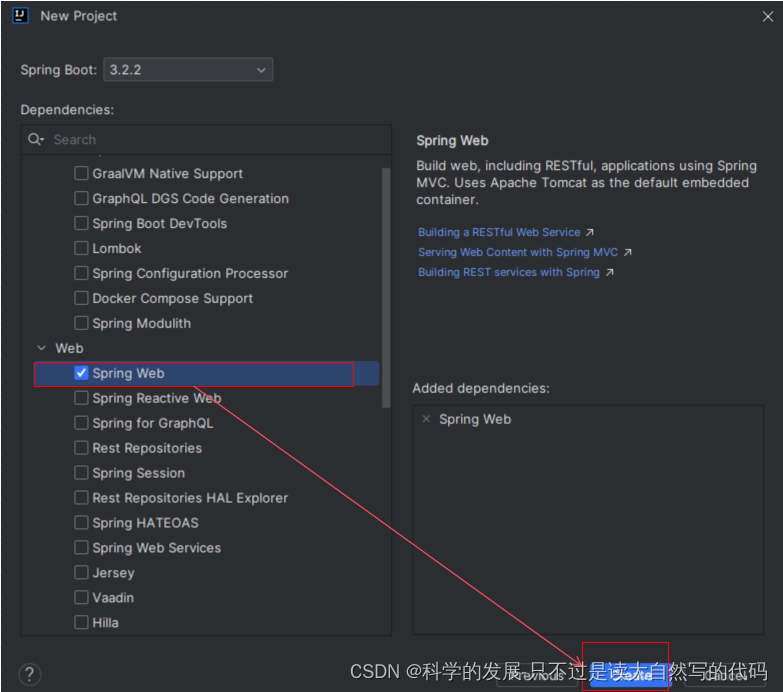
idea 创建 spring boot
1.创建步骤
 2. 编码添加
2.1 这是自动生成的启动函数
- package com.example.comxjctest4;
-
- import org.springframework.boot.SpringApplication;
- import org.springframework.boot.autoconfigure.SpringBootApplication;
-
- @SpringBootApplication
- public class Application {
-
- public static void main(String[] args) {
- SpringApplication.run(Application.class, args);
- }
-
- }
2.2 添加一个controler
- package com.example.comxjctest4;
-
- import org.springframework.web.bind.annotation.Mapping;
- import org.springframework.web.bind.annotation.RequestMapping;
- import org.springframework.web.bind.annotation.RestController;
-
- @RestController
- public class CTest {
- @RequestMapping("/h")
- public String h(){
- return "h";
- }
- }
3 要点记录
@SpringBootApplication 这个注解保证了会对你创建再工程下的类进行扫描。扫描后的类有回用户被框架管理的功能。
@RestController 这个注解表示是该类会被当做controller处理
@RequestMapping("/h") 这个注解表示映射的http地址栏中的地址
声明:本文内容由网友自发贡献,不代表【wpsshop博客】立场,版权归原作者所有,本站不承担相应法律责任。如您发现有侵权的内容,请联系我们。转载请注明出处:https://www.wpsshop.cn/article/detail/46794
推荐阅读

相关标签

