- 1SpringBoot【运维实用篇】---- 配置高级_配置项compatibility.override main response version: t
- 2数据结构.栈
- 3在eclipse中报找不到或加载到某类的错误解决办法_eclipse错误: 在模块 wekstest 中找不到或无法加载主类 weka.classifie
- 4纯净安装 Windows 11 官方原版系统的方法图解(适用强迫症患者)_winntsetup4.2 win11
- 5Unity引擎的打包Player Settings设置介绍_unity palyer 设置install location
- 6PDF与Base64的相互转换以及操作_pdf转base64
- 7【Python 第2篇】如何用Python设计简单的“猜数字”小游戏_用python输入数字,猜测输的对不对
- 8【Java进阶】Java线程池ThreadPoolExecutor的使用详解以及SpringBoot下如何使用线程池_threadpoolexecutor 实现类注册进bean
- 9stm32 hal库 RCC初始化函数SystemClock_Config()梳理分析、初步细致学习(一)
- 10ubuntu 12.04 使用纪要 -- 持续更新
SpringSecurity整合图形验证码_spring security 滑块验证码
赞
踩
在上一篇的博客中,教大家如何简单的整合SpringSecurity并使用,但是很多小伙伴都说,“哎呀,你这个只输入了用户名和密码,我还想加一个图形验证码怎么办”。我想想也是,实际的业务场景当中可能还存在图形验证码的校验以及图形滑块的校验等,所以这篇博客就来讲讲SpringSecurity整合图形验证码
1、生成图形验证码
我们知道前端的图片显示图形验证码只需要在它的src属性中指定对应的请求路径即可,并且我们点击图片的时候还能刷新图形验证码,所以可以写一个简单的接口,这里直接引用做完的图形验证码的依赖(偷懒一下)
- <dependency>
- <groupId>com.github.whvcse</groupId>
- <artifactId>easy-captcha</artifactId>
- <version>1.6.2</version>
- </dependency>
该依赖里面有很多的图形验证码,这里我直接使用最简单的数字验证码了,生成之后我们有两种方式存储我们的验证码,第一种是存储到服务端的session当中,第二种是存放到Redis缓存当中,两种皆可,这里都给大家演示一下
方法一:存储到session当中
- @RequestMapping("/captcha")
- public void captcha(HttpServletRequest request, HttpServletResponse response){
- //获取验证码
- response.setContentType("image/jpg");
- response.setHeader("Pargam","No-cache");
- response.setHeader("cache-Control","no-cache");
- response.setDateHeader("Expires",0);
- //生成对应的验证码
- ArithmeticCaptcha captch = new ArithmeticCaptcha(110, 38, 3);
- //将验证码存入到session当中,并且设置session的过期时间为3分钟
- request.getSession().setMaxInactiveInterval(3*60);
- request.getSession().setAttribute("captcha",captch.text());
- try {
- //将生成的验证码输出到前端
- captch.out(response.getOutputStream());
- } catch (IOException e) {
- //验证码生成失败就记录到日志当中
- log.error("验证码生成失败",e.getMessage());
- }
- }

方法二:存储到Redis缓存当中
注:存储到Redis缓存当中的时候,我们不能直接存储,因为Session是不能被不同客户端所共享的,而Redis可以被不同客户端所共享,所以在存储到Redis当中的时候可以根据用户的ip地址进行存储,这样不同客户端就不会产生冲突(使用Redis时还需要更改配置文件)
- @Autowired
- @Qualifier("MyRedisTemplate")
- private RedisTemplate redisTemplate;
-
- @RequestMapping("/captcha")
- public void getCaptcha(HttpServletRequest request, HttpServletResponse response){
- //获取验证码
- response.setContentType("image/jpg");
- response.setHeader("Pargam","No-cache");
- response.setHeader("cache-Control","no-cache");
- response.setDateHeader("Expires",0);
- //生成验证码,将验证码放入redis当中
- ArithmeticCaptcha captch = new ArithmeticCaptcha(110, 38, 3);
- //获得用户的ip地址
- String ip = getIpAddress(request);
- //将验证码存储到缓存当中,有效时间为5分钟
- redisTemplate.opsForValue().set("captcha:"+ip,captch.text(),300, TimeUnit.SECONDS);
- try {
- captch.out(response.getOutputStream());
- } catch (IOException e) {
- log.error("验证码生成失败",e.getMessage());
- }
-
- }
-
- //获取客户端IP地址
- public String getIpAddress(HttpServletRequest request) {
- String ip = request.getHeader("x-forwarded-for");
- if(ip == null || ip.length() == 0 || "unknow".equalsIgnoreCase(ip)) {
- ip = request.getHeader("Proxy-Client-IP");
- }
- if (ip == null || ip.length () == 0 || "unknown".equalsIgnoreCase (ip)) {
- ip = request.getHeader ("WL-Proxy-Client-IP");
- }
- if (ip == null || ip.length () == 0 || "unknown".equalsIgnoreCase (ip)) {
- ip = request.getRemoteAddr ();
- if (ip.equals ("127.0.0.1")) {
- //根据网卡取本机配置的IP
- InetAddress inet = null;
- try {
- inet = InetAddress.getLocalHost ();
- } catch (Exception e) {
- e.printStackTrace ();
- }
- ip = inet.getHostAddress ();
- }
- }
- // 多个代理的情况,第一个IP为客户端真实IP,多个IP按照','分割
- if (ip != null && ip.length () > 15) {
- if (ip.indexOf (",") > 0) {
- ip = ip.substring (0, ip.indexOf (","));
- }
- }
- return ip;
- }
2、自定义图形验证码过滤器
那验证码存储完之后,我们怎么在进行用户名和密码判断之前先去判断输入的验证码是否正确呢,这个时候我们可以继承UsernamePasswordAuthenticationFilter这个类,然后实现对应的方法,这个类是AbstractAuthenticationProcessingFilter针对使用用户名和密码进行身份验证而定制化的一个过滤器,所以我们可以在里面对我们输入的验证码进行判断(判断方法根据之前存储验证码的方式来)
- //用Session进行判断
- public class LoginFilter extends UsernamePasswordAuthenticationFilter {
-
- @Override
- public Authentication attemptAuthentication(HttpServletRequest request, HttpServletResponse response) throws AuthenticationException {
- if (!request.getMethod().equals("POST")) {
- throw new AuthenticationServiceException(
- "Authentication method not supported: " + request.getMethod());
- }
- //获取到服务端的验证码session
- String captcha = (String) request.getSession().getAttribute("captcha");
- //如果验证码为空,说明对应的session信息已经过期了
- if(captcha==null){
- throw new AuthenticationServiceException("验证码已过期");
- }
- //获取前端输入的验证码,判断是否一致
- String kaptcha = request.getParameter("captcha");
- if (!StringUtils.isEmpty(kaptcha) && !StringUtils.isEmpty(captcha) && kaptcha.equalsIgnoreCase(captcha)) {
- //如果一致的话,就通过了我们的验证码认证,继续执行登录逻辑
- return super.attemptAuthentication(request, response);
- }
- throw new AuthenticationServiceException("验证码输入错误");
- }
- }
-
- //用Redis进行判断
- public class LoginFilter extends UsernamePasswordAuthenticationFilter {
-
- @Autowired
- @Qualifier("MyRedisTemplate")
- private RedisTemplate redisTemplate;
-
- @Autowired
- private UserController userController;
-
- @Override
- public Authentication attemptAuthentication(HttpServletRequest request, HttpServletResponse response) throws AuthenticationException {
- if (!request.getMethod().equals("POST")) {
- throw new AuthenticationServiceException(
- "Authentication method not supported: " + request.getMethod());
- }
- //获取用户的ip
- String ip = userController.getIpAddress(request);
- //根据用户的ip来获取对应的缓存验证码
- String captcha = (String) redisTemplate.opsForValue().get("captcha:" + ip);
- //如果缓存不存在,就说明缓存有可能过期了
- if(captcha==null){
- throw new AuthenticationServiceException("验证码已过期");
- }
- //获取前端输入的验证码,判断是否一致
- String kaptcha = request.getParameter("captcha");
- if (!StringUtils.isEmpty(kaptcha) && !StringUtils.isEmpty(captcha) && kaptcha.equalsIgnoreCase(captcha)) {
- return super.attemptAuthentication(request, response);
- }
- throw new AuthenticationServiceException("验证码输入错误");
- }
- }
3、注入自定义过滤器
定义好我们的验证码过滤器之后,我们就需要在我们的配置类当中引入一下
- @Override
- protected void configure(HttpSecurity http) throws Exception {
-
- //把自定义的过滤器添加到UsernamePasswordAuthenticationFilter前去
- http.addFilterAt(loginFilter(), UsernamePasswordAuthenticationFilter.class);
-
- }
-
- @Override
- @Bean
- public AuthenticationManager authenticationManagerBean()
- throws Exception {
- return super.authenticationManagerBean();
- }
-
- @Bean
- LoginFilter loginFilter() throws Exception {
- LoginFilter loginFilter = new LoginFilter();
- loginFilter.setFilterProcessesUrl("/login");
- loginFilter.setAuthenticationManager(authenticationManagerBean());
- //登录成功后的跳转
- loginFilter.setAuthenticationSuccessHandler(new SimpleUrlAuthenticationSuccessHandler("/"));
- //登录失败后的跳转
- loginFilter.setAuthenticationFailureHandler(new SimpleUrlAuthenticationFailureHandler("/toLogin?error=true"));
- return loginFilter;
- }
我们还需要在我们的前端页面中加入验证码的输入框,name根据我们的要求进行指定
- //显示对应的错误信息
- <p style="color: red;" th:if="${param.error}" th:text="${session['SPRING_SECURITY_LAST_EXCEPTION'].message}"></p>
- <form action="/login" method="post">
- 用户名:<input type="text" name="username"><br>
- 密码:<input type="password" name="password"><br>
- 验证码:<input type="text" name="captcha"><img style="width: 110px;height: 38px" src="/captcha"><br>
- <input type="checkbox" name="rememberMe">记住我<br>
- <input type="submit" value="登录">
- </form>
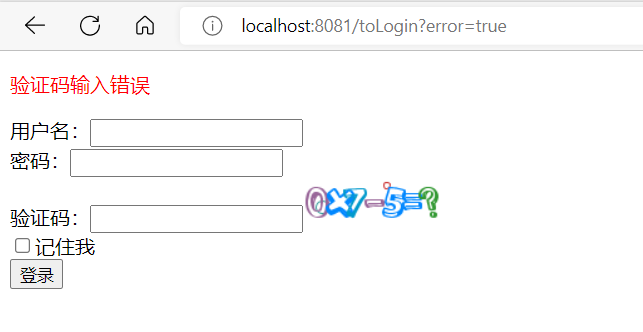
4、效果查看
完成之后我们就可以启动项目进行测试了,我们可以先输入错误的验证码来查看效果,然后还可以等待验证码过期然后进行效果的查看
-
验证码过期效果

-
验证码错误效果