
- 1软件测试VS软件开发 IT行业两大高薪岗位全方位对比 看完就知道选谁了_软件测试和程序员哪个更吃香
- 2参数传递过程中:函数形参 int a 与 int& a 的区别_int &a
- 3python --阿里短信服务_python阿里云定时短信
- 4django 用户认证_django 认证
- 5C++面试题汇总 数据库_c++软件开发工程师面试关于数据库部分的
- 6java的byte[]数组转成字符串并且再转回byte[]数组_java实现将byte[]转换为字符串进行存储传输,然后在利用该字符串还原为byte[],不能
- 7CVPR2020论文列表(中英对照)_perception consistency ultrasound image super-reso
- 8CUDA out of memory怎么解决
- 9Spark安装部署_export spark_worker_opts
- 10SpringBoot整合Zookeeper客户端Curator_springboot整合curator
安装LLaMA-Factory微调chatglm3,修改自我认知_python src/export_model.py \ --model_name_or_path
赞
踩
安装git clone https://github.com/hiyouga/LLaMA-Factory.git
conda create -n llama_factory python=3.10
conda activate llama_factory
cd LLaMA-Factory
pip install -r requirements.txt
之后运行
单卡训练,
CUDA_VISIBLE_DEVICES=0 python src/train_web.py,按如下配置
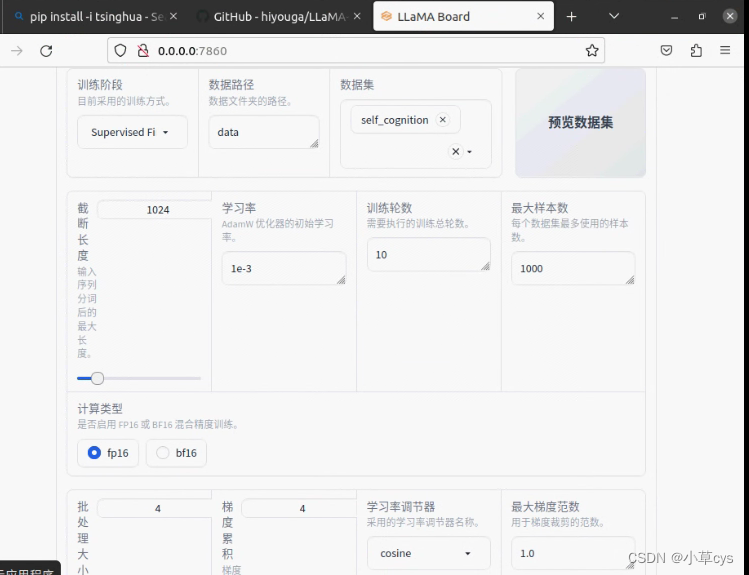
demo_tran.sh
- CUDA_VISIBLE_DEVICES=0 python src/train_bash.py \
- --stage sft \
- --model_name_or_path /data/models/llm/chatglm3-lora/ \
- --do_train \
- --overwrite_output_dir \
- --dataset self_cognition \
- --template chatglm3 \
- --finetuning_type lora \
- --lora_target query_key_value \
- --output_dir export_chatglm3 \
- --overwrite_cache \
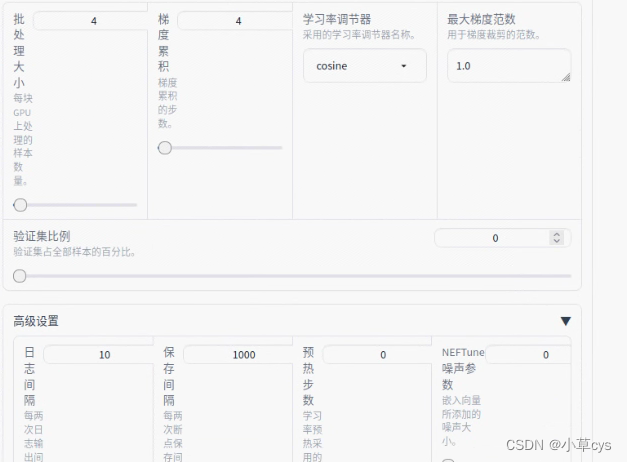
- --per_device_train_batch_size 4 \
- --gradient_accumulation_steps 4 \
- --lr_scheduler_type cosine \
- --logging_steps 10 \
- --save_steps 1000 \
- --learning_rate 1e-3 \
- --num_train_epochs 10.0 \
- --plot_loss \
- --fp16
export_model.sh
- python src/export_model.py \
- --model_name_or_path /data/models/llm/chatglm3-lora/ \
- --template chatglm3 \
- --finetuning_type lora \
- --checkpoint_dir /data/projects/LLaMA-Factory/export_chatglm3 \
- --export_dir lora_merge_chatglm3
cli_demo.sh
- python src/cli_demo.py \
- --model_name_or_path /data/models/llm/chatglm3-lora/ \
- --template default \
- --finetuning_type lora
注意合并模型的时候,最后复制chatglm3的tokenizer.model和tokenizer_config.json到合并后模型覆盖之后,要修改
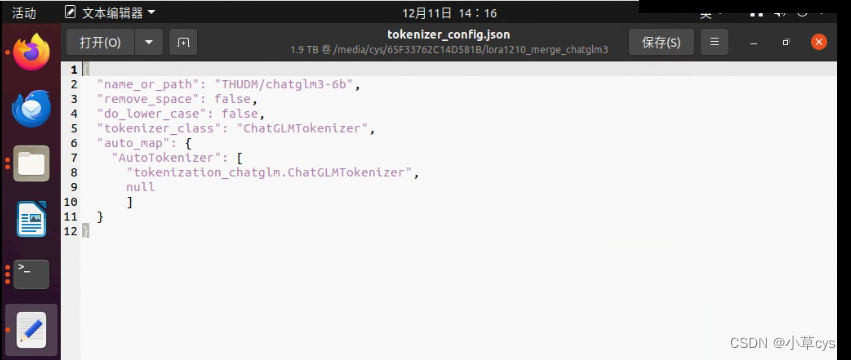
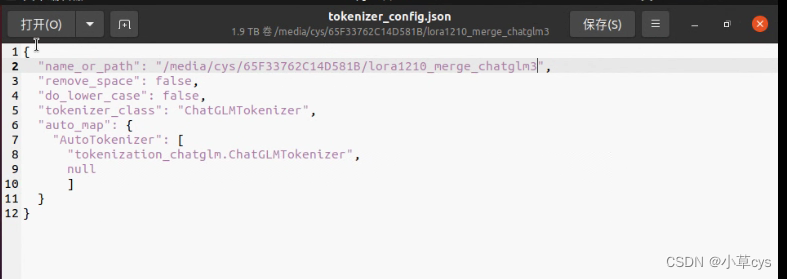 不覆盖会有这个错误,
Use DeepSpeed方法
- deepspeed --num_gpus 3 --master_port=9901 src/train_bash.py \
- --deepspeed ds_config.json \
- --stage sft \
- --model_name_or_path /media/cys/65F33762C14D581B/chatglm2-6b \
- --do_train True \
- --finetuning_type lora \
- --template chatglm2 \
- --flash_attn False \
- --shift_attn False \
- --dataset_dir data \
- --dataset self_cognition,sharegpt_zh \
- --cutoff_len 1024 \
- --learning_rate 0.001 \
- --num_train_epochs 10.0 \
- --max_samples 1000 \
- --per_device_train_batch_size 4 \
- --gradient_accumulation_steps 4 \
- --lr_scheduler_type cosine \
- --max_grad_norm 1.0 \
- --logging_steps 10 \
- --save_steps 1000 \
- --warmup_steps 0 \
- --neft_alpha 0 \
- --train_on_prompt False \
- --upcast_layernorm False \
- --lora_rank 8 \
- --lora_dropout 0.1 \
- --lora_target query_key_value \
- --resume_lora_training True \
- --output_dir saves/ChatGLM2-6B-Chat/lora/train_2023-12-12-23-26-49 \
- --fp16 True \
- --plot_loss True
ds_config.json的格式下面的:
- {
- "train_batch_size": "auto",
- "train_micro_batch_size_per_gpu": "auto",
- "gradient_accumulation_steps": "auto",
- "gradient_clipping": "auto",
- "zero_allow_untested_optimizer": true,
- "fp16": {
- "enabled": "auto",
- "loss_scale": 0,
- "initial_scale_power": 16,
- "loss_scale_window": 1000,
- "hysteresis": 2,
- "min_loss_scale": 1
- },
- "zero_optimization": {
- "stage": 2,
- "allgather_partitions": true,
- "allgather_bucket_size": 5e8,
- "reduce_scatter": true,
- "reduce_bucket_size": 5e8,
- "overlap_comm": false,
- "contiguous_gradients": true
- }
- }
跑成功的效果图:

如果出现下面 这个问题,
[E ProcessGroupNCCL.cpp:916] [Rank 3] NCCL watchdog thread terminated with exception: CUDA error: the launch timed out and was terminated CUDA kernel errors might be asynchronously reported at some other API call, so the stacktrace below might be incorrect. For debugging consider passing CUDA_LAUNCH_BLOCKING=1. Compile with `TORCH_USE_CUDA_DSA` to enable device-side assertions.
可能原因是显卡坏了或者显卡不是同一个型号!


