
热门标签
热门文章
- 1ARM第五章平时作业
- 2vue中初步使用store缓存获取当前登录用户id_vue3 缓存获取当前用户信息
- 3RC522 NFC IC卡简介_rc522上传数据是什么数据
- 4NISP二级--操作系统安全_操作系统的审计记录应包含如下信息: 事件的源地点
- 5Jmeter 01 -概述&线程组
- 6QueryRunner的使用_queryrunner runner = new queryrunner(jdbcutils.get
- 7python——开发2022年过年烟花小程序_龙年春节python
- 8Task1.2 A.I. 发展史_希腊的金色机器人
- 9“一带一路”国际国际方案CCG报告-万祥军 |国家(中国)智库
- 10Qt动画框架详解_qt ui动画
当前位置: article > 正文
机器学习水果识别——python+opencv实现物体特征提取_对输入的水果图片进行分割,得到水果的目标图像。 2.设计特征提取方法,实现对水果
作者:程序性能提升者 | 2024-01-29 21:04:08
赞
踩
对输入的水果图片进行分割,得到水果的目标图像。 2.设计特征提取方法,实现对水果
刚接触机器学习时候写的了,当时只知道机器学习不知道深度学习还以为只能人为的提取特征根据特征训练,后来才发现有深度学习这样更好的选择可以自动提取特征值。除了特征,深度学习在复杂背景下的效果也会明显优于普通机器学习,所以还是建议使用深度学习的方法。2019.4.25
一、用python+opencv实现物体特征值提取
以水果为例。要用机器学习来实现水果识别,无论是训练还是识别阶段都需要提取图片中水果的特征值。本篇将讲述如何提取水果的周长、面积、颜色、长度、宽度7个特征值。
1、读取图像、转为灰度图像并降噪
from math import *
import cv2 as cv
import numpy as np

img = cv.imread(path)
gray = cv.cvtColor(img, cv.COLOR_BGR2GRAY)
blurred = cv.GaussianBlur(gray, (3, 3), 0)
- 1
- 2
- 3
- 4
- 5
- 6
- 7
2、获取水果轮廓
这里使用图像梯度的方法
xgrad = cv.Sobel(blurred, cv.CV_16SC1, 1, 0)
ygrad = cv.Sobel(blurred, cv.CV_16SC1, 0, 1)
edge_output = cv.Canny(xgrad, ygrad, 50, 150)

cloneImg, contours, heriachy = cv.findContours(edge_output, cv.RETR_EXTERNAL, cv.CHAIN_APPROX_SIMPLE)
- 1
- 2
- 3
- 4
- 5
cv.findContours将图片中识别到的轮廓返回给contours变量,contours是一个list类型数据,里面存放了识别到的所有轮廓。有时候并不能很好的将目标轮廓完整的识别出来或者有没有去除掉的噪点的干扰所以不能简单粗暴的将获取到的轮廓全部运用。我尝试了一下两种方法:
将最大轮廓画入最开始的img图像并显示
max = 0
maxA = 0
for i, contour in enumerate(contours):
    x, y, w, h = cv.boundingRect(contour)
    if w*h>maxA:
    	max=i
    	maxA=w*h
cv.drawContours(img, contours, max, (0, 0, 255), 2)
#画框
x, y, w, h = cv.boundingRect(contours[max])
img = cv.rectangle(img, (x, y), (x + w, y + h), (0, 255,  0), 2)
cv.imshow('img', img)
- 1
- 2
- 3
- 4
- 5
- 6
- 7
- 8
- 9
- 10
- 11
- 12
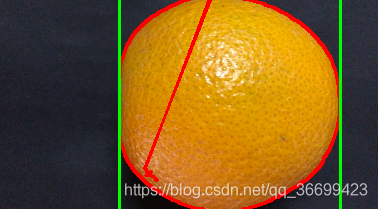
结果如图:


这个方法有一个问题:如果目标物体的轮廓被分为了多个区域,则不能完全显示出来轮廓。
所以想到了另一个方法:
将小于某一规模的轮廓删除
num=[]
for i, contour in enumerate(contours):
	x, y, w, h = cv.boundingRect(contour)
	if w < 50 or h < 50:
        continue
    num.append(i)
for i in num:
	if i == 0:
		continue
	contours[0] = np.concatenate((contours[i], contours[0]))
cv.drawContours(img, contours, max, (0, 0, 255), 2)
#画框
x, y, w, h = cv.boundingRect(contours[0])
img = cv.rectangle(img, (x, y), (x + w, y + h), (0, 255,  0), 2)
cv.imshow('img', img)
- 1
- 2
- 3
- 4
- 5
- 6
- 7
- 8
- 9
- 10
- 11
- 12
- 13
- 14
- 15
这个方法可以去除噪点的影响并且将轮廓连接起来。虽然轮廓也不正确但是矩形框是正确的。
轮廓可以通过cv2.contourArea和cv2.arcLength(cnt,True)分别获取面积和周长,但是因为轮廓是错误的,面积和周长求出来是不正确的。但是通过画出来的矩形框可以明显看出第二种方法是优于第一种方法的,所以我们要另找方法来获得周长和面积。到这里,已经可以拿到水果的长和宽了:
length = 0
width = 0
if w > h:
    length = w
    width = h
else:
    length = h
    width = w
- 1
- 2
- 3
- 4
- 5
- 6
- 7
- 8
3、提取水果的面积周长及颜色
为了提取面积和周长,这里分别再产生二值图和二值图的边缘提取图
###尽可能消除环境噪点的影响
将要用到的图像先剪裁出刚才识别到的区域,减小背景对识别影响的可能性
def myCut(img, x, y, w, h):
    cut = img[y:y + h, x:x + w]
    cv.imshow("cut", cut)
    return cut

cut_img = myCut(img, x, y, w, h)
cut_blurred = myCut(blurred, x, y, w, h)
- 1
- 2
- 3
- 4
- 5
- 6
- 7
获取二值图并计算面积
def GetArea(img):
    count = 0
    point_y = []
    point_x = []
    height, width = img.shape
    for h in range(0, height, 1):
        for w in range(0, width, 1):
            if (img[h, w] == 0):
                count += 1
                point_y.append(h)
                point_x.append(w)
    return count, point_x, point_y

ret, binary = cv.threshold(cut_blurred, 70, 255, cv.THRESH_BINARY)
cv.imshow("bi", binary)  # 求面积
area, point_x, point_y = GetArea(binary)

- 1
- 2
- 3
- 4
- 5
- 6
- 7
- 8
- 9
- 10
- 11
- 12
- 13
- 14
- 15
- 16
其中point_x、point_y分别记录着面积的区域,之后求颜色需要用到。
提取边缘并计算周长
def GetCircumference(img):
    count = 0
    height, width = img.shape
    for h in range(0, height, 1):
        for w in range(0, width, 1):
            if (img[h, w] == 255):
                count += 1
    return count

edge = cv.Canny(binary, 40, 100)
cv.imshow("edge", edge)  # 求周长
circumference = GetCircumference(edge)
- 1
- 2
- 3
- 4
- 5
- 6
- 7
- 8
- 9
- 10
- 11
- 12
提取平均颜色
def GetColor(img, point_height, point_width):
    R = 0
    G = 0
    B = 0
    count = 0
    color = []
    for i in range(0, len(point_height), 1):
        count += 1
        R += img[point_height[i], point_width[i]][0]
        G += img[point_height[i], point_width[i]][1]
        B += img[point_height[i], point_width[i]][2]
    R = int(R / count)
    G = int(G / count)
    B = int(B / count)
    color.append(R)
    color.append(G)
    color.append(B)
    return color
color = GetColor(cut_img, point_height, point_width)

#打印刚才所求的面积周长及颜色
print('area:', area, 'circumference:', circumference, 'longth:', longth, 'width:', width, 'color:', color)
- 1
- 2
- 3
- 4
- 5
- 6
- 7
- 8
- 9
- 10
- 11
- 12
- 13
- 14
- 15
- 16
- 17
- 18
- 19
- 20
- 21
- 22
二、代码
#!usr/env/bin python3

from math import *
import cv2 as cv
import numpy as np

file = '/Users/apple/Desktop/video/image-1/'
p=file+'data.txt'
#f = open(p, 'a')


def myCut(img, x, y, w, h):
    cut = img[y:y + h, x:x + w]
    cv.imshow("cut", cut)
    return cut


def GetColor(img, point_height, point_width):
    R = 0
    G = 0
    B = 0
    count = 0
    color = []
    for i in range(0, len(point_height), 1):
        count += 1
        R += img[point_height[i], point_width[i]][0]
        G += img[point_height[i], point_width[i]][1]
        B += img[point_height[i], point_width[i]][2]
    R = int(R / count)
    G = int(G / count)
    B = int(B / count)
    color.append(R)
    color.append(G)
    color.append(B)
    return color


# 返回面积
def GetArea(img):
    count = 0
    point_height = []
    point_width = []
    height, width = img.shape
    for h in range(0, height, 1):
        for w in range(0, width, 1):
            if (img[h, w] == 0):
                count += 1
                point_height.append(h)
                point_width.append(w)
    return count, point_width, point_height


# 返回周长
def GetCircumference(img):
    count = 0
    height, width = img.shape
    for h in range(0, height, 1):
        for w in range(0, width, 1):
            if (img[h, w] == 255):
                count += 1
    return count

def edge(img):
    # 灰度图像
    gray = cv.cvtColor(img, cv.COLOR_BGR2GRAY)

    # 高斯模糊,降低噪声
    blurred = cv.GaussianBlur(gray, (3, 3), 0)

    # 图像梯度
    xgrad = cv.Sobel(blurred, cv.CV_16SC1, 1, 0)
    ygrad = cv.Sobel(blurred, cv.CV_16SC1, 0, 1)
    # 计算边缘
    # 50和150参数必须符合1:3或者1:2
    edge_output = cv.Canny(xgrad, ygrad, 50, 150)


    cloneImg, contours, heriachy = cv.findContours(edge_output, cv.RETR_EXTERNAL, cv.CHAIN_APPROX_SIMPLE)

    # max = 0
    # maxA = 0
    num = []
    for i, contour in enumerate(contours):
        x, y, w, h = cv.boundingRect(contour)
        # if (w * h > maxA):
        #     max = i
        #     maxA = w * h

        if w < 50 or h < 50:
            continue
        num.append(i)

    for i in num:
        # cv.drawContours(img, contours, i, (0, 0, 255), 2)
        # x, y, w, h = cv.boundingRect(contours[i])
        # img = cv.rectangle(img, (x, y), (x + w, y + h), (0, 255, 0), 2)
        if i == 0:
            continue
        contours[0] = np.concatenate((contours[i], contours[0]))

    cv.imshow('img', img)

    x, y, w, h = cv.boundingRect(contours[0])

    cut_img = myCut(img, x, y, w, h)
    cut_blurred = myCut(blurred, x, y, w, h)
    cv.imshow('cut', cut_blurred)

    ret, binary = cv.threshold(cut_blurred, 70, 255, cv.THRESH_BINARY)
    cv.imshow("bi", binary)  # 求面积

    edge = cv.Canny(binary, 40, 100)
    cv.imshow("edge", edge)  # 求周长

    longth = 0
    width = 0
    if w > h:
        longth = w
        width = h
    else:
        longth = h
        width = w
    area, point_width, point_height = GetArea(binary)
    circumference = GetCircumference(edge)
    color = GetColor(cut_img, point_height, point_width)

    print('area:', area, 'circumference:', circumference, 'longth:', longth, 'width:', width, 'color:', color)
    # f.write(str(area))
    # f.write(' ')
    # f.write(str(circumference))
    # f.write(' ')
    # f.write(str(longth))
    # f.write(' ')
    # f.write(str(width))
    # f.write(' ')
    # for i in range(3):
    #     f.write(str(color[i]))
    #     f.write(' ')
    # f.write('\n')


def do():
    for i in range(1, 8, 1):
        print(i, ':')
        path = file + str(i) + '.jpg'

        src1 = cv.imread(path)

        # 图三(原图)
        size = src1.shape
        src = cv.resize(src1, ((int)(size[1] / 5), (int)(size[0] / 5)), cv.INTER_LINEAR)
        edge(src)
        cv.waitKey(0)

    cv.destroyAllWindows()
    #f.closed()
do()
- 1
- 2
- 3
- 4
- 5
- 6
- 7
- 8
- 9
- 10
- 11
- 12
- 13
- 14
- 15
- 16
- 17
- 18
- 19
- 20
- 21
- 22
- 23
- 24
- 25
- 26
- 27
- 28
- 29
- 30
- 31
- 32
- 33
- 34
- 35
- 36
- 37
- 38
- 39
- 40
- 41
- 42
- 43
- 44
- 45
- 46
- 47
- 48
- 49
- 50
- 51
- 52
- 53
- 54
- 55
- 56
- 57
- 58
- 59
- 60
- 61
- 62
- 63
- 64
- 65
- 66
- 67
- 68
- 69
- 70
- 71
- 72
- 73
- 74
- 75
- 76
- 77
- 78
- 79
- 80
- 81
- 82
- 83
- 84
- 85
- 86
- 87
- 88
- 89
- 90
- 91
- 92
- 93
- 94
- 95
- 96
- 97
- 98
- 99
- 100
- 101
- 102
- 103
- 104
- 105
- 106
- 107
- 108
- 109
- 110
- 111
- 112
- 113
- 114
- 115
- 116
- 117
- 118
- 119
- 120
- 121
- 122
- 123
- 124
- 125
- 126
- 127
- 128
- 129
- 130
- 131
- 132
- 133
- 134
- 135
- 136
- 137
- 138
- 139
- 140
- 141
- 142
- 143
- 144
- 145
- 146
- 147
- 148
- 149
- 150
- 151
- 152
- 153
- 154
- 155
- 156
- 157
- 158
1 :
area: 7032 circumference: 605 longth: 183 width: 177 color: [34, 31, 35]
2 :
area: 8564 circumference: 619 longth: 206 width: 197 color: [34, 29, 32]
3 :
area: 9032 circumference: 623 longth: 221 width: 215 color: [44, 36, 37]
4 :
area: 9121 circumference: 630 longth: 232 width: 214 color: [44, 37, 38]
5 :
area: 10747 circumference: 714 longth: 224 width: 216 color: [43, 36, 40]
6 :
area: 9127 circumference: 630 longth: 196 width: 194 color: [44, 39, 44]
7 :
area: 9787 circumference: 636 longth: 198 width: 198 color: [46, 41, 47]
- 1
- 2
- 3
- 4
- 5
- 6
- 7
- 8
- 9
- 10
- 11
- 12
- 13
- 14
声明:本文内容由网友自发贡献,不代表【wpsshop博客】立场,版权归原作者所有,本站不承担相应法律责任。如您发现有侵权的内容,请联系我们。转载请注明出处:https://www.wpsshop.cn/article/detail/45052
推荐阅读


相关标签

