
- 1华为云云耀云服务器L实例评测|Python Selenium加Chrome Driver构建UI自动化测试实践_华为浏览器driver
- 2使用Flutter的image_picker插件实现设备的相册的访问和拍照
- 3[点云学习] 一、点云相关知识了解
- 4HarmonyOS云开发基础认证【最新题库 满分答案】
- 5aigc修复美颜学习笔记
- 6Java 算法篇-深入了解单链表的反转(实现:用 5 种方式来具体实现)
- 7华为 ensp SSL VPN 史诗级配置
- 8如何解决大模型的「幻觉」问题
- 9【动态规划】【广度优先搜索】LeetCode:2617 网格图中最少访问的格子数
- 10视觉机械臂自主抓取全流程_机械臂视觉抓取
线程池--JAVA
赞
踩
虽然线程是轻量级进程,但是如果当创建和销毁的的频率非常之高,那么它也就会消耗很多的资源。
而线程池就是用来优化线程频繁创建和销毁的场景,减少线程创建、销毁的频率。
ExecutorService
JAVA标准库为我们实现了线程池,ExecutorService是一个接口,线程池的创建并不像平常的接口实现那样直接new,而是使用了“工厂模式”。
- public static void main(String[] args) {
- //创建有4个线程的线程池
- ExecutorService service = Executors.newFixedThreadPool(4);
- //创建一个可以根据任务数量 来自行调整线程数量 的线程池
- ExecutorService service1 = Executors.newCachedThreadPool();
- //创建含有一个线程的线程池
- ExecutorService service2 = Executors.newSingleThreadExecutor();
- //创建一个含有3个线程的线程池,该线程池可以调度命令在给定时间后延迟运行
- ScheduledExecutorService service3 = Executors.newScheduledThreadPool(3);
- }
创建好了之后可以利用submit()方法来给里面添加任务
- public static void main(String[] args) {
- //创建有4个线程的线程池
- ExecutorService service = Executors.newFixedThreadPool(4);
- //添加5个任务
- for (int i = 0; i < 5; i++) {
- int a = i;
- service.submit(()->{
- System.out.println(a);
- });
- }
- }

但是第四种创建线程池的方法有点特殊如果你想要实现延时执行任务就需要使用schedule
()方法。
- public static void main(String[] args) {
- // 创建一个定时执行任务的线程池,设置核心线程数为3
- ScheduledExecutorService service = Executors.newScheduledThreadPool(3);
- //打印当前时间
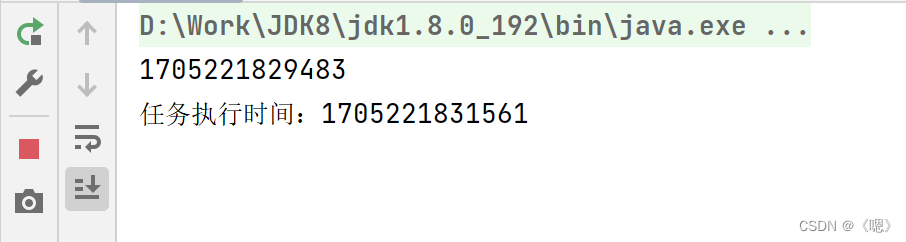
- System.out.println(System.currentTimeMillis());
- // 定时执行任务,延迟2秒后开始执行
- service.schedule(() -> {
- // 执行的任务逻辑
- System.out.println("任务执行时间:" + System.currentTimeMillis());
- }, 2, TimeUnit.SECONDS);
- }

上述这几个创建线程池的方法本质上都是将ThreadPoolExecutor进行了封装。
ThreadPoolExecutor
这个类有4中构造方法,可是仔细看就会发现前三种还是调用的的四种,所以本质上是只有一种。

各个参数的含义
corePoolSize
当前线程池中的核心线程数即当前线程池在空闲时含有的线程数量,也就是当前线程池包含的线程最少数量。
maximumPoolSize
当前线程池中允许存在的最大线程数。
keepAliveTime
当实际线程数大于核心线程数时,多余的空闲线程能够存活的最长时间。
unit
存活时间的单位。
NANOSECONDS:千分之一微秒;
MICROSECONDS:千分之一毫秒;
MILLISECONDS:千分之一秒;
SECONDS:秒;
MINUTES:分钟;
HOURS:小时;
DAYS:天;
workQueue
用于保存待执行任务的队列。
threadFactory
创建新线程时所用的工厂类。
handler
当线程池中的任务满了之后所使用的拒绝策略。
ThreadPoolExecutor.AbortPolicy:直接抛出异常;
ThreadPoolExecutor.CallerRunsPolicy:新添加的任务,由添加任务的线程执行;
ThreadPoolExecutor.DiscardOldestPolicy :丢弃队列中最老的任务,再将新任务添加进任务队列;
ThreadPoolExecutor.DiscardPolicy:丢弃新添加的任务。
线程池的关闭
想要关闭线程池需要使用shutdown()方法
- public static void main(String[] args) {
- // 创建一个定时执行任务的线程池,设置核心线程数为3
- ScheduledExecutorService service = Executors.newScheduledThreadPool(3);
- //打印当前时间
- System.out.println(System.currentTimeMillis());
- // 定时执行任务,延迟2秒后开始执行
- service.schedule(() -> {
- // 执行的任务逻辑
- System.out.println("任务执行时间:" + System.currentTimeMillis());
- }, 2, TimeUnit.SECONDS);
- }
可以看出任务执行完后程序并没有退出。
- public static void main(String[] args) {
- // 创建一个定时执行任务的线程池,设置核心线程数为3
- ScheduledExecutorService service = Executors.newScheduledThreadPool(3);
- //打印当前时间
- System.out.println(System.currentTimeMillis());
- // 定时执行任务,延迟2秒后开始执行
- service.schedule(() -> {
- // 执行的任务逻辑
- System.out.println("任务执行时间:" + System.currentTimeMillis());
- }, 2, TimeUnit.SECONDS);
-
- //主线程休眠一段时间
- try {
- Thread.sleep(2000); // 休眠2秒
- } catch (InterruptedException e) {
- e.printStackTrace();
- }
- // 关闭线程池
- service.shutdown();
- }


接下来为了更好的理解线程池,下面是模拟实现一个含有固定线程数的线程池。
模拟实现
先创建一个类名为MyThreadPool里面含有一个属性,类型为BlockingQueue。
- public class MyThreadPool {
- //队列大小为5
- private BlockingQueue<Runnable> queue = new ArrayBlockingQueue<>(5);
- }
写一个只有一个参数的有参构造方法,参数为线程池的线程数。
利用循环创建n个线程,每个线程都不断地从队列中拿任务。
- public MyThreadPool(Integer n) {
- for (int i = 0; i < n; i++) {
- Thread t = new Thread(()->{
- while(true) {
- try {
- Runnable runnable = queue.take();
- runnable.run();
- } catch (InterruptedException e) {
- throw new RuntimeException(e);
- }
- }
- });
- t.start();
- }
- }
写一个submit()方法可以给队列中添加任务。
- public void submit(Runnable runnable) {
- try {
- this.queue.put(runnable);
- } catch (InterruptedException e) {
- throw new RuntimeException(e);
- }
- }
此时一个简单的线程池就完成了,下面来进行一下简单的测试:
- public static void main(String[] args) {
- MyThreadPool myThreadPool = new MyThreadPool(5);
- for (int i = 0; i < 40; i++) {
- int a = i;
- myThreadPool.submit(()->{
- System.out.println(a);
- });
- }
- }

完整代码
- import java.util.concurrent.ArrayBlockingQueue;
- import java.util.concurrent.BlockingQueue;
-
- //线程池
- public class MyThreadPool {
- private BlockingQueue<Runnable> queue = new ArrayBlockingQueue<>(5);
-
- public MyThreadPool(Integer n) {
- for (int i = 0; i < n; i++) {
- Thread t = new Thread(()->{
- while(true) {
- try {
- Runnable runnable = queue.take();
- runnable.run();
- } catch (InterruptedException e) {
- throw new RuntimeException(e);
- }
- }
- });
- t.start();
- }
- }
-
- public void submit(Runnable runnable) {
- try {
- this.queue.put(runnable);
- } catch (InterruptedException e) {
- throw new RuntimeException(e);
- }
- }
- }
![[ 云计算 | AWS 实践 ] 使用 Java 更新现有 Amazon S3 对象](https://img-blog.csdnimg.cn/direct/f6b4b45ef01445aa9a147e7c5f1a8f15.png?x-oss-process=image/resize,m_fixed,h_300,image/format,png)


