
热门标签
热门文章
- 1GoLang封装redigo_golang redigo封装方法
- 207蚂蚁-高并发解决方案——1.Hystrix服务降级,服务隔离,服务熔断,服务限流,CDN
- 3C++域作用符_c++ 全局作用域符
- 4linux中配置文件目录为什么用etc来命名
- 5python tabula 使用方法,如何使用tabula-py将PDF转换为CSV?
- 6java项目如何配置多数据源(基于SpringBoot+Mybatis框架)_多个java工程怎么配置多个数据源并互相关联
- 7【Linux】cat 命令使用_linux cat -v
- 8Android对性能要求,Android性能管理
- 9高维数据惩罚回归方法:主成分回归PCR、岭回归、lasso、弹性网络elastic net分析基因数据...
- 10Caddi Programming Contest 2021(AtCoder Beginner Contest 193) F.Zebraness(最小割)_[abc193f] zebraness 题解
当前位置: article > 正文
wxWidgets Windows下安装 配置 编译 创建项目 实现“hello world”(Visual Studio2019)详细图文教程_window中wxwidgets库安装
作者:编程先知 | 2024-01-16 14:48:35
赞
踩
window中wxwidgets库安装
一、下载wxWidgets
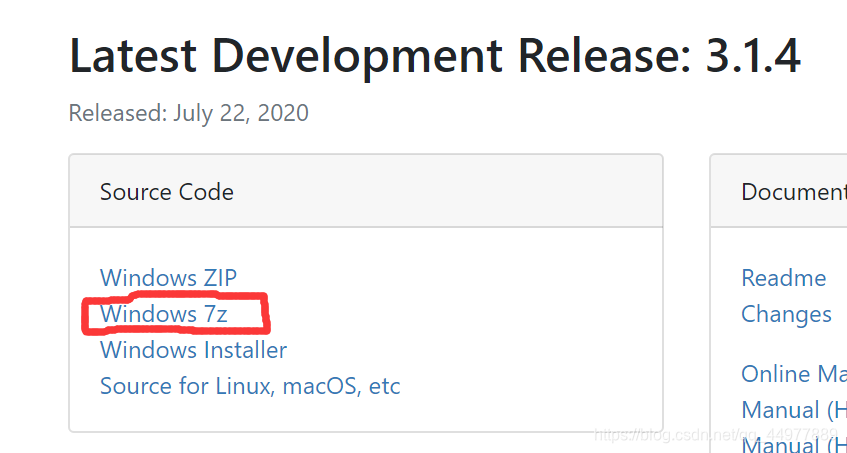
1.官网链接下载地址如下:
下载地址戳我戳我~
2.选择 7Z格式的下载,因为比ZIP格式的更小,不容易导致下载失败
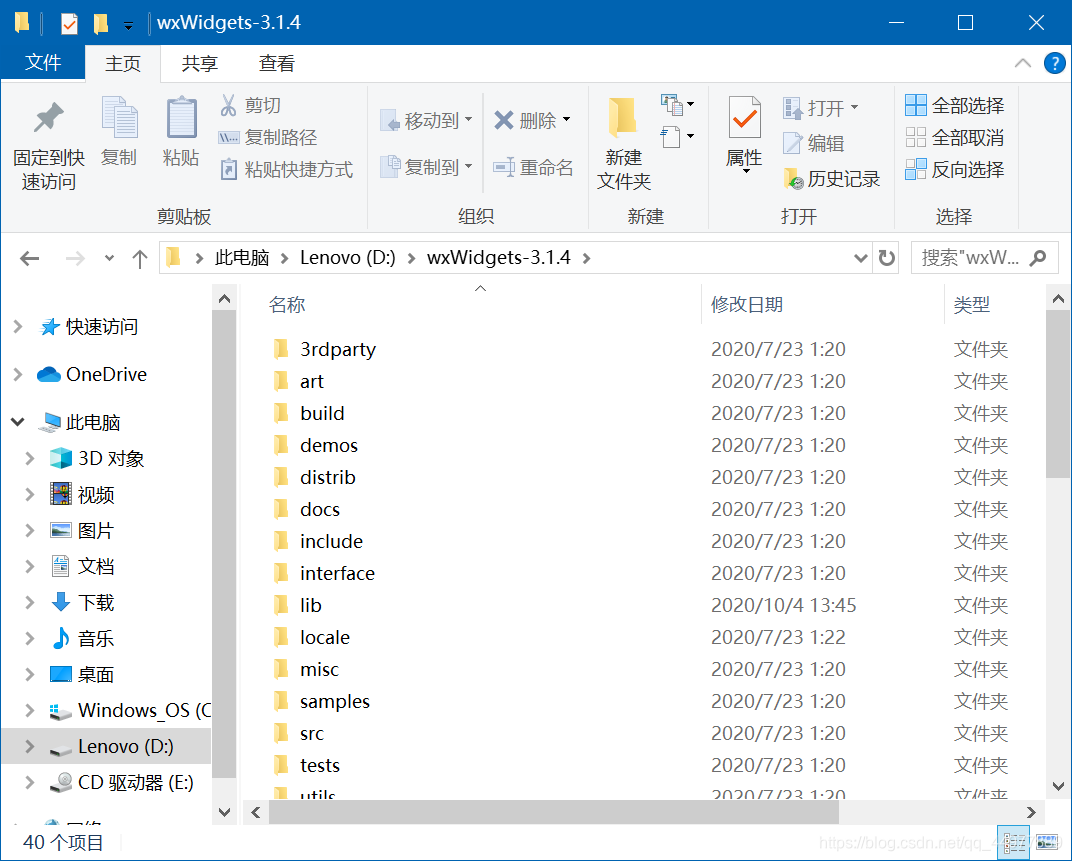
3.解压后如图所示
二、编译wxWidgets源代码
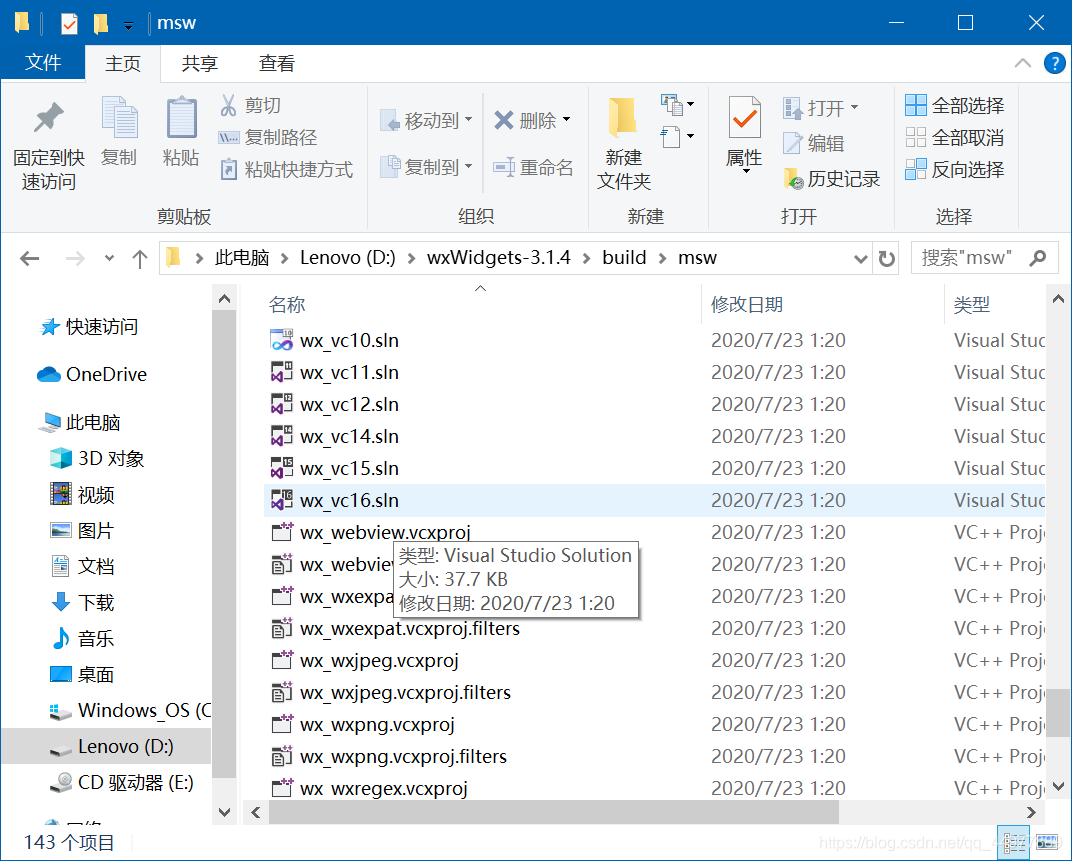
1.打开目录wxWidgets-3.1.4\build\msw,找到与自己的Visual Studio版本最相近的.sln文件并用VS打开。
(我的VS版本是2019,所以选择wx_vc16.sln)
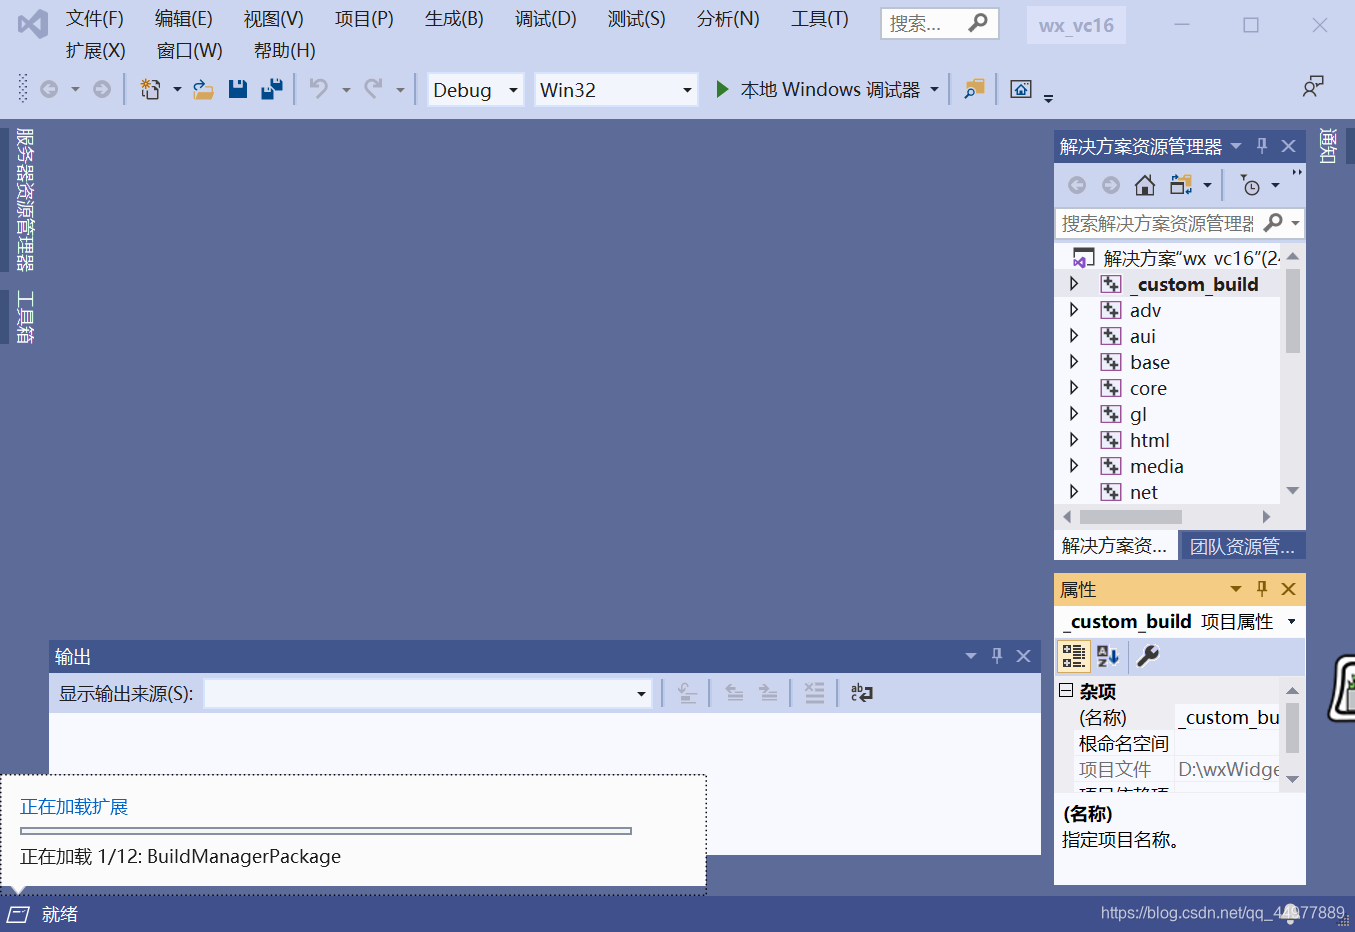
用VS打开后如下图所示:
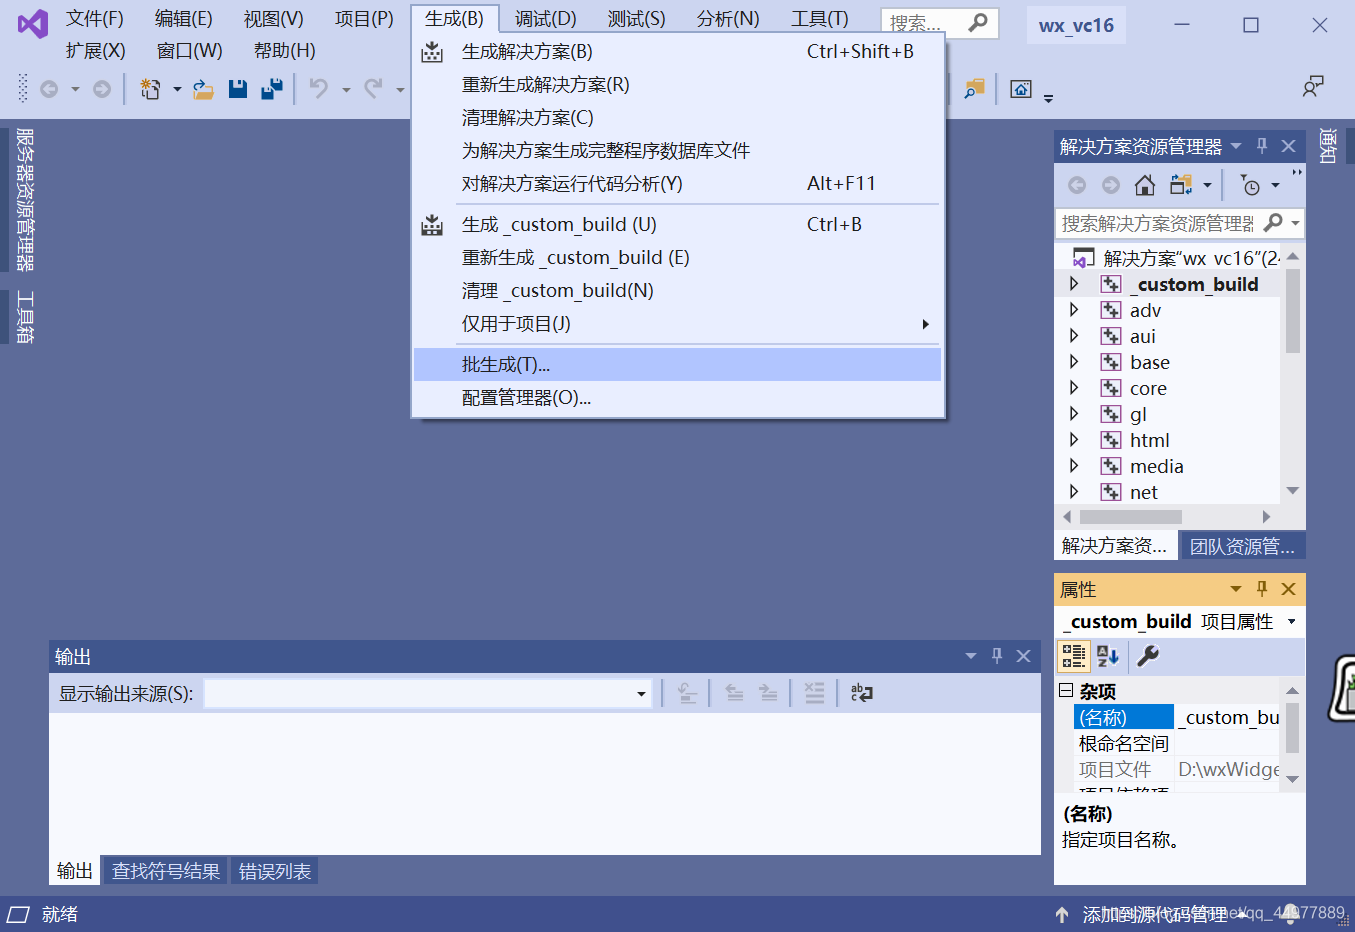
2.(等上图的左下角准备就绪后进行这一步):选择 生成——批生成
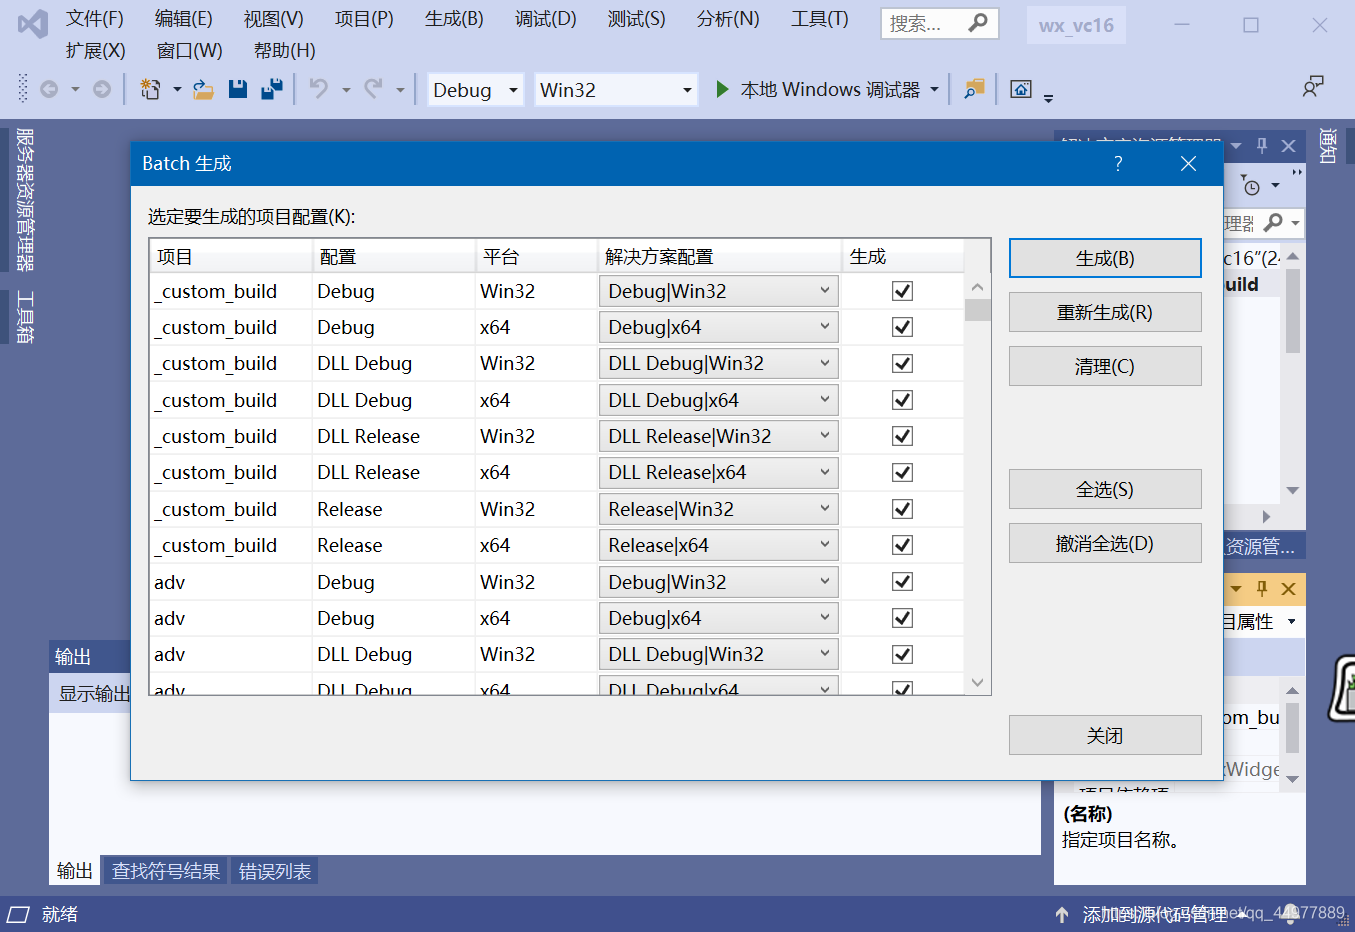
3.选择 全选——生成(据配置不同需等待十几分钟,大概~)
三、配置环境变量
1.选择 我的电脑 —— 属性 —— 高级系统设置 —— 环境变量 —
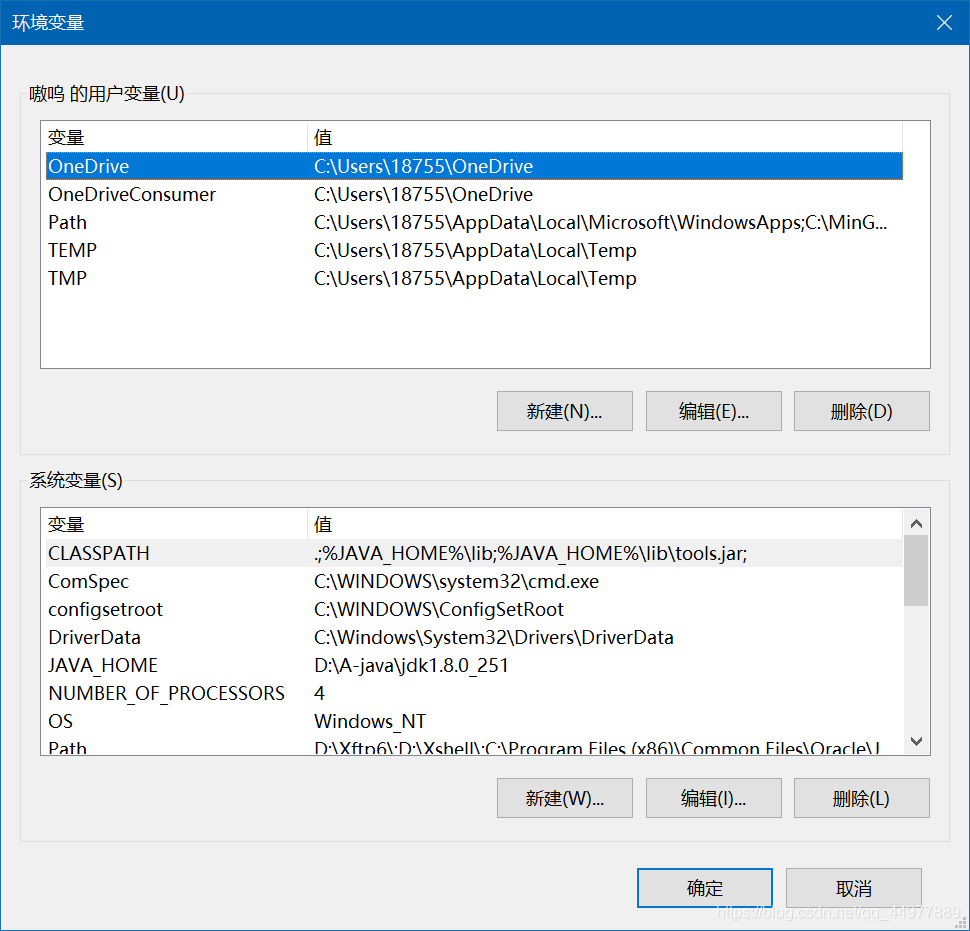
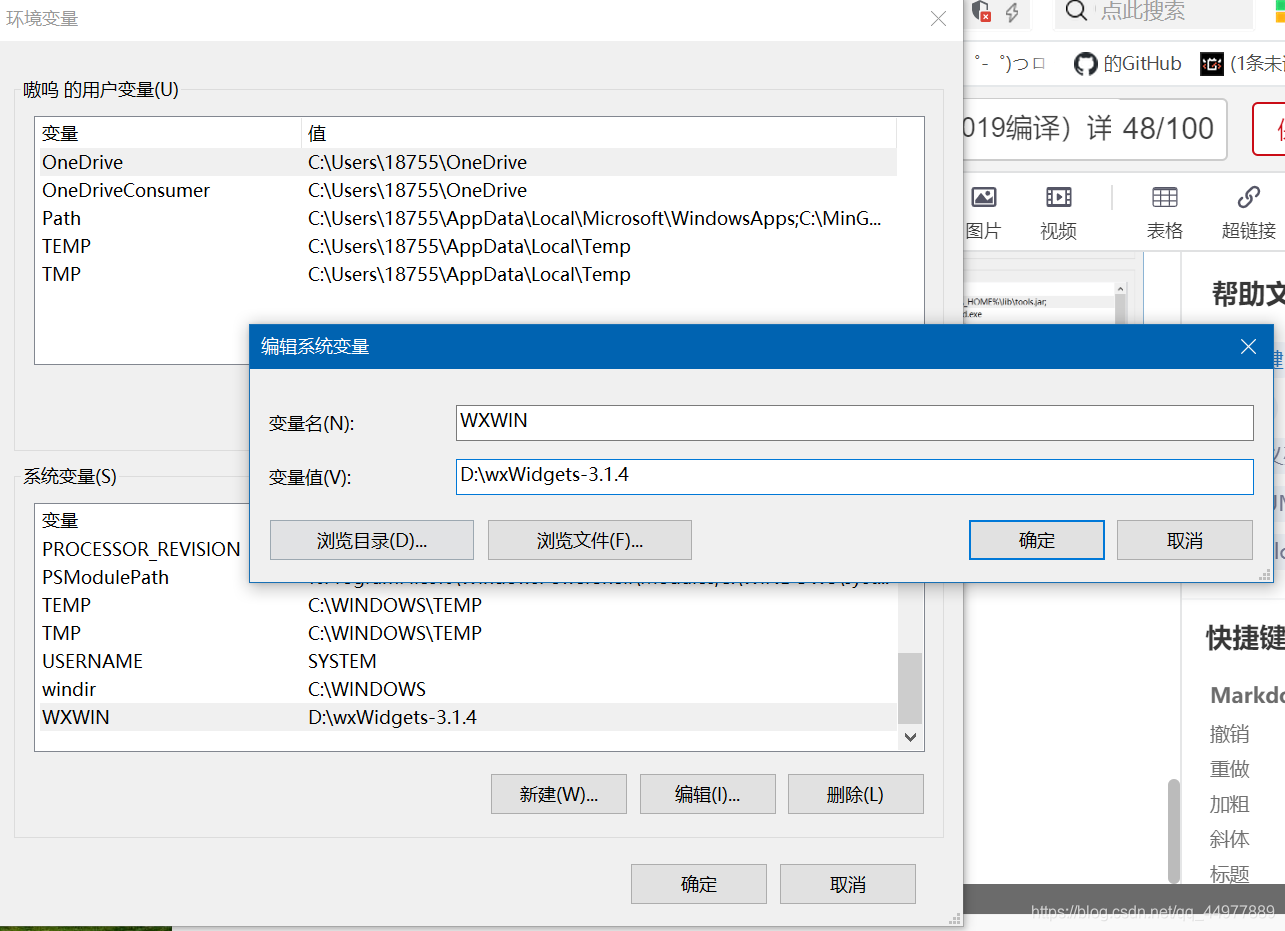
2.在系统变量中选择 新建;
变量名:可以随便起一个,后面步骤需要用到变量名
变量值:wxWidgets文件解压后的地址
四、创建项目并配置项目环境
1.打开VS 选择 创建新项目 —— Windows桌面应用程序 —— 下一步 ——(。。。正常过程。。。),创建完成后如下图所示
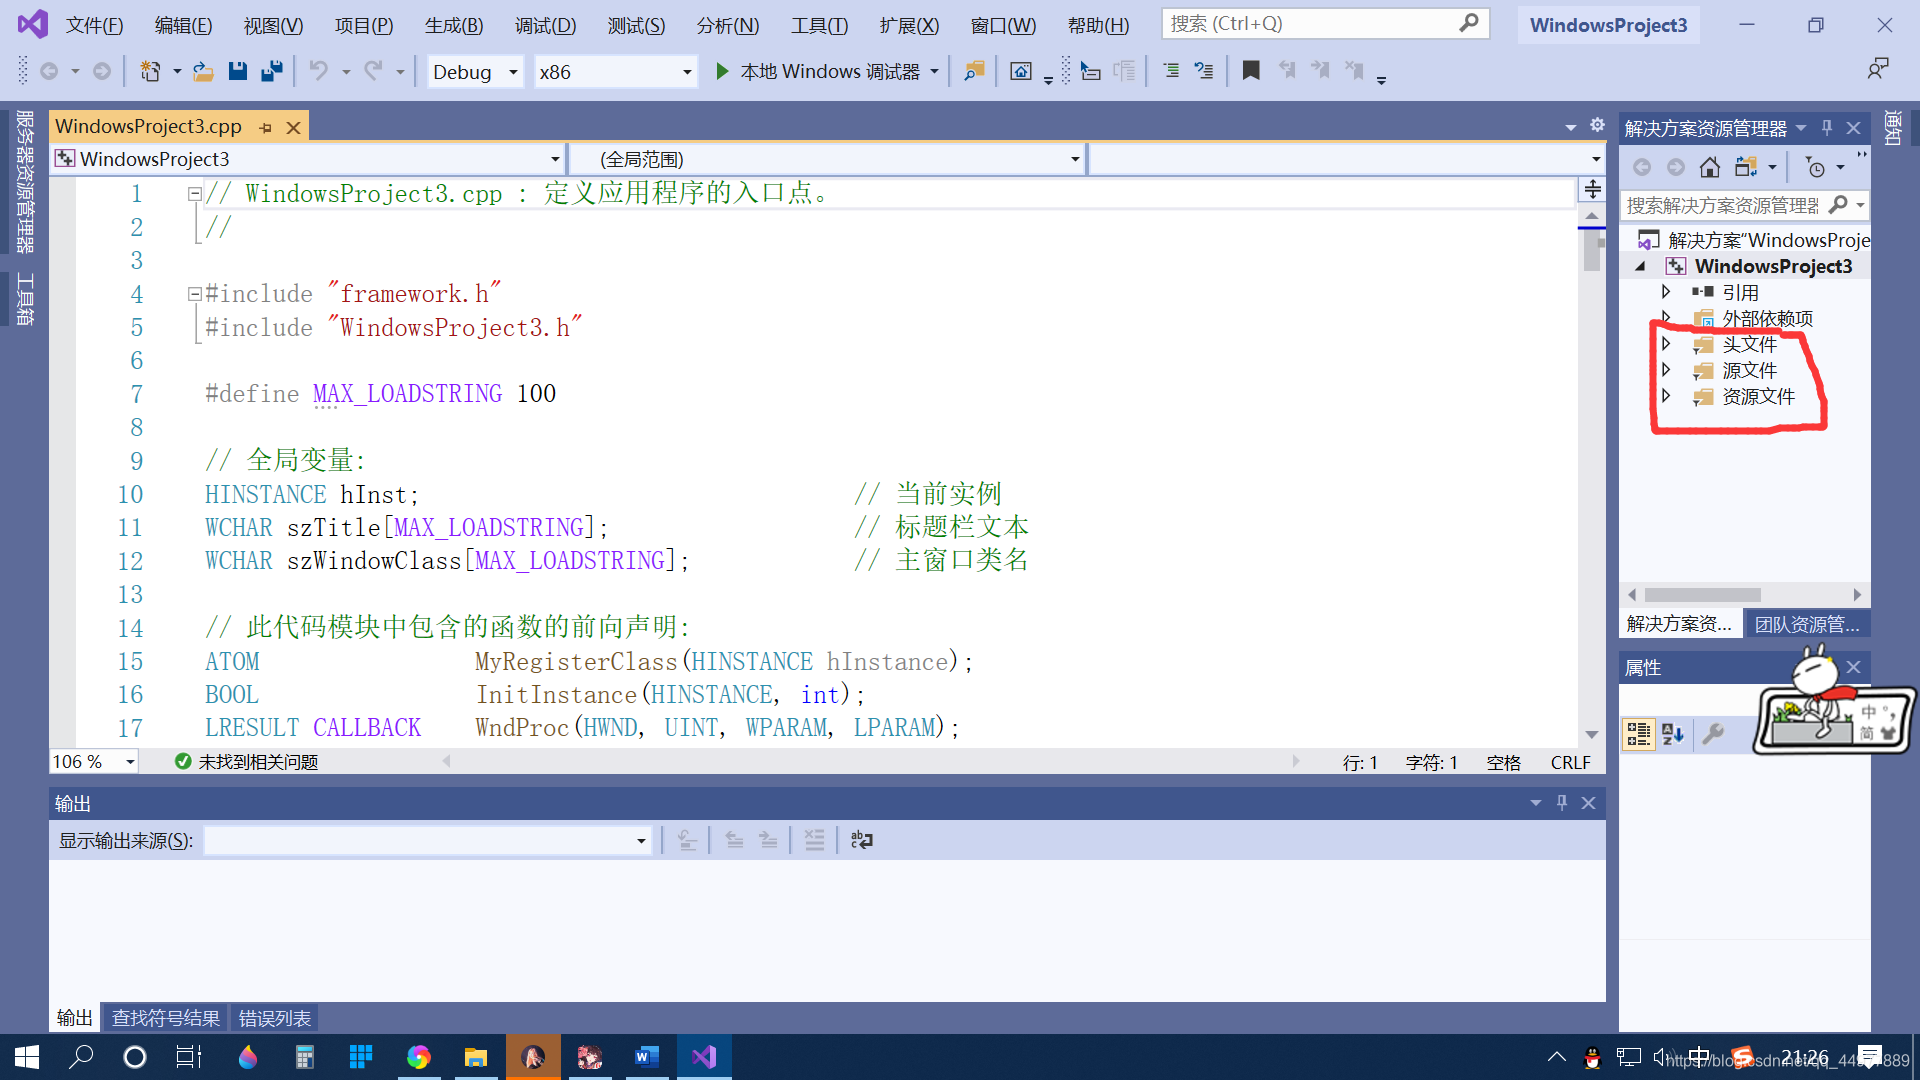
2.删掉下图中的三个文件
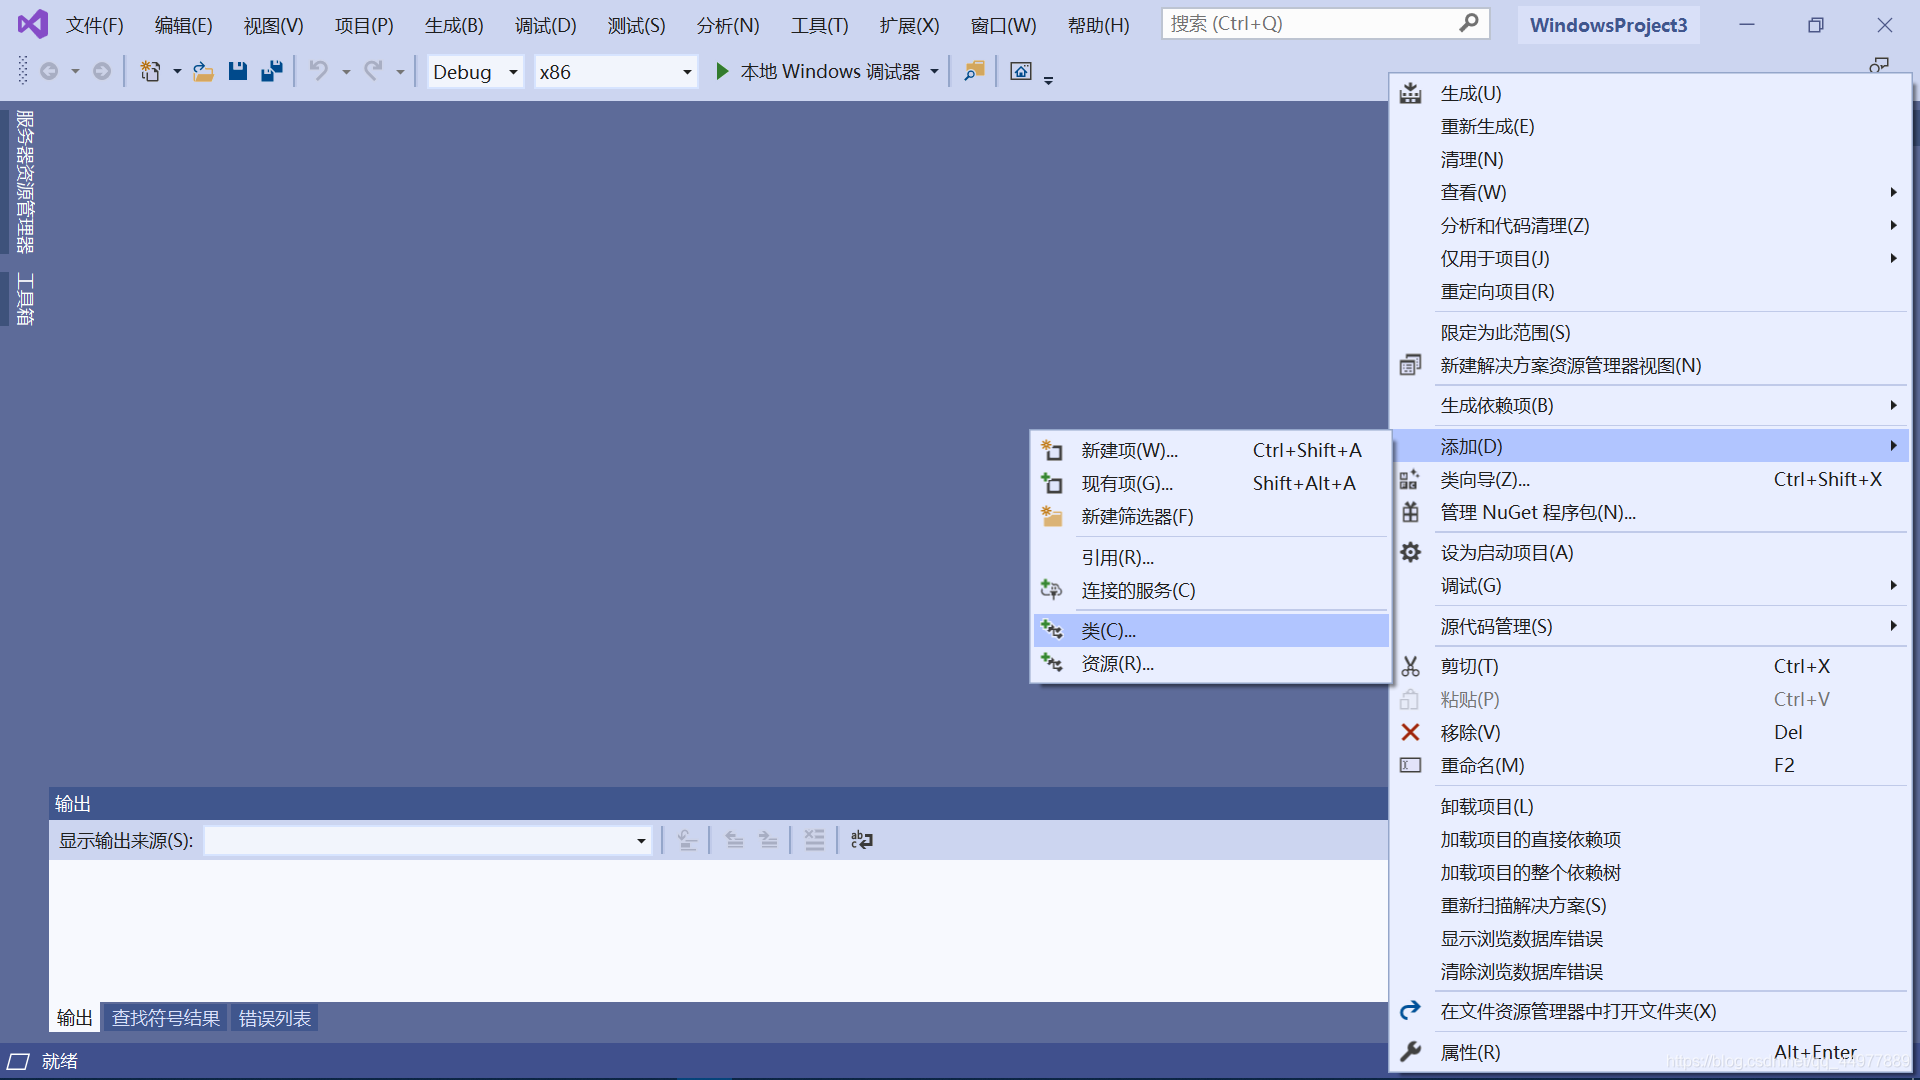
3.右击右边的 资源管理器 中的 项目名称 (如图的WindowsProject3)选择 添加—— 类
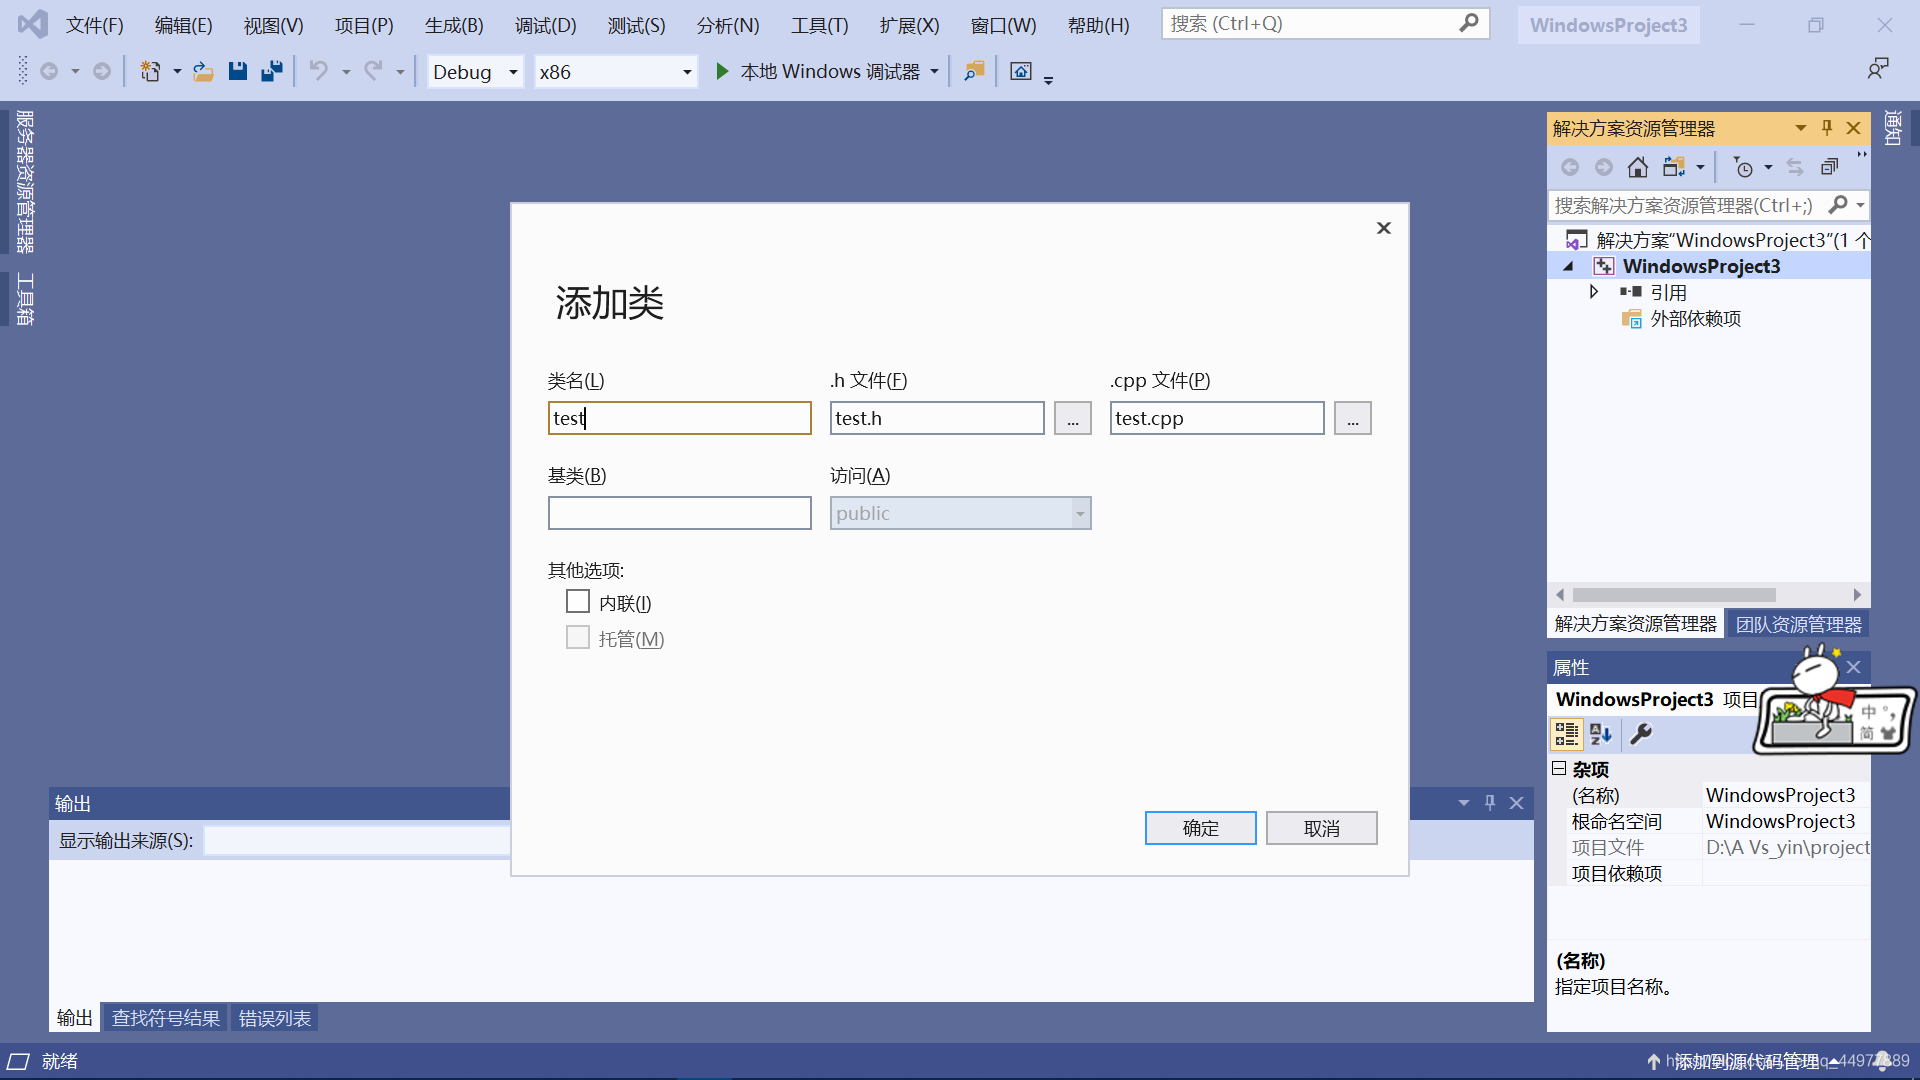
4.如下图所示创建类
5.右击右边的 资源管理器 中的项目名称 (如上图的WindowsProject3)选择 属性
6.选择 C/C++中的常规,在 附加包含目录中 添加 $(WXWIN)\include;$(WXWIN)\include\msvc(WXWIN为前面步骤3.2中的变量名)
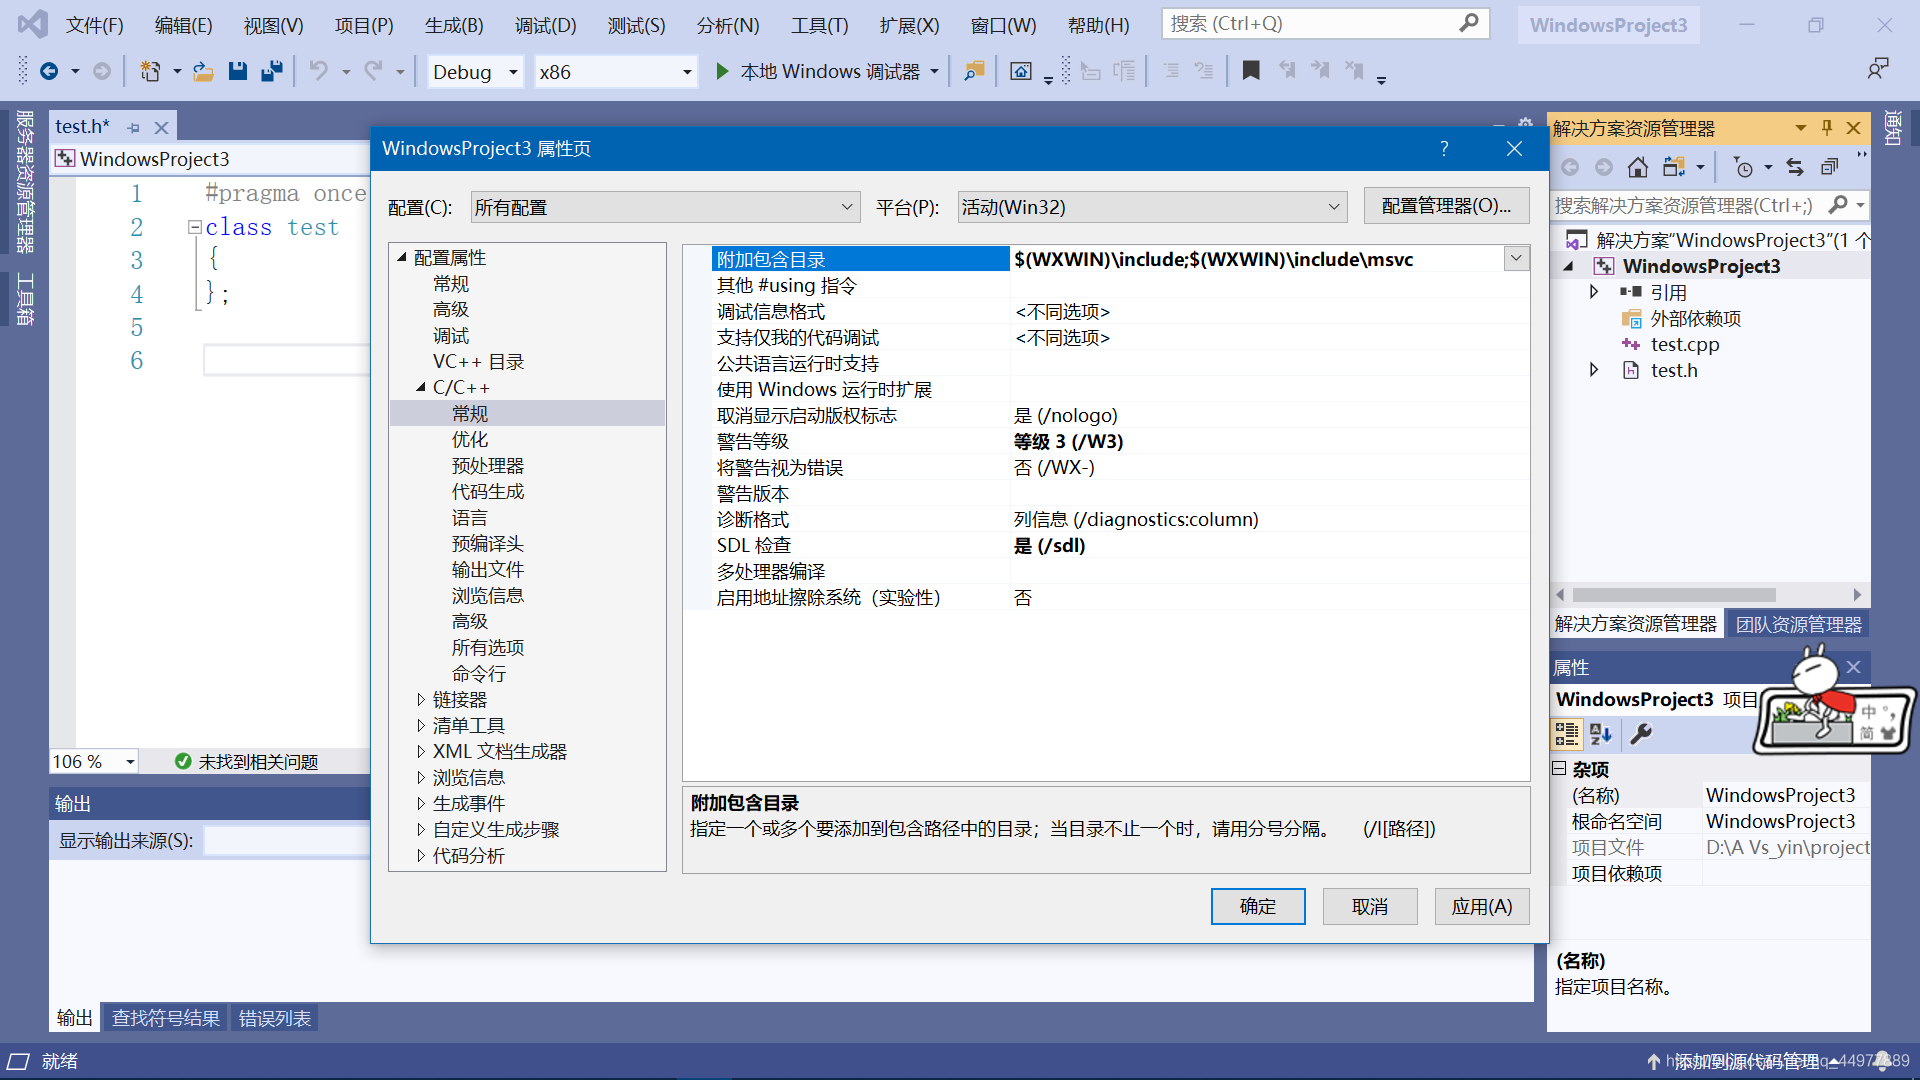
7.点击链接器,在附加库目录中填$(WXWIN)\lib\vc_lib

五、实现“hello world”
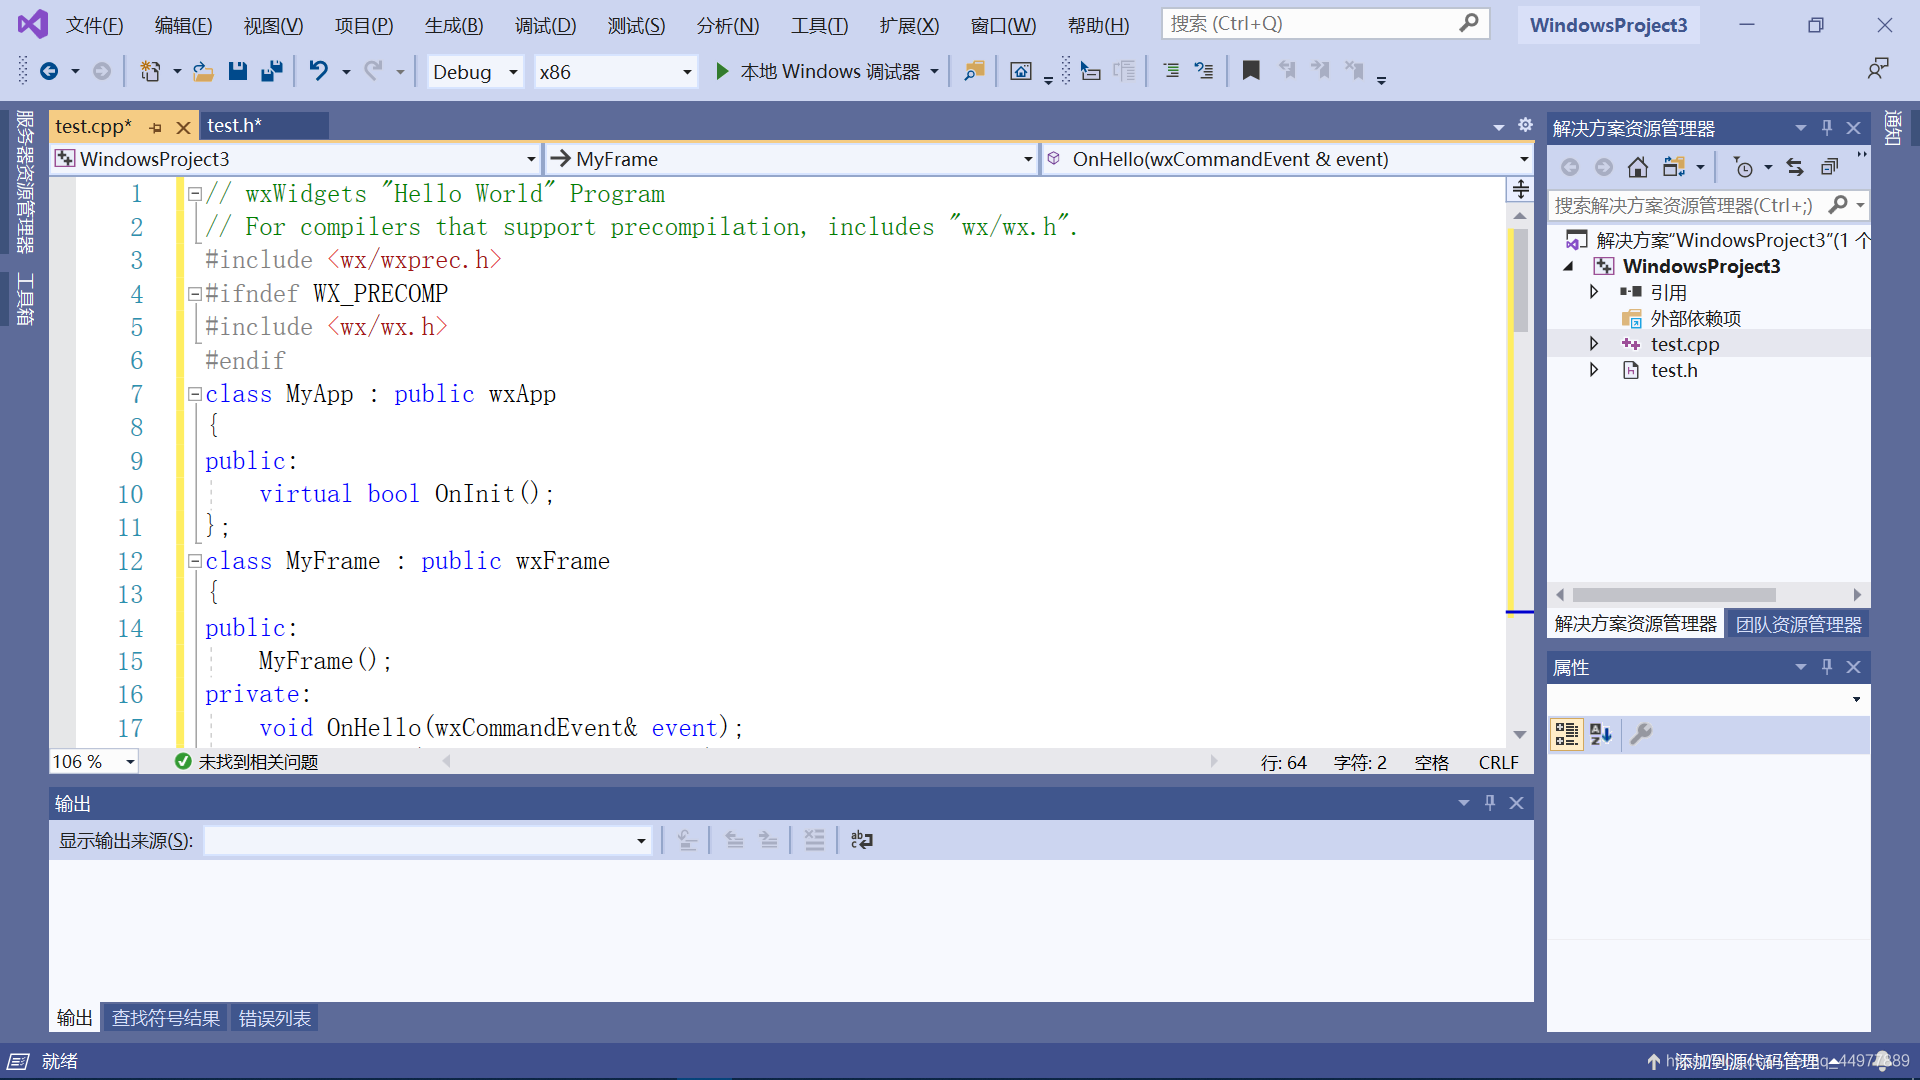
1.在test.cpp中copy如下代码:
// wxWidgets "Hello World" Program
// For compilers that support precompilation, includes "wx/wx.h".
#include <wx/wxprec.h>
#ifndef WX_PRECOMP
    #include <wx/wx.h>
#endif
class MyApp : public wxApp
{
public:
    virtual bool OnInit();
};
class MyFrame : public wxFrame
{
public:
    MyFrame();
private:
    void OnHello(wxCommandEvent& event);
    void OnExit(wxCommandEvent& event);
    void OnAbout(wxCommandEvent& event);
};
enum
{
    ID_Hello = 1
};
wxIMPLEMENT_APP(MyApp);
bool MyApp::OnInit()
{
    MyFrame *frame = new MyFrame();
    frame->Show(true);
    return true;
}
MyFrame::MyFrame()
    : wxFrame(NULL, wxID_ANY, "Hello World")
{
    wxMenu *menuFile = new wxMenu;
    menuFile->Append(ID_Hello, "&Hello...\tCtrl-H",
                     "Help string shown in status bar for this menu item");
    menuFile->AppendSeparator();
    menuFile->Append(wxID_EXIT);
    wxMenu *menuHelp = new wxMenu;
    menuHelp->Append(wxID_ABOUT);
    wxMenuBar *menuBar = new wxMenuBar;
    menuBar->Append(menuFile, "&File");
    menuBar->Append(menuHelp, "&Help");
    SetMenuBar( menuBar );
    CreateStatusBar();
    SetStatusText("Welcome to wxWidgets!");
    Bind(wxEVT_MENU, &MyFrame::OnHello, this, ID_Hello);
    Bind(wxEVT_MENU, &MyFrame::OnAbout, this, wxID_ABOUT);
    Bind(wxEVT_MENU, &MyFrame::OnExit, this, wxID_EXIT);
}
void MyFrame::OnExit(wxCommandEvent& event)
{
    Close(true);
}
void MyFrame::OnAbout(wxCommandEvent& event)
{
    wxMessageBox("This is a wxWidgets Hello World example",
                 "About Hello World", wxOK | wxICON_INFORMATION);
}
void MyFrame::OnHello(wxCommandEvent& event)
{
    wxLogMessage("Hello world from wxWidgets!");
}

- 1
- 2
- 3
- 4
- 5
- 6
- 7
- 8
- 9
- 10
- 11
- 12
- 13
- 14
- 15
- 16
- 17
- 18
- 19
- 20
- 21
- 22
- 23
- 24
- 25
- 26
- 27
- 28
- 29
- 30
- 31
- 32
- 33
- 34
- 35
- 36
- 37
- 38
- 39
- 40
- 41
- 42
- 43
- 44
- 45
- 46
- 47
- 48
- 49
- 50
- 51
- 52
- 53
- 54
- 55
- 56
- 57
- 58
- 59
- 60
- 61
- 62
- 63
- 64
出现如下图所示即安装成功~

既来之~
则赞之~
如有疑问~
畅所欲言~
声明:本文内容由网友自发贡献,不代表【wpsshop博客】立场,版权归原作者所有,本站不承担相应法律责任。如您发现有侵权的内容,请联系我们。转载请注明出处:https://www.wpsshop.cn/article/detail/40393?site
推荐阅读


相关标签

