
热门标签
热门文章
- 1K8s 入门指南(一):单节点集群环境搭建
- 22023年最热门的网络安全行业岗位分析_网络安全的职业分析
- 3【知识图谱】图数据库Neo4jDesktop的安装图文详解(小白适用)_neo4j桌面版
- 4IntelliJ IDEA无公网远程连接Windows本地Mysql数据库提高开发效率
- 5人工智能 - 目标检测:发展历史、技术全解与实战
- 6最最普通程序员,如何利用工资攒够彩礼,成为人生赢家
- 7【Docker】Docker Compose,yml 配置指令参考的详细讲解
- 8无需部署服务器,如何结合内网穿透实现公网访问导航页工具Dashy
- 9AI 绘画Stable Diffusion 研究(八)sd采样方法详解
- 10南京邮电大学数学实验最新版
当前位置: article > 正文
【IDEA】一直scanning files to index的四种解决方法(VIP典藏版)
作者:代码架构师 | 2024-01-16 14:04:01
赞
踩
scanning files to index
目录
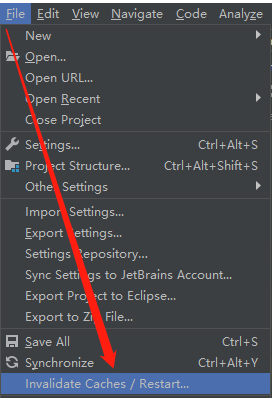
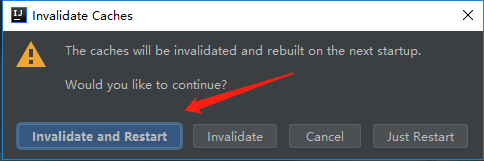
1、File -> Invalidate Caches / Restart
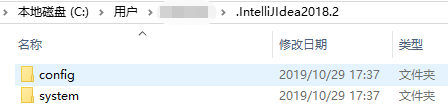
2、删除C:\Users\xxx\.IntelliJIdea2018.2\system文件夹
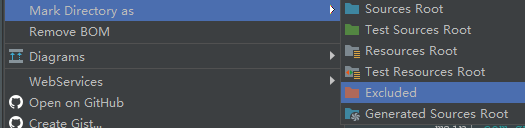
3、将扫描的文件夹排除在建立索引的范围之外,即将xxx文件夹标记为Excluded。
4、更改Edit Configurations和idea配置路径

第四种方法摸索研究后得出,亲测好用!

一、问题描述
- 长时间/重复性的scanning files to index
- scanning files to index :扫描文件建立索引
scanning files to index 扫描文件建立索引二、解决方法
1、File -> Invalidate Caches / Restart
2、删除C:\Users\xxx\.IntelliJIdea2018.2\system文件夹
3、将扫描的文件夹排除在建立索引的范围之外,即将xxx文件夹标记为Excluded。
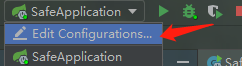
4、更改Edit Configurations和idea配置路径
a、一直扫描很长时间,点击Edit Configurations,update classes and resources更改为Do nothing。

b、会发现扫描时间很短,但是还会一直重复扫描
c、更改idea配置路径 或 直接注掉三行注释 达到刷新目的
xx\bin\idea.properties
- idea.config.path=D:\Java\idea\IntelliJ IDEA 2018.2.4\01edit\config
- idea.system.path=D:\Java\idea\IntelliJ IDEA 2018.2.4\01edit\system
- idea.plugins.path=D:\Java\idea\IntelliJ IDEA 2018.2.4\01edit\plugins
-
- #---------------------------------------------------------------------
- # Uncomment this option if you want to customize path to IDE config folder. Make sure you're using forward slashes.
- #---------------------------------------------------------------------
- # idea.config.path=${user.home}/.IntelliJIdea/config
- #---------------------------------------------------------------------
- # Uncomment this option if you want to customize path to IDE system folder. Make sure you're using forward slashes.
- #---------------------------------------------------------------------
- # idea.system.path=${user.home}/.IntelliJIdea/system
-
- #---------------------------------------------------------------------
- # Uncomment this option if you want to customize path to user installed plugins folder. Make sure you're using forward slashes.
- #---------------------------------------------------------------------
- # idea.plugins.path=${idea.config.path}/plugins
心酸历程:
- 重启idea,重装idea,重启电脑,kill idea进程都不好使
- 重新clone的代码一样的问题,所以大概率是配置的问题
- 配置文件删掉一样不好使,可能是需要刷新加载配置文件
- 不重启的情况下(重启也不一定好用),更改idea配置路径即可起到刷新的效果,或者尝试放开、注掉配置文件,再或者拿其他人的配置文件直接覆盖...
- 更改完毕后,关闭idea,任务管理器杀死进程,重新启动
- 发现update完毕后就不会重复扫描建立索引了

5、项目文件过多
项目文件过多的情况会创建索引就会很慢,所以可以把文件数量很大的目录排除创建索引的范围就可以了。借图哈。

三、往期推荐

收藏点赞加关注,遇到问题不迷路!
点赞关注加收藏,工作撸码不迷茫!
声明:本文内容由网友自发贡献,不代表【wpsshop博客】立场,版权归原作者所有,本站不承担相应法律责任。如您发现有侵权的内容,请联系我们。转载请注明出处:https://www.wpsshop.cn/article/detail/40154
推荐阅读

相关标签

