
- 1初识云计算
- 2traceroute命令结果分析_traceroute命令详解
- 32021-10-30_使用vmware软件启动提供的opensatckallinone镜像,自行检查openstack中各
- 4《Redis核心技术与实战》学习笔记1——基本架构:一个键值数据库包含什么?
- 5java list取最后一个元素_Java stream() 获取List指定元素或最后一个元素的方法
- 6Vite+Vue3+TypeScript_vite vue3 typescript
- 7NFC 学习笔记 5 MFRC522读写器2 NDEF_nfc data exchange format
- 8接口开放平台的产品设计脑图及解决方案_api开放平台设计文档
- 9【小白学OpenCV】(1): 图像处理之低通滤波_低通滤波器实现图像信号的滤波运算
- 10Docker和docker-compose基础入门及应用部署_docker部署和dockercompose
07. HTTP接口请求重试怎么处理?
赞
踩
目录
1、前言
HTTP接口请求重试是指在请求失败时,再次发起请求的机制。在实际应用中,由于网络波动、服务器故障等原因,HTTP接口请求可能会失败。为了保证系统的可用性和稳定性,需要对HTTP接口请求进行重试。
2、实现方式
今天给大家分享一些常见的接口请求重试的方式。本地模拟了一个请求接口,后面的代码示例均模拟请求该接口:
- @GetMapping("http_test")
- public String getHttpTest(){
- return "接口请求成功,返回:OK";
- }
2.1、循环重试
循环重试是最简单最粗暴的方式,就是在请求接口代码中加入循环机制,如果接口请求失败,则循环继续发起接口请求,直到请求成功或接口重试次数达到上限。如果请求成功,则不进行重试。
简单代码示例如下:
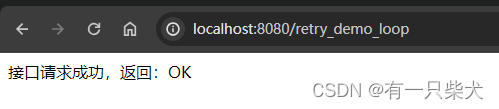
- @GetMapping("retry_demo_loop")
- public String retry_demo_loop(){
- // 重试上限次数为3次
- int maxRetryTime = 3;
- String result = null;
- // 接口循环请求
- for (int i = 1; i <= maxRetryTime; i++) {
- try {
- // 模拟请求接口
- result = HttpUtil.get("http://localhost:8080/http_test");
- // 模拟一次请求失败
- if(i == 1){
- int co = i / 0;
- }
- // 请求成功,跳出循环
- break;
- } catch (Exception e) {
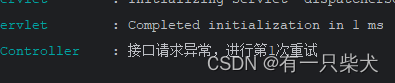
- log.error("接口请求异常,进行第{}次重试", i);
- result = "接口请求失败,请联系管理员";
- }
- }
- return result;
- }

请求结果:
重试日志打印:

2.2、递归重试
除了循环,还可以使用递归来实现接口的请求重试。递归是我们都比较熟悉的编程技巧,在请求接口的方法中调用自身,如果请求失败则继续调用,直到请求成功或达到最大重试次数。
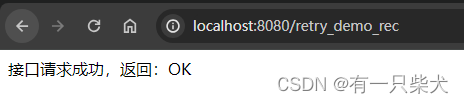
- @GetMapping("retry_demo_rec")
- public String retry_demo_rec(){
- // 重试上限次数为3次
- int maxRetryTime = 3;
- return retryRequest(maxRetryTime);
- }
-
- /**
- * 递归方法
- * @param maxRetryTime
- * @return
- */
- private String retryRequest(int maxRetryTime){
- if (maxRetryTime <= 0) {
- return "接口请求失败,请联系管理员";
- }
-
- int retryTime = 0;
- try {
- // 模拟请求接口
- String result = HttpUtil.get("http://localhost:8080/http_test");
- // 模拟一次请求失败
- if(maxRetryTime == 3){
- int co = 1 / 0;
- }
- return result;
- } catch (Exception e) {
- // 处理异常
- log.error("接口请求异常,进行第{}次重试", ++retryTime);
- return retryRequest(maxRetryTime - 1);
- }
- }
请求结果:
重试日志打印:
2.3、Spring Retry
第三种便是使用Spring Retry依赖实现。首先我们需要集成相关依赖:
- <dependency>
- <groupId>org.springframework.retry</groupId>
- <artifactId>spring-retry</artifactId>
- </dependency>
- <!-- 由于retry使用到了aop,所以还需要加入aop依赖 -->
- <dependency>
- <groupId>org.springframework.boot</groupId>
- <artifactId>spring-boot-starter-aop</artifactId>
- </dependency>
加入@EnableRetry启动:
- @EnableRetry
- @SpringBootApplication
- public class Application {
- public static void main(String[] args) {
- SpringApplication.run(Application.class, args);
- }
- }
添加retry方法注解:
- public interface MyRetryService {
-
- /**
- * retryable注解表示该方法需要重试
- * value:出现该指定异常后,进行重试
- * maxAttempts:重试次数上限,这里指定为3次
- * backoff:重试策略,这里指定200ms间隔一次
- * @param code
- * @return
- * @throws Exception
- */
- @Retryable(value = {Exception.class}, maxAttempts = 3, backoff = @Backoff(200))
- String retry(int code) throws Exception;
-
-
- /**
- * 当重试达到上限后还是失败,则作为异常回调方法
- * @param th
- * @param code
- * @return
- */
- @Recover
- String recover(Throwable th, int code);
-
- }
MyReretService实现类:
- @Slf4j
- @Service
- public class MyRetryServiceImpl implements MyRetryService {
-
- @Override
- public String retry(int code) throws Exception {
- log.info("请求retry接口");
- String result = HttpUtil.get("http://localhost:8080/http_test");
- if(code != 200){
- throw new Exception("接口请求异常");
- }
-
- return result;
- }
-
- @Override
- public String recover(Throwable th, int code) {
- log.error("回调方法执行!!!!");
- return "异常码为:" + code + ",异常信息:" + th.getMessage();
- }
- }
Controller:
- @Autowired
- private MyRetryService myRetryService;
-
-
- /**
- * 当请求code参数为200时,直接成功
- * 当code参数!=200时,会出发重试
- * @param code
- * @return
- * @throws Exception
- */
- @GetMapping("retry_demo_spring_retry")
- public String retry_demo_spring_retry(Integer code) throws Exception {
- return myRetryService.retry(code);
- }
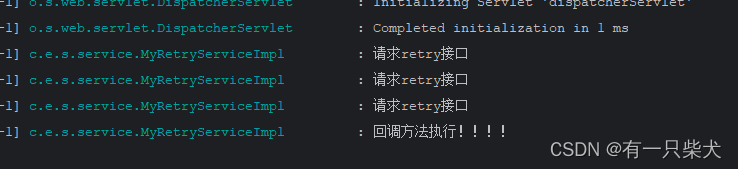
访问地址:http://localhost:8080/retry_demo_spring_retry?code=123
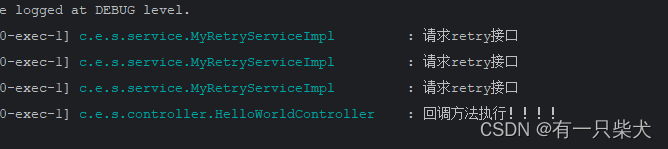
查看结果:可以看到接口重试了3次,最后执行了@Recover方法最后的回调。

2.4、Resilience4j
Resilience4j是一个轻量级、易于使用的轻量级“容错”包。它受Neflix Hystrix启发但只有一个依赖(Vavr),而不像Hystrix很多很多的依赖。同时它是一个 Java 库,可以帮助我们构建弹性和容错的应用程序。Resilience4j在“容错”方面提供了各种模式:断路器(Circuit Breaker)、重试(Retry)、限时器(Time Limiter)、限流器(Rate Limiter)、隔板(BulkHead)。我们今天讨论的话题是重试,那么今天就来演示下Retry。
首先,添加相应依赖:
- <dependency>
- <groupId>io.github.resilience4j</groupId>
- <artifactId>resilience4j-spring-boot2</artifactId>
- <version>2.1.0</version>
- </dependency>
application.yml配置相关策略,配置官方文档:https://resilience4j.readme.io/docs/retry
- resilience4j:
- retry:
- instances:
- retry_demo:
- max-attempts: 3 # 重试的上限次数
- wait-duration: 1s # 重试的间隔时间,配置为1s
我们改造一下上面spring-retry的demo。
controller:
- @GetMapping("retry_demo_spring_retry")
- @Retry(name = "retry_demo", fallbackMethod = "recover")
- public String retry_demo_spring_retry(Integer code) throws Exception {
- return myRetryService.retry(code);
- }
-
- public String recover(Throwable th) {
- log.error("回调方法执行!!!!");
- return "异常信息:" + th.getMessage();
- }
myRetryService:
- @Override
- public String retry(int code) throws Exception {
- log.info("请求retry接口");
- String result = HttpUtil.get("http://localhost:8080/http_test");
- if(code != 200){
- throw new Exception("接口请求异常");
- }
- return result;
- }
程序执行,打印结果:

同样接口请求了3次,均失败后执行了fallback回调方法。
2.5、http请求网络工具内置重试方式
通常一些外部的http网络工具,都会内置一些重试的策略。如Apache HttpClient。这里以httpclient5为例。
首先添加依赖:
- <dependency>
- <groupId>org.apache.httpcomponents.client5</groupId>
- <artifactId>httpclient5</artifactId>
- <version>5.1.4</version>
- </dependency>
定义HttpClient相关类,指定重试策略。可以使用默认的DefaultHttpRequestRetryStrategy,也可以自定义重试策略CustomRetryStrategy。
- private static volatile CloseableHttpClient HTTP_CLIENT = null;
- static {
- if(HTTP_CLIENT == null){
- synchronized (HelloWorldController.class) {
- if(HTTP_CLIENT == null){
- HTTP_CLIENT = HttpClients.custom()
- // 设置重试策略
- // .setRetryStrategy(new DefaultHttpRequestRetryStrategy(3, TimeValue.NEG_ONE_SECOND))
- // 自定义重试策略
- .setRetryStrategy(new CustomRetryStrategy())
- .build();
- }
- }
- }
- }
CustomRetryStrategy:
- public static class CustomRetryStrategy implements HttpRequestRetryStrategy {
-
- @Override
- public boolean retryRequest(HttpRequest httpRequest, IOException e, int executeCount, HttpContext httpContext) {
- return false;
- }
-
- @Override
- public boolean retryRequest(HttpResponse httpResponse, int executeCount, HttpContext httpContext) {
- System.out.println("进入重试策略");
- if(executeCount > 3){
- System.out.println("重试超过3次,终止重试");
- return false;
- }
-
- if(httpResponse.getCode() != 200){
- System.out.println("http状态码不等于200,进行重试");
- return true;
- }
-
- // 其他情况,不重试
- return false;
- }
-
- @Override
- public TimeValue getRetryInterval(HttpResponse httpResponse, int executeCount, HttpContext httpContext) {
- return null;
- }
- }
Controller代码:
- @GetMapping("retry_demo_httpclient")
- public String retry_demo_httpclient(Integer code) throws Exception {
- return httpclientRetry(code);
- }
-
- private String httpclientRetry(int code) throws Exception {
- log.info("请求retry接口");
- // 这里模拟了一个不存在的地址
- HttpGet request = new HttpGet("http://localhost:8080/http_test1");
- CloseableHttpResponse httpResponse = HTTP_CLIENT.execute(request);
- String result = IoUtil.read(httpResponse.getEntity().getContent()).toString();
- if(code != 200){
- throw new Exception("接口请求异常");
- }
-
- return result;
- }
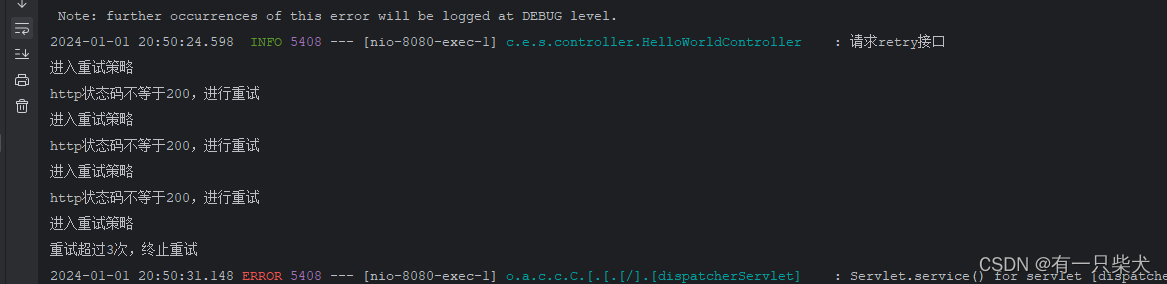
访问接口地址:http://localhost:8080/retry_demo_httpclient?code=200。查看控制台日志打印:
2.6、自定义重试工具
装X的话,我们还可以自定义我们的重试工具。其实无非以下几个步骤:
- 自定义重试的工具类
- 接收一个方法调用,并对该方法进行异常捕获
- 如果捕获了该异常,则进行一定间隔,然后重新请求
- 记录请求次数,如果超过上限,则提示异常信息
直接定义一个重试的工具类RetryUtil.java:
- import cn.hutool.core.thread.ThreadUtil;
- import lombok.extern.slf4j.Slf4j;
-
- import java.util.concurrent.TimeUnit;
- import java.util.concurrent.atomic.AtomicInteger;
- import java.util.function.Function;
- import java.util.function.Supplier;
-
- @Slf4j
- public class RetryUtil {
-
-
- /**
- * 重试方法
- * @param invokeFunc 原方法调用
- * @param maxAttempts 重试次数上限
- * @param deplay 重试的间隔时间
- * @param timeUnit 重试的间隔时间单位
- * @param faultFunc 如果超过重试上限次数,那么会执行该错误回调方法
- * @return
- * @param <T>
- */
- public static <T> T retry(Supplier<T> invokeFunc, int maxAttempts, long deplay, TimeUnit timeUnit, Function<Throwable, T> faultFunc) {
- AtomicInteger retryTimes = new AtomicInteger(0);
- for(;;) {
- try{
- return invokeFunc.get();
- } catch (Throwable th) {
- if(retryTimes.get() > maxAttempts){
- log.error("重试次数超过{}次,进入失败回调", retryTimes.get());
- return faultFunc.apply(th);
- }
- ThreadUtil.sleep(deplay, timeUnit);
- retryTimes.getAndAdd(1);
- }
- }
- }
-
- }
工具类使用:
- @GetMapping("retry_demo_custom")
- public String retry_demo_custom(Integer code) {
- return RetryUtil.retry(() -> {
- String result = null;
- try {
- result = customRetry(code);
- } catch (Exception e) {
- throw new RuntimeException(e);
- }
- return result;
- }, 3, 1000, TimeUnit.MILLISECONDS, Throwable::getMessage);
- }
-
- private String customRetry(int code) throws Exception {
- log.info("请求customRetry接口");
- String result = HttpUtil.get("http://localhost:8080/http_test");
- if(code != 200){
- throw new Exception("接口请求异常");
- }
-
- return result;
- }
执行完后,访问地址:http://localhost:8080/retry_demo_custom?code=2001

这里只是简单的进行了定义,如果项目中使用肯定需要考虑更复杂的因素。如进入重试时不一定只有异常的时候需要重试,可以指定重试策略,然后制定进入重试策略的规则。
2.7、并发框架异步重试
在 Java 并发框架中,异步重试通常涉及到使用线程池和定时器,以便在异步任务失败后进行重试。以下是一个简单的示例,演示了如何使用 CompletableFuture、ScheduledExecutorService 和 CompletableFuture.supplyAsync 来实现异步任务的重试。
- import java.util.concurrent.CompletableFuture;
- import java.util.concurrent.Executors;
- import java.util.concurrent.ScheduledExecutorService;
- import java.util.concurrent.TimeUnit;
-
- public class AsyncRetryExample {
-
- private static final ScheduledExecutorService scheduler = Executors.newScheduledThreadPool(1);
-
- public static void main(String[] args) {
- // 示例异步任务,这里使用 supplyAsync,你可以根据实际情况选择其他异步任务
- CompletableFuture<String> asyncTask = CompletableFuture.supplyAsync(() -> performAsyncTask("Task"));
-
- // 异步任务失败后的重试逻辑
- retryAsyncTask(asyncTask, 3, 1, TimeUnit.SECONDS);
- }
-
- private static CompletableFuture<String> performAsyncTask(String taskName) {
- // 模拟异步任务,这里可以是任何异步操作
- System.out.println("Performing async task: " + taskName);
- // 这里模拟任务失败的情况
- throw new RuntimeException("Task failed");
- }
-
- private static <T> void retryAsyncTask(CompletableFuture<T> asyncTask, int maxRetries, long delay, TimeUnit timeUnit) {
- asyncTask.exceptionally(throwable -> {
- // 异步任务失败后的处理逻辑
- System.out.println("Task failed: " + throwable.getMessage());
-
- // 重试逻辑
- if (maxRetries > 0) {
- System.out.println("Retrying...");
-
- CompletableFuture<T> retryTask = CompletableFuture.supplyAsync(() -> performAsyncTask("Retry Task"));
- // 递归调用,进行重试
- retryAsyncTask(retryTask, maxRetries - 1, delay, timeUnit);
- } else {
- System.out.println("Max retries reached. Task failed.");
- }
-
- return null; // 必须返回 null,否则会影响链式调用
- });
- }
- }
示例中,performAsyncTask 模拟了一个异步任务,如果任务失败,它会抛出一个运行时异常。retryAsyncTask 方法用于处理异步任务的失败情况,并进行重试。在重试时,它使用 CompletableFuture.supplyAsync 创建一个新的异步任务,模拟了重试的过程。请注意,这只是一个简单的示例,实际应用中可能需要更复杂的重试策略和错误处理逻辑。
2.8、消息队列
网上还有一种消息队列的方式来实现,这里没过多的去研究过,目前以上几种方式应该也是够用的了。这里直接贴出网上的部分代码,使用 RabbitMQ 作为消息队列,演示了请求重试的实现:
首先添加依赖:
- <dependencies>
- <dependency>
- <groupId>com.rabbitmq</groupId>
- <artifactId>amqp-client</artifactId>
- <version>5.13.1</version>
- </dependency>
- </dependencies>
然后,创建一个发送者和接收者类:
消息发送者(Producer)
- import com.rabbitmq.client.Channel;
- import com.rabbitmq.client.Connection;
- import com.rabbitmq.client.ConnectionFactory;
-
- import java.io.IOException;
- import java.util.concurrent.TimeoutException;
-
- public class MessageProducer {
-
- private static final String QUEUE_NAME = "retry_queue";
-
- public static void main(String[] args) throws IOException, TimeoutException {
- ConnectionFactory factory = new ConnectionFactory();
- factory.setHost("localhost");
-
- try (Connection connection = factory.newConnection(); Channel channel = connection.createChannel()) {
- channel.queueDeclare(QUEUE_NAME, false, false, false, null);
-
- // 模拟发送请求
- String request = "Your request data";
-
- // 将请求发送到队列
- channel.basicPublish("", QUEUE_NAME, null, request.getBytes());
- System.out.println(" [x] Sent '" + request + "'");
- }
- }
- }
消息接收者(Consumer)
- import com.rabbitmq.client.*;
-
- import java.io.IOException;
- import java.util.concurrent.TimeoutException;
-
- public class MessageConsumer {
-
- private static final String QUEUE_NAME = "retry_queue";
-
- public static void main(String[] args) throws IOException, TimeoutException {
- ConnectionFactory factory = new ConnectionFactory();
- factory.setHost("localhost");
-
- try (Connection connection = factory.newConnection(); Channel channel = connection.createChannel()) {
- channel.queueDeclare(QUEUE_NAME, false, false, false, null);
-
- // 设置消息监听器
- DeliverCallback deliverCallback = (consumerTag, delivery) -> {
- String request = new String(delivery.getBody(), "UTF-8");
-
- // 模拟处理请求,这里可能会出现处理失败的情况
- boolean processingSucceeded = processRequest(request);
-
- if (processingSucceeded) {
- System.out.println(" [x] Received and processed: '" + request + "'");
- } else {
- // 处理失败,将请求重新放入队列,进行重试
- channel.basicPublish("", QUEUE_NAME, null, delivery.getBody());
- System.out.println(" [x] Processing failed. Retrying: '" + request + "'");
- }
- };
-
- // 消费消息
- channel.basicConsume(QUEUE_NAME, true, deliverCallback, consumerTag -> {
- });
- }
- }
-
- private static boolean processRequest(String request) {
- // 模拟处理请求的方法
- // 在实际应用中,这里应该是对请求的处理逻辑
- // 返回 true 表示处理成功,返回 false 表示处理失败,需要进行重试
- // 这里简单地模拟了一个失败的情况
- return !request.equals("Your request data");
- }
- }
示例中,消息发送者(MessageProducer)将请求发送到名为 "retry_queue" 的队列中。消息接收者(MessageConsumer)监听队列,当接收到消息时,模拟处理请求的逻辑。如果处理失败,将请求重新放入队列进行重试。
3、小结
接口请求重试机制对保证系统高可用非常关键,需要根据业务需求选择合适的重试策略。常用的组合策略包括带最大次数的定时/指数退避重试、故障转移重试等。重试机制需要综合设置以达到容错效果 又避免产生过大的系统负载。
![[ 云计算 | AWS 实践 ] 使用 Java 更新现有 Amazon S3 对象](https://img-blog.csdnimg.cn/direct/f6b4b45ef01445aa9a147e7c5f1a8f15.png?x-oss-process=image/resize,m_fixed,h_300,image/format,png)


