
热门标签
热门文章
- 1zookeeper总有节点启动失败_xshell开启zookeeper其余结点打不开
- 2使用objdump objcopy查看与修改符号表_objdump 可执行文件 符号
- 3Spring Boot Jpa 的使用(转载)_springboot jpa使用getconnection
- 4华为薪资等级结构表_2020年华为工资等级对照表
- 5利用java filter 实现业务异常拦截 跳转到错误信息提示页面_拦截器过滤error页面
- 6初步探索GraalVM--云原生时代JVM黑科技_graalvm 动态生成字节码
- 7算法5分钟|如何实现整数的数字反转【首尾交换法】_数字翻转算法
- 8openGauss学习笔记-133 openGauss 数据库运维-例行维护-日维护检查项_opengauss数据库怎么查看锁
- 9阿里云服务器镜像怎么选?操作系统版本选择说明_服务器操作系统选什么知乎
- 10深入浅出 Java 虚拟机 · 通往高级 Java 开发的必经之路_java虚拟机定义
当前位置: article > 正文
微信小程序开发之连接本地MYSQL数据库_小程序怎么使用mysql数据
作者:算法研究专家 | 2024-01-01 18:46:33
赞
踩
小程序怎么使用mysql数据
一、本地搭建HTTP服务器
1.使用Node.js在本地搭建HTTP服务器
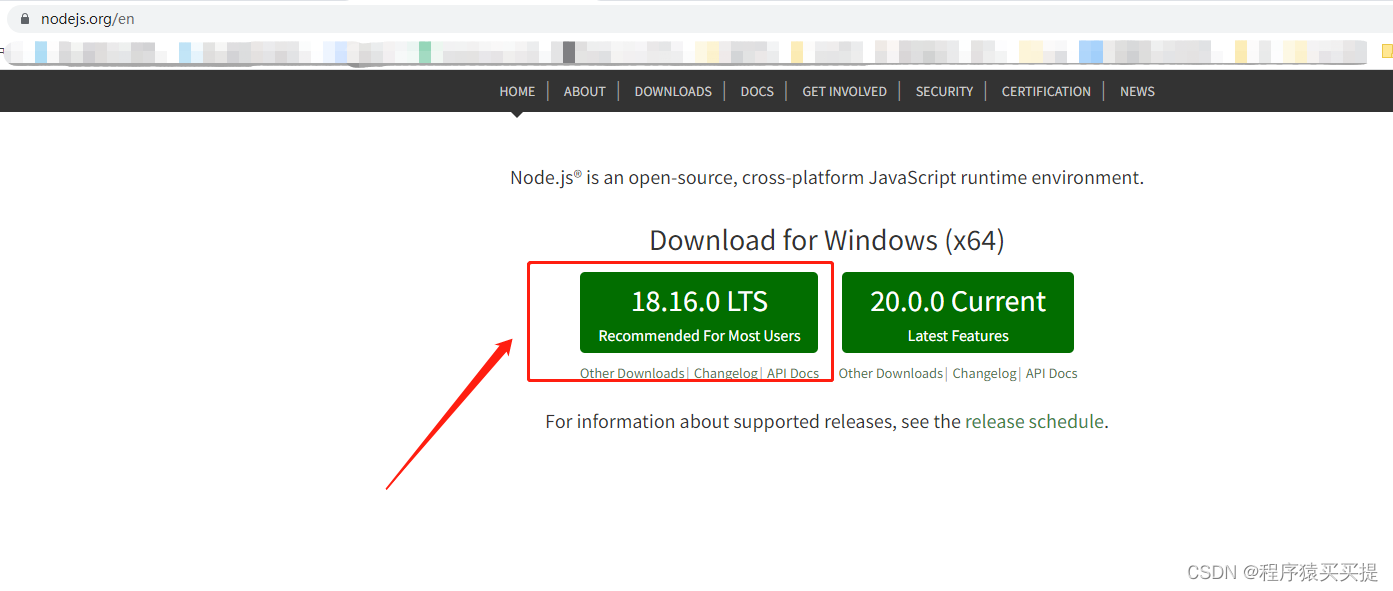
1)下载安装Node.js
网址:https://nodejs.org/en
右边是长期维护版本,左边是尝鲜版,推荐下载长期维护版本
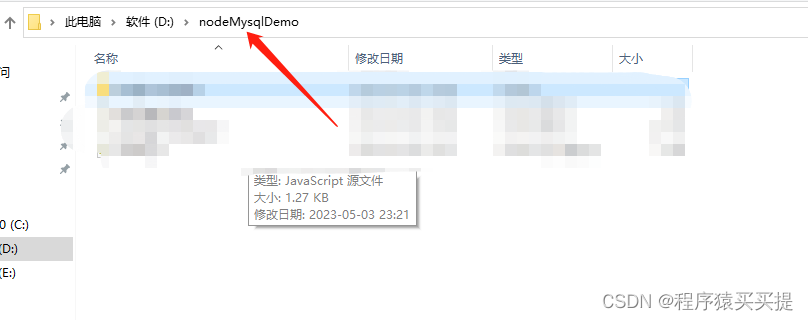
2)安装完成后本地创建文件夹,文件夹名字随便,我的文件夹名称是nodeMysqlDemo
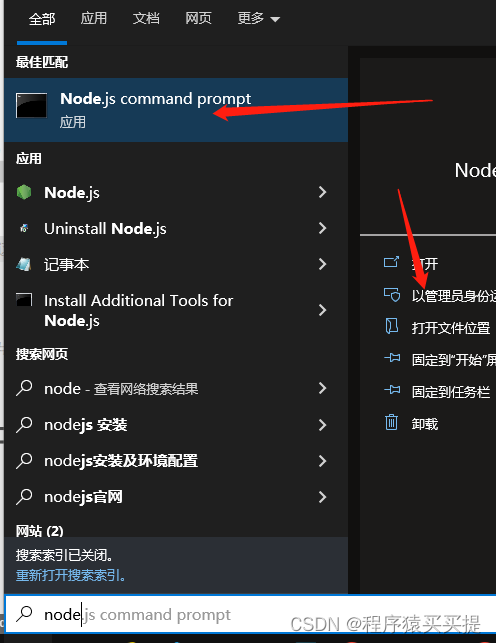
3)打开命令行
搜索node关键字,用管理员身份打开node.js command prompt
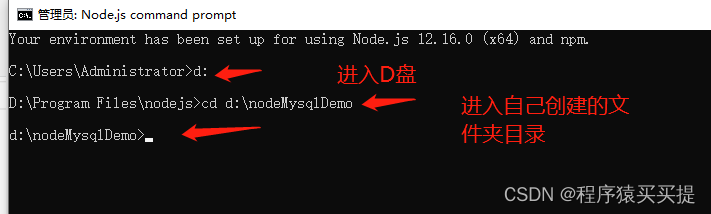
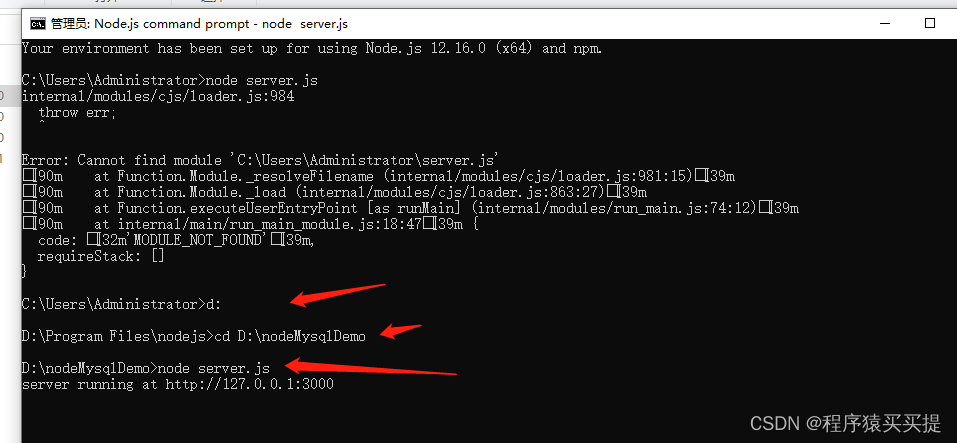
4)进入D盘,进入刚创建的文件夹
5)依次输入如下命令
[1] 初始化项目,将会自动创建package.json配置文件
npm init -y
- 1
[2] 安装Express框架,用于快速创建HTTP服务器
npm install express --save
- 1
[3] 安装nodemon监控文件修改
npm install nodemon -g
- 1
[4] 安装mysql的软件包
npm install mysql --save
- 1
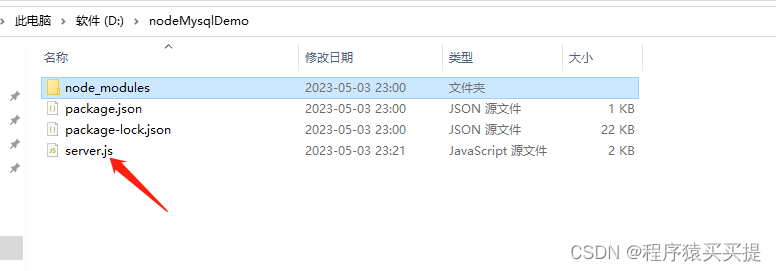
操作成功后文件夹里面会有这些文件

6)在该目录创建server.js文件
如果不会创建可以先创建server.txt文本文件,然后把后缀改成js即可
6)打开server.js文件,写如下服务器端代码并保存
const express=require('express')
const bodyParser =require('body-parser')
const app=express()
const mysql = require('mysql')
app.use(bodyParser.json())

//处理post请求
app.post('/',(req,res) => {
  console.log(req.body)
  res.json(req.body)
})

app.post('/show',(req,res)=>{
  console.log(req.body.name)
  const a=req.body.name
  var connection=mysql.createConnection({
    host:'localhost',
    user:'数据库用户名',
    password:'数据库密码',
    database:'数据库名称'
  })
  connection.connect();
  connection.query("select * from tb_tags where f_tagID='"+a+"'",function(error,results,fields){
    if(error) throw console.error;
    res.json(results)
    console.log(results)

  })
  connection.end();

})

app.get('/',(req,res)=>{
  var connection = mysql.createConnection({
    host:'localhost',
    user:'数据库用户名',
    password:'数据库密码',
    database:'数据库名称'
  });
  connection.connect();
  //查找所有的人物名字返回给客户端。其实没必要(测试用的)
  connection.query('select * from tb_tags',function(error,results,fields){
    if(error) throw error;
    res.json(results)
    // console.log(results)
  })
  connection.end();
})

app.listen(3000,()=>{
  console.log('server running at http://127.0.0.1:3000')
})

- 1
- 2
- 3
- 4
- 5
- 6
- 7
- 8
- 9
- 10
- 11
- 12
- 13
- 14
- 15
- 16
- 17
- 18
- 19
- 20
- 21
- 22
- 23
- 24
- 25
- 26
- 27
- 28
- 29
- 30
- 31
- 32
- 33
- 34
- 35
- 36
- 37
- 38
- 39
- 40
- 41
- 42
- 43
- 44
- 45
- 46
- 47
- 48
- 49
- 50
- 51
- 52
7)最后在命令行运行该文件,启动服务器
二、微信小程序获取本地数据库内容
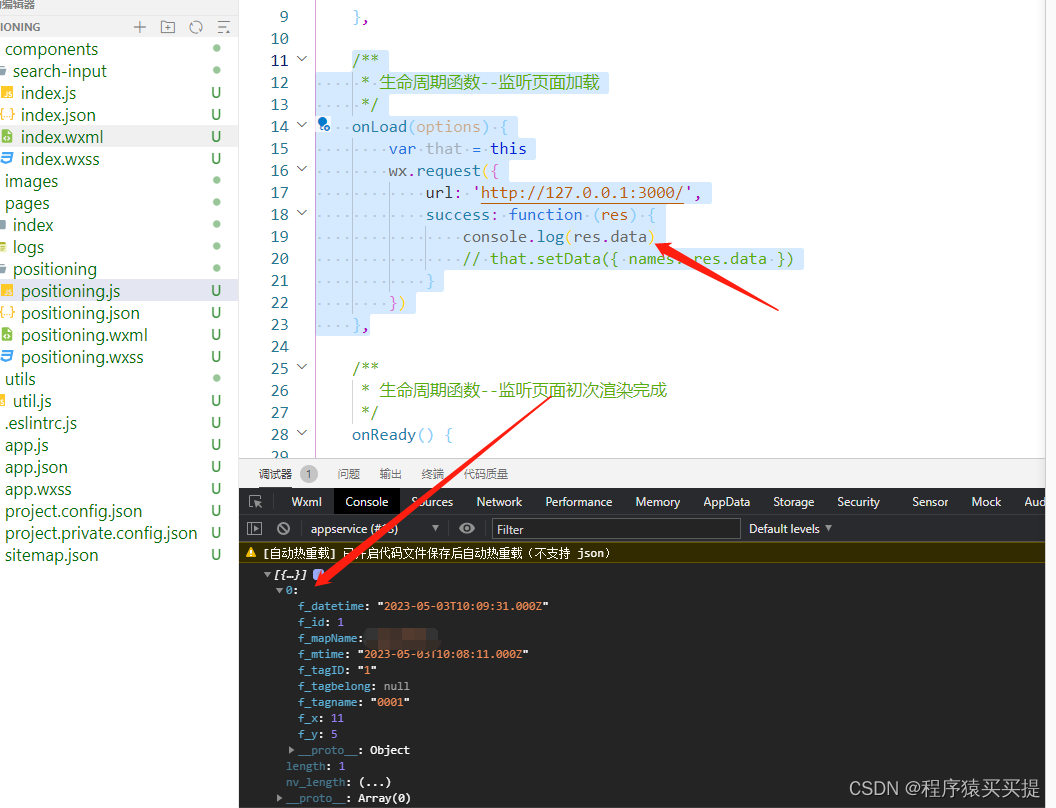
1)小程序端数据获取部分代码
/**
     * 生命周期函数--监听页面加载
     */
    onLoad(options) {
        var that = this
        wx.request({
            url: 'http://127.0.0.1:3000/',
            success: function (res) {
                console.log(res.data)
                // that.setData({ names: res.data })
            }
        })
    },
- 1
- 2
- 3
- 4
- 5
- 6
- 7
- 8
- 9
- 10
- 11
- 12
- 13
2)关闭域名校验设置
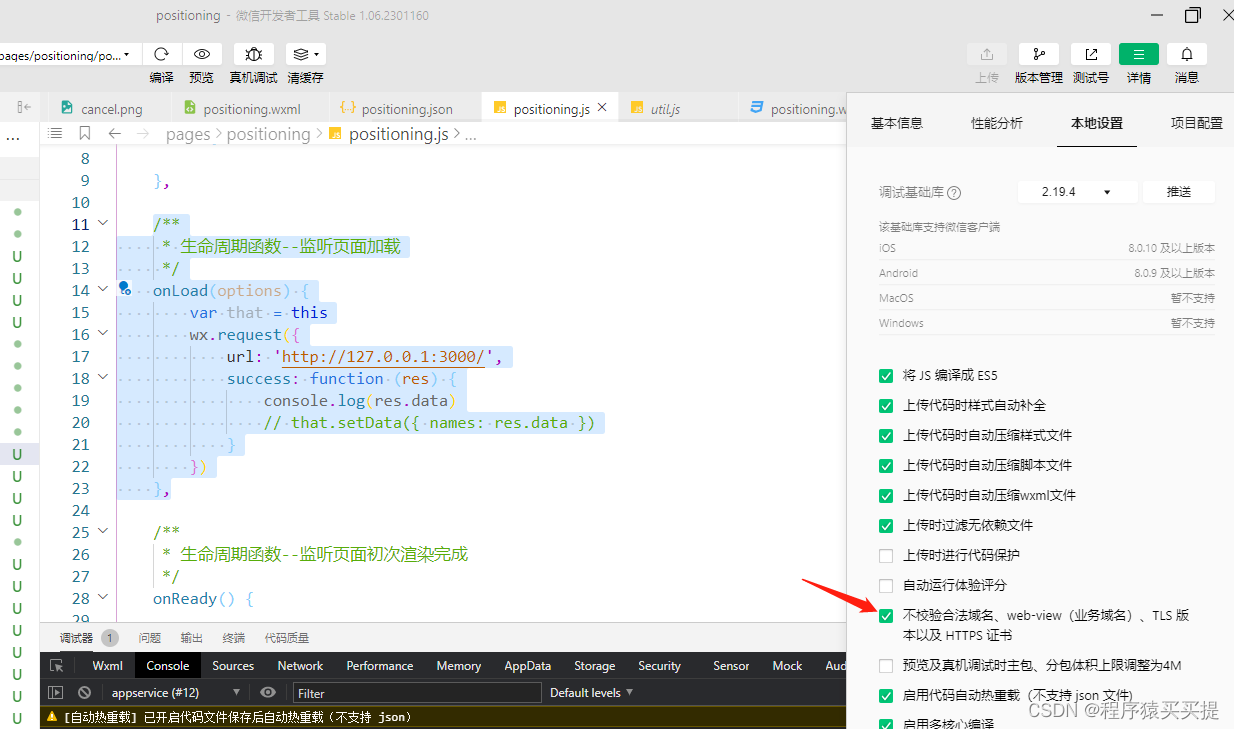
对于正式上线的项目,小程序要求服务器域名必须在小程序管理后台中添加,域名必须经过ICP备案,且支持HTTPS和WSS协议,对于开发人员来说,为了方便学习,可以在微信开发者工具中关闭这些验证,从而利用本地服务器来测试网络功能。单击工具栏中的详情按钮,找到【不校验合法域名、web-view(业务域名)、TLS版本以及HTTPS证书】选项,勾选它即可。--------来自《微信小程序开发实战》一书。
3)运行程序,成功获取本地数据库数据
常见错误:
数据库没连接,提示Error: ER_NOT_SUPPORTED_AUTH_MODE: Client does not support authentication protocol
解决办法:https://blog.csdn.net/qq_34235767/article/details/127617282
声明:本文内容由网友自发贡献,不代表【wpsshop博客】立场,版权归原作者所有,本站不承担相应法律责任。如您发现有侵权的内容,请联系我们。转载请注明出处:https://www.wpsshop.cn/article/detail/37433
推荐阅读
- 微信小程序案例 ...
赞
踩


相关标签

