
热门标签
热门文章
- 11. 若某存储器芯片有地址线16条、数据线8条,则该芯片的存储容量是( )位。————计算机组成原理_16条地址线8条数据线
- 2github进不去----解决办法
- 3linux nohup命令如何使用?_linux中nohup怎么用
- 4【算法速查】万字图解带你快速入门八大排序(上)_csdn算法速查万字图解
- 5Metasploit技术(一)——Metasploit简介与基础
- 6【安全】Java幂等性校验解决重复点击(6种实现方式)_防止重复点击多次设计
- 7Kali--MSF-永恒之蓝详解(复现、演示、远程、后门、加壳、修复)
- 8Azure Machine Learning - Azure可视化图像分类操作实战_azure 图片元素识别
- 9CSDN为什么会发展社区?看看官方怎么说
- 10CentOS 7系统安装配置Zabbix 5.0LTS 步骤_cenros7安装zabbix
当前位置: article > 正文
mac系统安装git 详细教程_mac安装git
作者:AI数据结构灵魂 | 2023-12-30 09:02:56
赞
踩
mac安装git
0.概述
记录一下mac系统安装git环境
打开终端输入git --version
2.我们进入git官网
git官网下载界面https://git-scm.com/download/mac
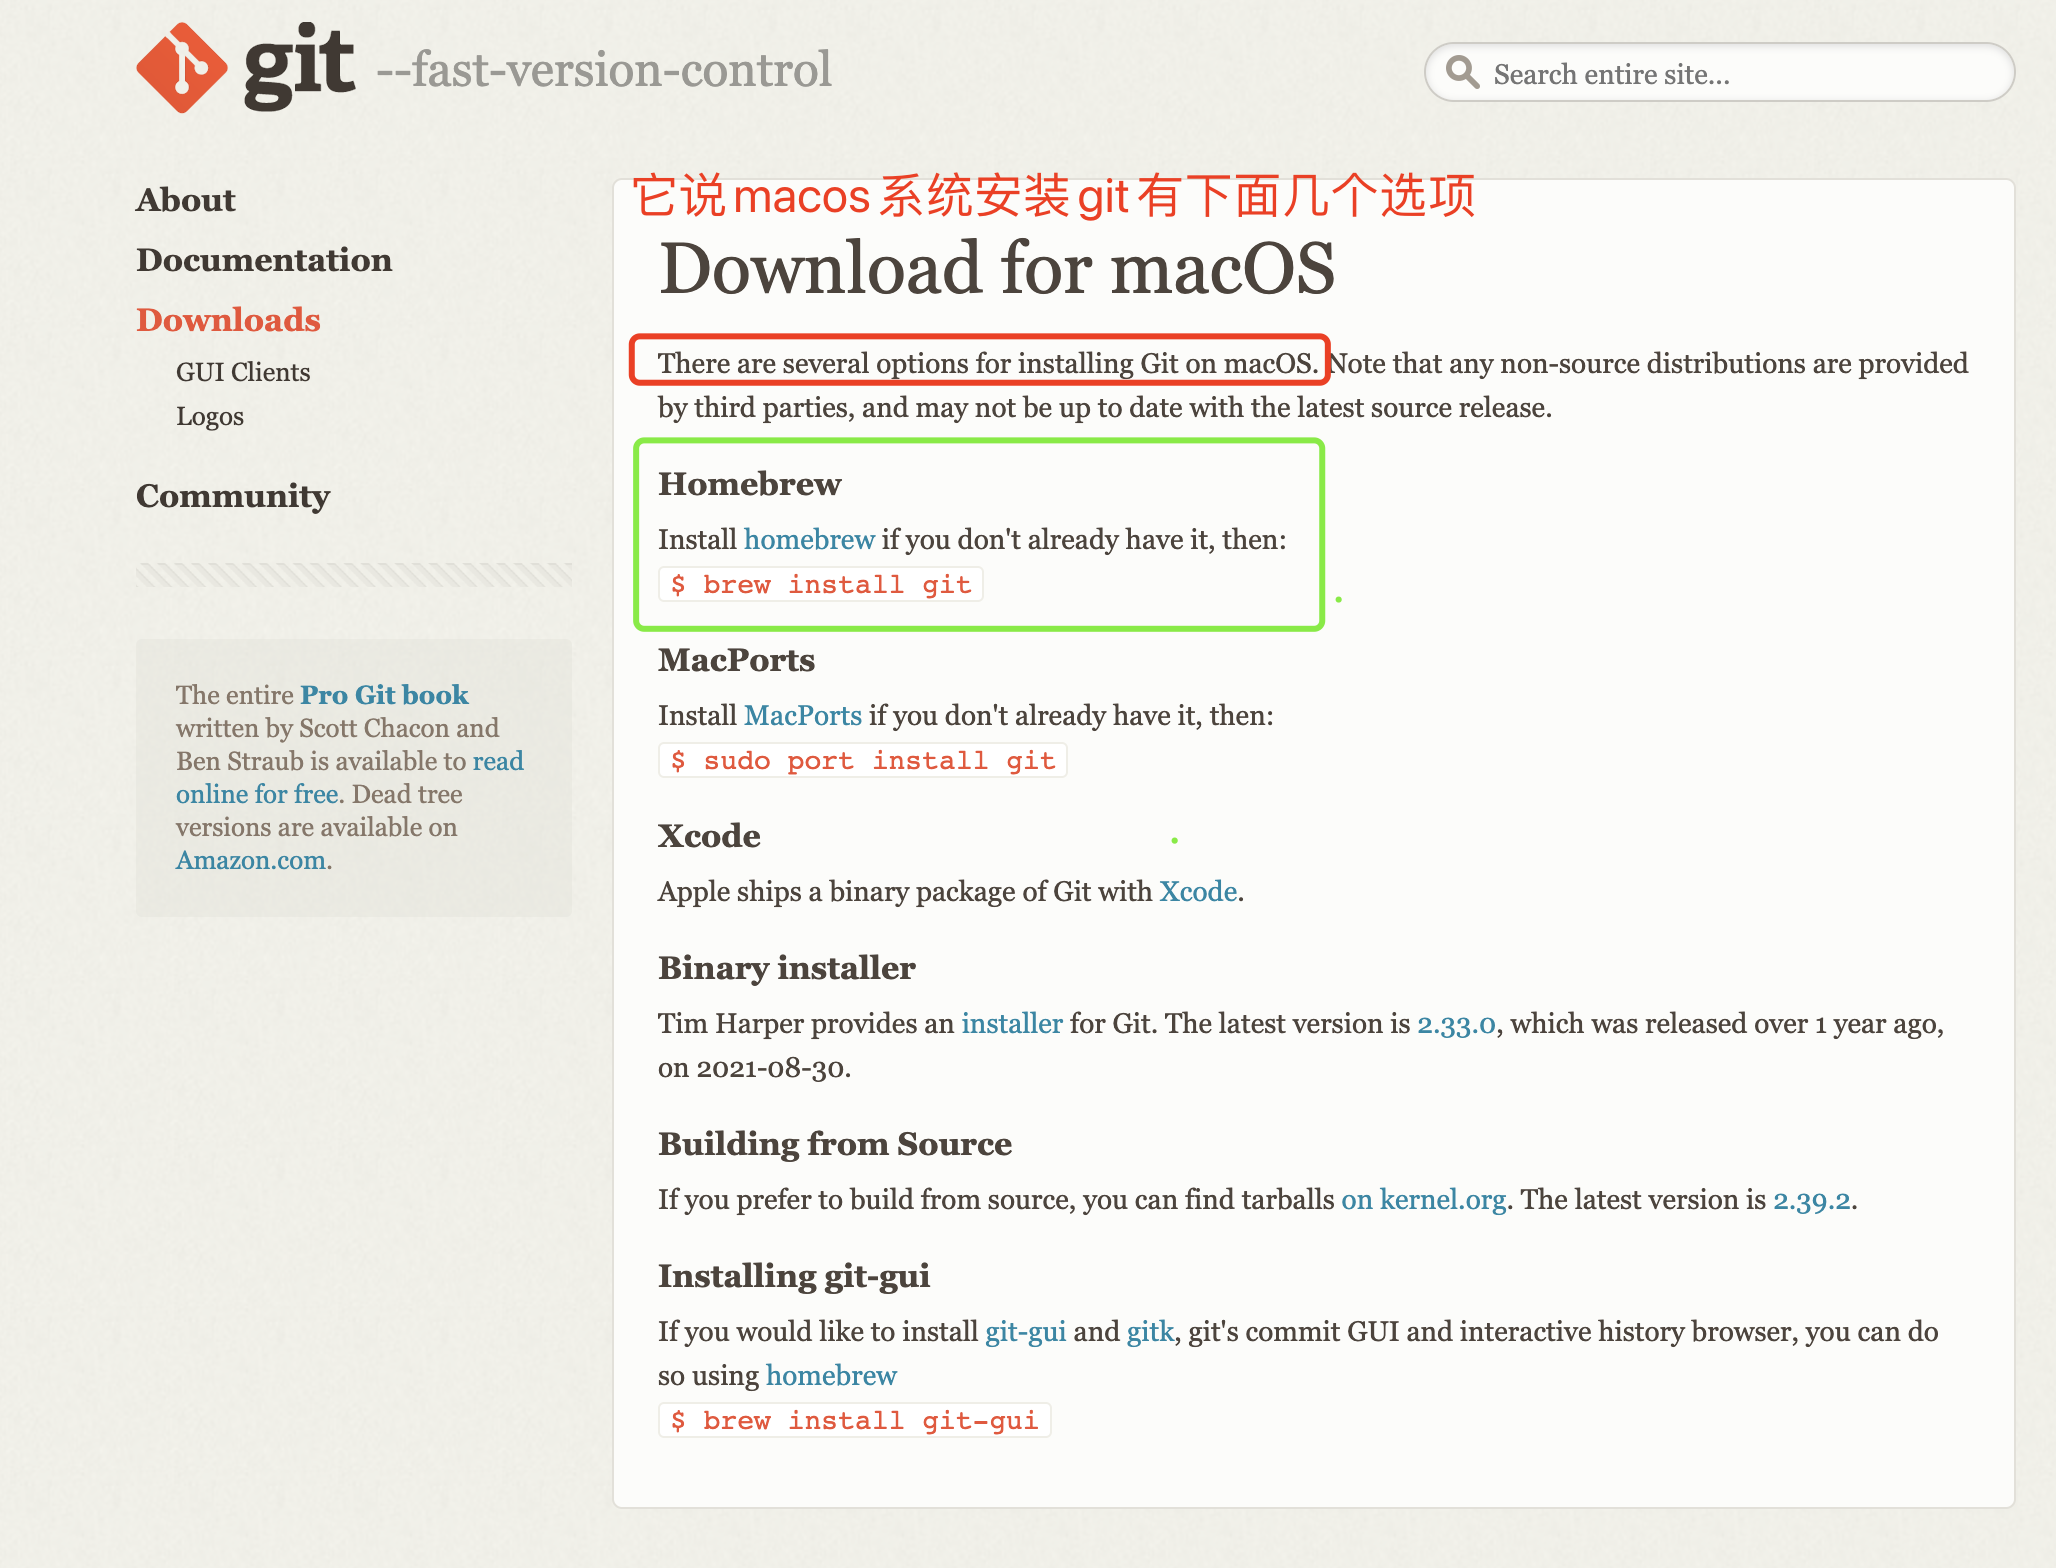
通过官网介绍我们得知安装git有下面几种方式,我们下面会通过Homebrew的方式进行安装
3.安装Homebrew
可参考本人写的第一篇http://t.csdn.cn/XlZ1M mac m1芯片安装Homebrew,里面有详细介绍

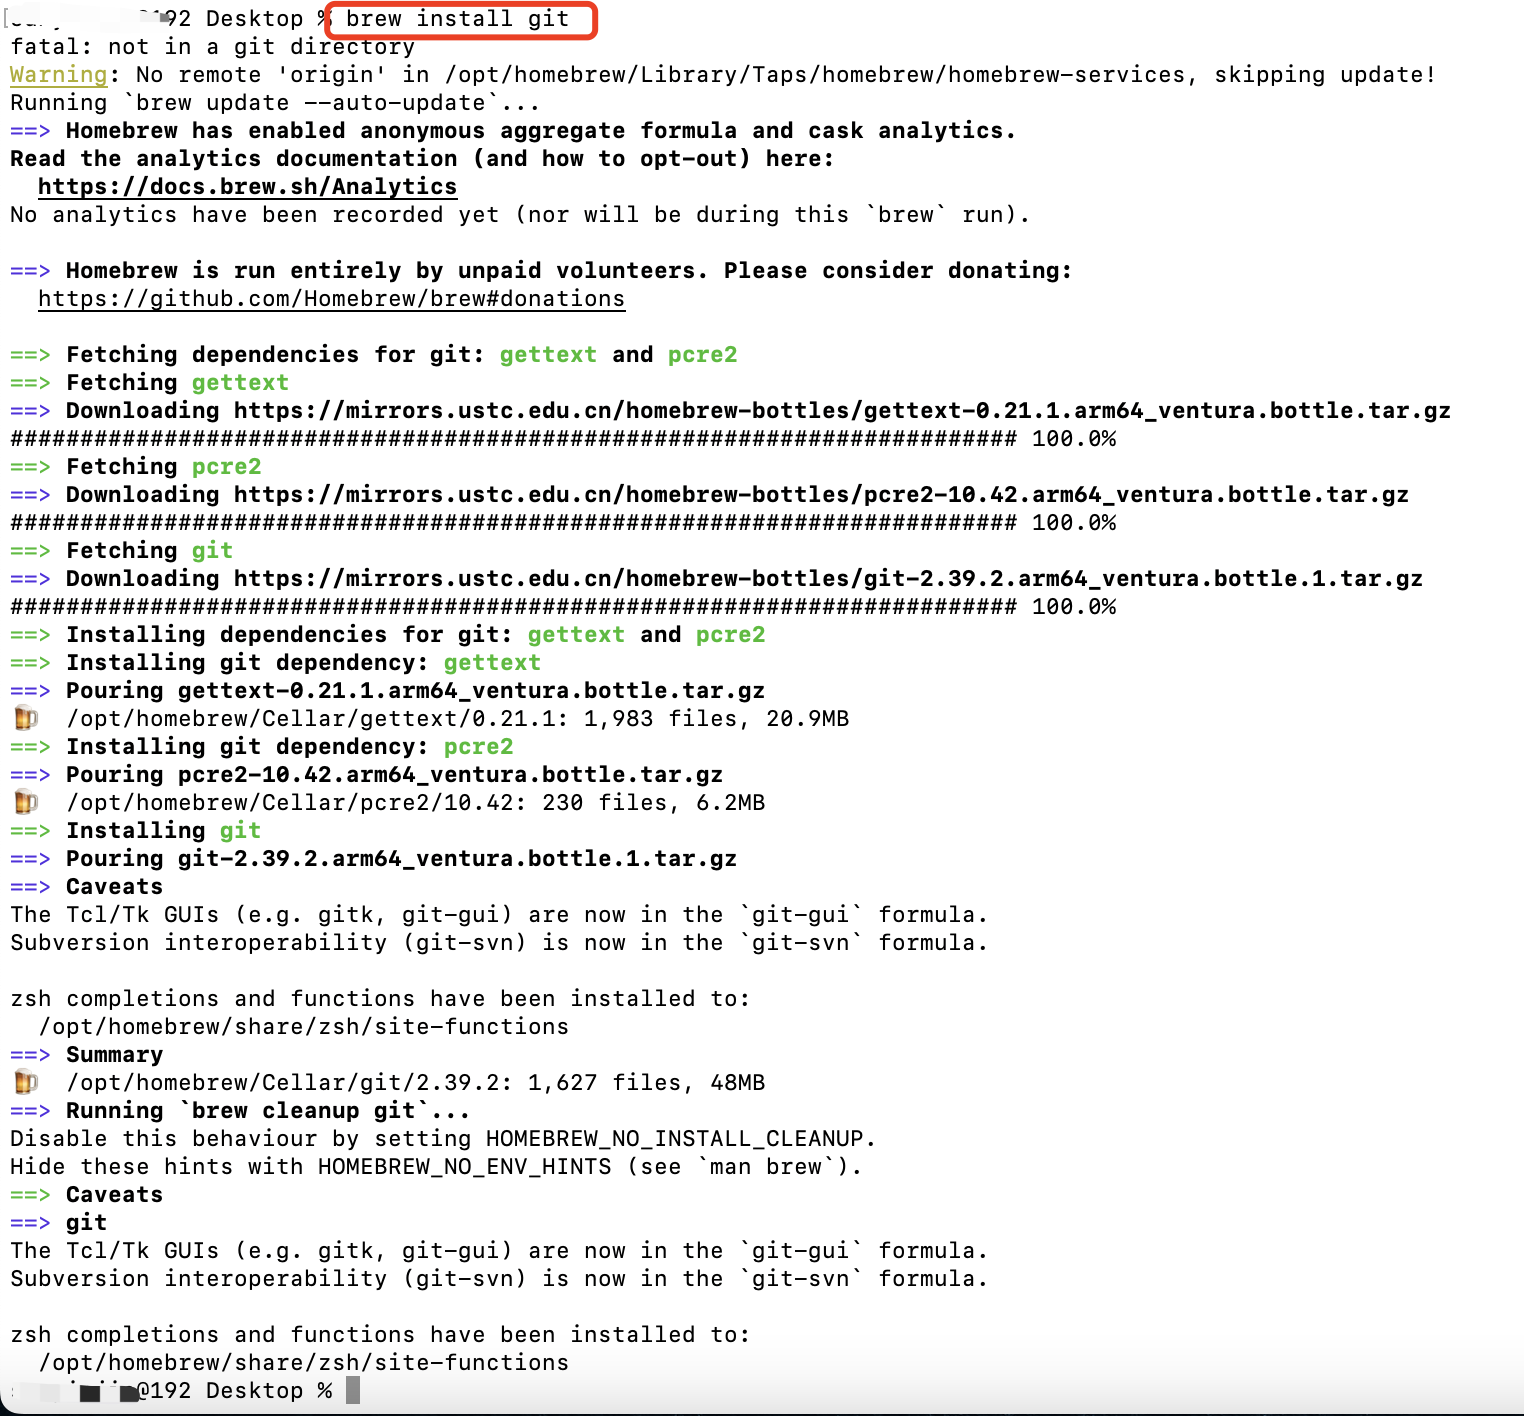
4.通过Homebrew安装git
- #通过brew 中的search 可以查询git
- brew search git


- #通过brew 安装git
- brew install git
- #通过brew 更新git
- brew upgrade git

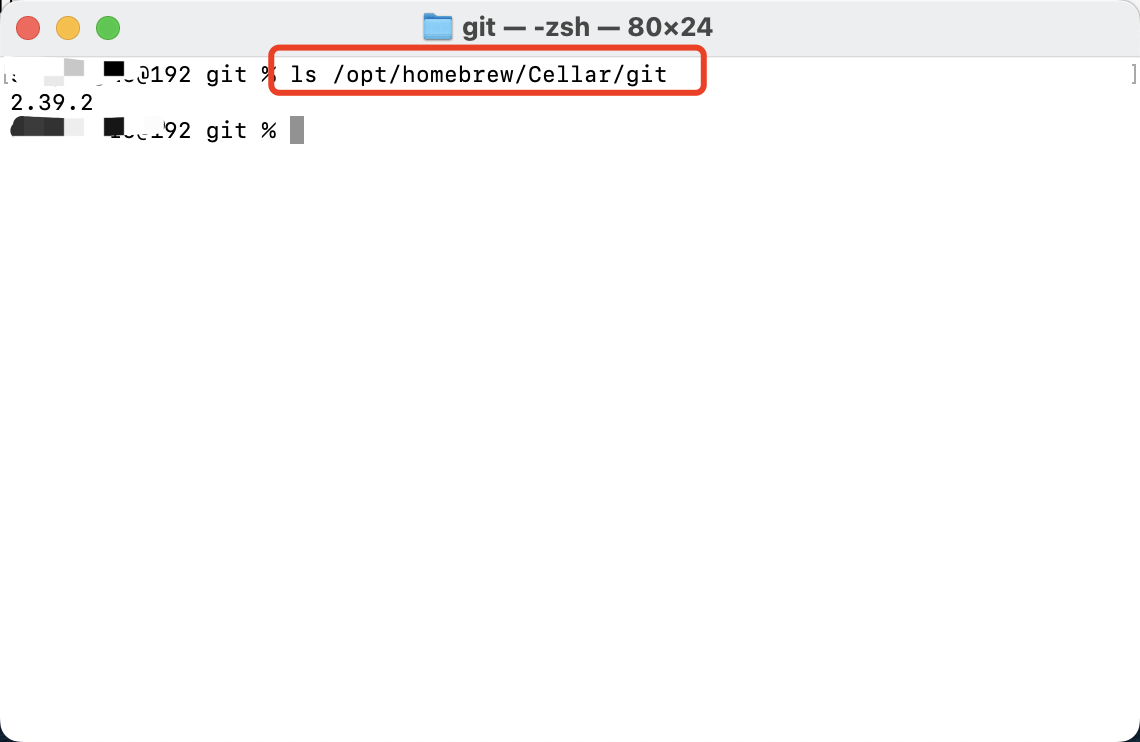
M1芯片ARM版Homebrew会把程序安装到/opt/homebrew/Cellar路径下
5.接下来我们去配置git环境
- vim ~/.zshrc
- #输入i进入编辑模式
- #添加下面这句话,版本需要进入/opt/homebrew/Cellar/git/目录下查看
- export GIT=/opt/homebrew/Cellar/git/2.39.2
- #然后按esc,在输入:wq退出编辑模式并保存
- #通过source命令更新~/.zshrc文件
- source ~/.zshrc
- #现在就可以通过git --version查看一下安装的版本了

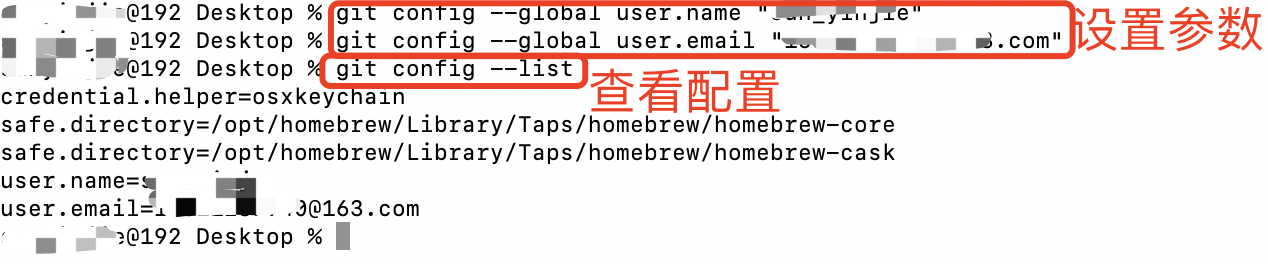
6.设置git信息
- git config --global user.name "git账号"
- git config --global user.email "git邮箱"
- #通过git config --list来查看配置
到这里我们的git安装就结束啦!仅供大家参考
声明:本文内容由网友自发贡献,不代表【wpsshop博客】立场,版权归原作者所有,本站不承担相应法律责任。如您发现有侵权的内容,请联系我们。转载请注明出处:https://www.wpsshop.cn/article/detail/36869
推荐阅读
![[ 云计算 | AWS 实践 ] 使用 Java 更新现有 Amazon S3 对象](https://img-blog.csdnimg.cn/direct/f6b4b45ef01445aa9a147e7c5f1a8f15.png?x-oss-process=image/resize,m_fixed,h_300,image/format,png)


相关标签

